Monday, March 31, 2014

March stamp club cards

By now you've probably seen the post about our "masterpiece" card from March club. I referred to it as that because it took the longest amount of time to make!

We made two other awesome cards as well! Two that can easily be mass-produced!
This card was made using the Circle Thinlit die for the Big Shot, which creates a "flip" card.
Here is a link to an awesome video by Stampin' Up! which shows how to use that the Thinlit and all that comes with it:

The sun was made with a large circle punch and the free banner punch from Sale-a-bration!

The clouds were cut using the Word Bubble framelits:
(shown with the matching Just Sayin' stamps, available in new Occasions catalog)

Finally, we embossed a sentiment from the Sale-a-bration set See Ya Later.

The colors this card are Tempting Turquoise, Pumpkin Pie, Daffodil Delight and Whisper White.

The second card we did was a CASE of another demonstrator, Kay Kalthoff.

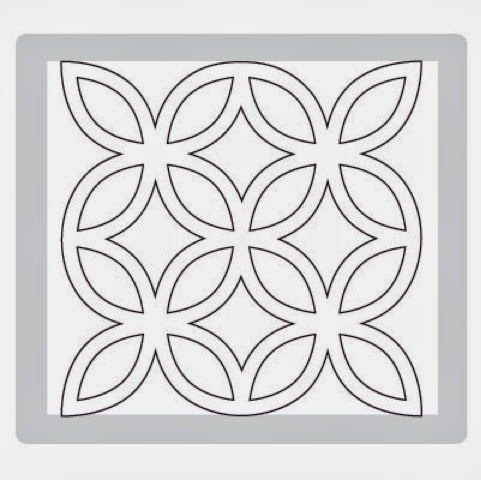
It's called a "tiled background", and it was so quick and easy!

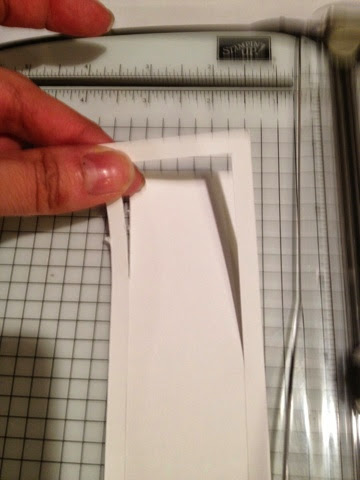
First, I had cut out 10 squares of the Watercolor Wonder DSP (Occasions catalog)using my square 1 1/4" punch. Everybody had a different piece of DSP and they all looked terrific!
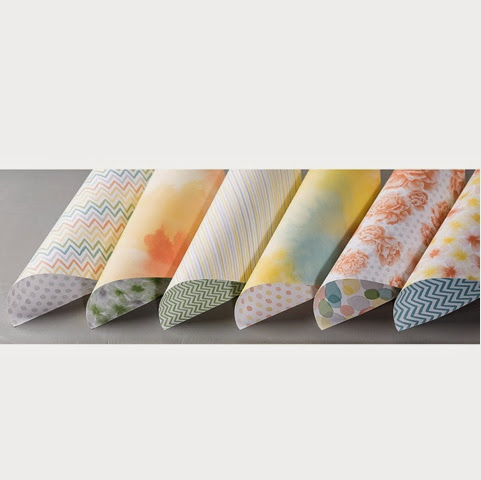
They were glued onto a card of Gumball Green starting with the outer-most corners so that you can judge even spacing. There are no squares in the middle of the card - only around the edges.

Next, on a piece of white card stock, we stamped the Blessed Easter single, wood stamp using black StazOn ink.

Not wanting to color in the tulips, we used the "wash" from the Happy Watercolor stamp set (Occasions) in Daffodil Delight, Crisp Cantaloupe and Gumball Green. We stamped "off" each time so that our card received a lighter version of the original ink color.
A piece of Gumball Green stitched ribbon and a few gold sequins were added to complete the look!

Once we glued that to the front of the card, we added a piece of white card stock trimmed with matching DSP to the inside so that we could easily write a message!


We have a great time at our monthly stamp clubs, - learning new techniques, using current Stampin' Up! products and enjoying each other's company! 

Clubs are made up of five participants and run for five consecutive months. Each participant has the one-time opportunity to receive the free hostess benefits of the workshop order placed at the club.

New clubs are forming all the time!

Contact me if interested!

Saturday, March 29, 2014

What's cookin'? - "Impossible" Pie

The other day I had a hankering for something sweet.

I looked through all the recipes I had pinned on Pinterest to see if I had anything I could easily make with what I had on hand at home.

I came across a recipe for "Impossible" Coconut Pie.
At first I was a little afraid!

After all, it was called impossible!

Why would you even post a recipe if it's something that is impossible to make?

After reading how to make it, I found out that it wasn't even remotely impossible to make! The fact that it's called "impossible" refers to its ability to  transform from a liquid mixture into a delicious pie!

A pie you make in the blender? Yep!

It could just be the simplest thing I've ever made! It's unbelievably fast and easy!

Really!  You just mix all the ingredients in a blender and pour it into a pie pan to bake! That's it! I'm not kidding!

And we loved it! 

The flour will settle to form a crust. The coconut will rise to form a topping. The inside will be a custard-like texture.

Try it for yourself! It does not disappoint!

"Impossible" Coconut Pie

In a blender mix together:
•4 eggs
•1 stick butter, melted
•1c sugar
•1/2c flour
•2c milk (I used coconut almond milk because he had it!)
•2t vanilla
•1c Coconut
• nutmeg (optional, for sprinkling on top before baking)

Pour mixture into a greased pie plate.
Bake 350° for 1 hour. Center of pie should be barely set and edges starting to pull away from crust.
Cool.
Serve warm or chilled (I prefer chilled)


Thursday, March 27, 2014

"Throwback Thursday"

How about a scrapbook page?

Many of us use our stamps not just for making cards, but also scrapbook pages and (as you have seen other "throwback" posts) papercraft-y items!

Before the age of digital scrapbooking there was a good old-fashioned way!

I found this scrapbook page and I thought it was very appropriate for this edition of "Throwback Thursday".


It is a scrapbook page made at Stampin' Up! convention in Las Vegas. According to the date it was from 2003.

Wow!

This being the start of my 18th year as a Stampin' Up! Demonstrator, I don't know why I'm surprised...

The stamps may have retired, but the friends remain the same!

In the top picture that's me and my dear friend Denise after we just got done making this very page at the convention make n' takes! See it? I'm holding it!

(Denise), remember when they announced a downline "roll-up" at convention and we just looked at each other because at the time, you were "the roll-up" for me? ... And ladies were screaming because that meant extra thousands of dollars for them? Haha

... And when that one drink made you woozy, and you passed out on the bed at convention? LOL

How about that time when you surprised me with the news that you were pregnant? At this point in our friendship (we probably knew each other five years), and all along believing that you couldn't have children anymore! And along came our little T.!  You are so blessed!

The bottom picture shows my friend Kim and I at the Manager's Reception - a special gathering they hold every year for the leadership of Stampin' Up!

(Kim), remember selling $15,000 and getting a Xyron laminator? LOL - big whoop.

.... And falling asleep on the phone because we could only place phone orders then and the wait times were so long?

Remember how W. ordered "two of everything" on the Alaska cruise? And he's still so thin -  it's not fair!

.... Shopping till we dropped at the mall of America... Ordering fattening food (cheese curds) from room service when we got back to the hotel... Then we missed our flight back home the next day?.... And then we shopped at every airport that we got stuck in on the way home? (I'm still paying that credit card bill by the way, LOL)

...Introducing you at convention when you made the Advisory Board ... I was so proud of you!

I love this page for the colors.

I love this page because I'm holding the just-completed version in the top picture.

I love this page mainly though, because it's all about friends - friends that would not have been in my life had it not been for Stampin' Up!

Friends with whom I have traveled (Alaska, Hawaii, Mexico!)

Friends with whom I have spent quality time (girls getaway weekends are the best!)

Friends with whom I have gotten to know their families (and even seen new additions added to their families!)

Friends with whom I have laughed, cried and prayed.

They are both going through a hard time right now health-wise.

This page reminds me of the many good times we have shared together...

And the many more that will come our way!

I love you both!


Tuesday, March 25, 2014

"Card in a box" Challenge - First Results

In a couple of previous posts I showed you the two projects that I had made named "card in a box".
 I also provided a link for directions. 

They are all the rage right now - you can find tons of them on Pinterest.

At stamp club I showed them how to make the box itself. We didn't complete the project because there are just too many options! If you going to spend time to make an elaborate card such as this, you may as well make it to be the way you want not what I want!

So, I issued a challenge to all participants of my stamp clubs: finish the box!

I asked them to either bring it to the next club or email me a picture of their completed box and I would put it on the blog to share with everyone.

Here are the results so far:

Ronnie P.'s box:

And here is one from Lisa B:
See what talented stampers they are?

I love both projects! Don't you?

I hope I get some more to share!

What's cookin'? - Corn Pudding

One of my new favorite side dishes is corn pudding.
We usually eat a lot of vegetables as side dishes. I like most everything, so it could be anything: artichokes, asparagus, beets, carrots, greens, you name it -I'll eat it! Roasted, raw, baked, steamed... any way you serve it, it's fine with me!

Getting my boys to eat vegetables? Well, that's another story!

I prepare a variety of vegetables, and in different manners hoping to find one that appeals to their immature sense of taste. I know that it's not hopeless - geez, when my husband and I first started dating he only ate corn. Now he eats anything I put in front of him! So I keep plugging away....

I don't always please both sons, but the next day I try to appeal to the other one! Like this one - three out of four of us love it - the other one doesn't like corn ! (Sigh) If he would just try it, I know he would like this one. Maybe someday....

I found this recipe on the Internet and I have made it now three times. Once was at Thanksgiving  (yes, it's special enough to make it to that meal) and the other two times, well, you know, we just needed some comfort food!

That's how I would categorize this side dish. It's definitely not your steamed veggies that you have alongside your fish every night. It's a stick-to-your-ribs kind of side dish.

Take my word for it - it's super yummy! I could just eat it out of the casserole dish with a spoon!

Soft corn bread? Better!
Corn Pudding

• 1 can cream-style corn
• 1 can whole kernel corn, drained
• 2 eggs, slightly beaten
• 1 stick butter, melted
• 1 box Jiffy brand corn muffin mix
• 1 c sour cream

Mix all ingredients well in a casserole dish. Bake 350°, 45 to 55 minutes depending on your size of dish, until edges start to turn golden brown.

Be careful not to eat it all at one sitting!

Monday, March 24, 2014

What's cooking? - Sauce!

A wise Italian man (my father) once said, "Hon, sauce is the key!" 

He said this as we were discussing why Del's Restaurant, in the Bloomfield section of Pittsburgh, has always been our family favorite.

He was right, of course. 

As any Italian knows - the sauce can make or break you!

With that in mind, I do have my tried and true marinara sauce. But, I also serve pastas with many other types of sauces.

Some are creamy white sauces. Others are red. A couple are a combination of the two!

"Variety is the spice of life", they say!

Here are two red sauces with meat that we enjoy (both come from the Quick From Scratch Italian cookbook). Feel free to serve over any type of pasta you wish! 

Sardinian Meat Sauce (served with cavatelli)

• 3T olive oil
• 1 lb. Italian sweet sausage (casings removed)
• 1/4 t dried red-pepper flakes
• 1 onion, chopped
• 3 cloves garlic, minced
• one 28 oz. can crushed tomatoes in thick purée 
• 3 T chopped fresh mint
• 1/3 c chopped fresh parsley
• 1/4 c water
• 1 1/4 t salt
• 1/4 c chopped fresh basil
• 3 T grated Parmesan cheese

1) In a large hot heat oil over moderate heat. Add sausage and cook, breaking up with meat, until it is no longer pink (about 5 minutes).

2) Reduce the heat to moderately low and stir in onion and garlic. Cook, stirring occasionally, until the onion is translucent (about 5 minutes).

3) Add: tomatoes, mint, parsley, water and salt. Simmer until thickened (about 15 minutes).

4) Toss your cooked, drained, pasta with meat sauce, the basil and cheese. If sauce is too thick add some of the pasta water (up to 1/2 cup).

Serve with additional Parmesan or Pecorino Romano cheese.

** The recipe says that the mint is optional. I have made it both ways and I say include it if you can - it makes a difference!

(That's vegetable focaccia bread I bought at a local supermarket bakery - Yum!)
------
Here's one that's wonderful on Fridays during Lent!

Arrabbiata Sauce with Tuna (a little spicy!)

(The original recipe calls for 1 pound cod fillet, cut into 1- inch chunks, but I have always used tuna)


• 1/4 c olive oil
• 2 cloves garlic, minced
• one 28 oz. can crushed tomatoes in thick purée
• 1 large tomato, peeled and chopped (or 1 can diced tomatoes with juices)
• 1 3/4 t salt
• 1/2 t dried red-pepper flakes
• two 6 oz. cans tuna, drained
• 3 T chopped fresh parsley

1) In a large pot, heat the oil over moderate heat. Add the garlic and cook, stirring, for 1 minute. Add: the crushed tomatoes, fresh tomato (or your diced, canned tomatoes), salt and red-pepper flakes. Simmer until sauce is thick (about 30 minutes).

2) Add the tuna and 2 tablespoons of the parsley to the sauce. 

3) Stir tuna into the tomato sauce and warm for about a minute.

4) Toss sauce with your cooked, drained pasta. Top with remaining parsley and Parmesan cheese (if desired).

My picture shows rigatoni, because that's what we had. Sometimes I use penne pasta if we have it , but really, you can use anything!

**note: I do use fresh herbs, if I can, in my cooking. If you don't have fresh, you can substitute dry herbs - but only use 1/3 the amount called for. Dried herbs are more potent!

Sunday, March 23, 2014

March 2/5/15 class cards!

Here they are!

This month cards made at the 2/5/15 were a mixture of spring, Sale-a-bration and Occasions Mini catalog. In other words, a real hodgepodge - but cute, nevertheless!

I will discuss each of the cards from left to right starting on the top row.

This card just screams, "I'm ready for spring!"

The base is Daffodil Delight card stock. It was run through the Big Shot with the oval frame from Designer Frames

The bow was added with a glue dot and made from the white organza ribbon. I love this ribbon because it is satin in the middle. Very elegant!
 The oval piece is an "isolated" vase from the wood stamp Vivid Vases
We used a black marker to only ink-up that vase in particular. The flower was colored and then the whole piece was punched out using the large oval punch.

Of course the perfect envelope liner was made using the Envelope Liner Framelits for the Big Shot with Polkadot Parade Designer Series Paper! 
-------
This simple "thank you" card was a favorite of many receiving comments of being "elegant" and/or being easily used as a masculine card. 
The greeting is from the photopolymer set Another Thank You.  
I do love this set, especially for the largest stamp. I get a lot of use out of it and I love how the photopolymer stamps stick to the clear blocks!

(I did notice recently however that one of the sets was announced as "sold out" on the Stampin' Up! website. I didn't realize it, but with these stamps, when they are gone, they are gone! So if you see something you like be sure to get it! They are not in our catalogs, but rather found online. You go to the Stampin' Up! store and click on "stamps" on the left-hand side. One of the choices will be our photopolymer sets where you can see all we still have to offer.)

Anyway back to the card ....it was embossed in gold on a Crumb Cake card base. We added a strip of the Brushed Gold card stock (found in the main catalog) and finished it off with some Watercolor Wonder washi tape (Occasions catalog) on the bottom of the card.
And what better way to line the envelope than with the Gold Foil Sheets from the Occasions catalog, cut out with the Envelope Liner Framelits?
-------
The next card features the "in-colors" of Coastal Cabana and Strawberry Slush on a Very Vanilla card stock base. The matching envelope features the Chevron embossing folder to coordinate with the chevron banner on the card.
 This card was made using the Banner Blast stamp set and the matching Banner Punch. Both are free options during Sale-a-bration! When you spend $50 (net total) you get to choose something freeMarch 31 is the last day of our Sale-a-Bration - don't miss out!
------
My favorite of the group is this card:
It uses the new Retro Fresh washi tape along with the Just Sayin' stamp set and the matching Word Bubble framelits . All our featured in that Occasions catalog, and you can purchase the stamp set and framelits as a bundle in order to save money!

The colors are: Tangerine Tango and  Coastal Cabana with some So Saffron and Soft Suede in the striped tape.
We used a striped embossing folder that was sold in the holiday catalog on the flap of the matching envelope. What would look even cuter, I think, is a strip of matching washi tape to hold the envelope closed. Try it!
----
The fifth and final card of the group is a lovely masculine card that features the popular Wetlands stamps set.
I love this stamp set not only because it lends itself well to masculine cards but anything that requires a "beachy" feel. Just incorporate the "sandpiper" stamp into your card or scrapbook page and add some sand/water colors!
This card was done very simply. All stamping, including on the envelope, was done in Chocolate Chip ink. We used a sponge dauber rubbed on the Baked Brown Sugar ink pad and "swished" - just to add some background color.

The card base is Soft Suede and we added a layering piece of Baked Brown Sugar card stock. The goose was stamped on Confetti white card stock - you can see some of the multicolored flecks in that piece. The final step was adding a piece of Chocolate Chip taffeta ribbon.
-----
Do you want to make great, simple cards like these?

Then you need to come to my next 2/5/15 class! You pay $15 and make to each of five different cards! Envelopes are available optionally (10/$2).

The next class will be held on Friday, April 25, so mark your calendars now and watch for the email that includes the RSVP date!

-----
You can find all these products and more by visiting my Stampin' Up! website:
Click on "shop" in the upper right-hand corner and it will bring you to the Stampin' Up! online store.
-----
Remember: if you spend $50 you can choose something free from the Sale-a-Bration mini brochure! Time is running out, as this promotion ends on March 31!


Thursday, March 20, 2014

What's cooking? - Clam Chowder

Looking for a quick, easy meal for meatless Friday?

Look no further!

Clam chowder!


"Doctored", not homemade, is one of our favorite meals.

Everyone in my family loves the rich creaminess and taste of this chowder. For me, I love that I can just throw it together!

If you don't mind using canned goods, then this is a recipe you might like to try.

It is a recipe that I got from my slow cooker cookbook, but I make it on the stovetop.

If you make it in your crockpot, you cook it for two hours on low.

On the stovetop: low heat, and maybe 45 minutes - that's it!

1 small onion (chopped)
1/2c butter
In a soup pot melt butter over low heat.
Add onions and cook until soft (about five minutes).

Add the following:
3 cans condensed cream of potato soup (like Campbell's)
2 cans condensed clam chowder (I like Snow's)
2 - 6 1/2 oz. cans clams (chopped/ minced) WITH JUICE
1 pt. (16 oz.) half-and-half
Cook over low heat, 30 minutes to 45 minutes.

I like to sprinkle fresh parsley on the top before serving!


"Throwback Thursday" - shadow box card

Here's a cute shadow box card that we meet in stamp club several years ago.
It was brought to my attention how cute it was other night when my stamp club met. Someone pulled it off of the classroom ledge to comment on it. I had forgotten about it! Sometimes things are right in front of your face and you forget they're even there!

We used circle punches to create the window. You can use anything you want - other shape punches or framelits.  They would be wonderful (they didn't exist on the made this card)!

Here is a top view:
This amazing card will fold flat to fit in a standard envelope!

Follow the link below so that you can make one of your own!

Sunday, March 16, 2014

March stamp club - "masterpiece" card

A card was shared recently by one of my sidelines named Brianna Thompson. (A "sideline" means we are members of the same group somehow - not necessarily recruited by the same person.) Anyway, she made such a beautiful card that I knew I wanted to make one just like it. We included it in our March stamp club lineup.

 Here's her card:
Isn't it gorgeous? I loved the way she used the Chevron border punch to create a lattice background simply by turning one upside down and overlapping them.

Of course, the one thing standing in my way is that I don't own that punch!

What to do?...  What to do?

Wait! We have the Lattice Bigs die! 

It hardly ever gets any use around here so it's about time I started using it! I did use it at stamp club to make a valentine, remember?
For this card, we simply adhered it behind the cut out heart window frame. I have seen other cards with it like that behind other frames. I want to try that too!

Back to the card I was copying...
(Here's my card without a greeting!)

I cut out the Lattice die with my Big Shot and cut it in half. At this point, I could glue it right to the card vertically to create a lattice.

But I really liked the look of the lattice behind a frame! Hmmm...  I could take a piece of white card stock and punch out squares repeatedly to get an open window...
But when I did that there was no way to see if I had my punch evenly spaced on the card stock.

So I used my paper trimmer and cut out the window.

I will explain to you how I did it. I hope it makes sense!  I know that it would be so much easier to follow with a video but my son's video camera broke!  So it will be picture tutorials until we get a new one!

I used a piece of white card stock that measured 2" x 5.5". On my paper cutter, I moved the left side of the white card stock down a quarter of an inch to 5 1/4". I lifted the ruler and moved the cutting blade so that it was on the 1/4" mark - that way it wouldn't cut the end of my paper but rather start 1/4" inward. I then cut with the blade, moving it downward, but stopped 1/4" shy of the end (at 1 3/4 " on the ruler). 

By the way, be sure to use the dark gray cutting blade on your Stamping Trimmer! That is the one that cuts. The lighter one is for scoring.

I continue to do that three more times rotating the white card stock each time (so that the third cut is the same as the first , and the second and fourth cuts are at these measurements :
Left side at 1 3/4", start the blade again at the 1/4" mark. You can also use the little gray point of the cutting blade to match up with your previous cut - that's what I do a lot of times! 

On the second and fourth cuts, you drag the cutting blade down to 5 1/4 inches - stopping 1/4" shy of the end.
When I was done making all four cuts , I ended up with a rectanguler frame. 
Next I glued my lattice pieces to the backside of the frame. For such a small detailed piece, my Tombow glue really came in handy, because it has that pointy pen-like tip on one end.
I also found that using my silicone craft sheet works wonders when using any kind of adhesive, because nothing sticks to it!
If I got a little glue on it, I just waited until it was dry and it rubbed right off! No glue to worry about on my workspace underneath! 

Ha! This is one of those items that has been in a drawer for two years and I am finally using it and appreciating what it does!

You've got to get one!

Even the snail adhesive didn't stick to it if I glued my card together on top of it! No sticky grid paper to worry about! I wish I could get one at every station at the 2/5/15 class, so no one would have to worry about adhesive being on the paper from the last person who was at that station.

A girl can dream...

I stamped a piece of Crumb Cake with the new Hardwood background stamp In Soft Suede ink.
Before the lattice piece was ready to officially be added to the card I added a piece of Midnight Muse stitched ribbon. 

I knew that I wanted to use this color combination:
(If you have never visited this website go there now! "ColorQ" it's awesome!)

So now for the stamping...  I used the Petite Petals stamp set with the coordinating punch ( from the Occasions catalog) in Marina Mist and So Saffron inks.
I also used Old Olive card stock to cut out the leafy branches. That was done using the sizzlet called Little Leaves (for the Big Shot).
I added each flower with a dimensional. I also stuck a medium pearl in the middle of each.
I call this card a "masterpiece" because it was not as quickly done as the other two card we made. I have to hand it Brianna, life would be a lot easier if I had that Chevron Border punch!


But, when there's a will there's always a way! 

Just because you don't own something and you see it used on the card don't give up! There is usually always something else you can substitute and come up with something similar.

(Oh! By the way, take a good look at Jen's card in the top picture because she'll never send it to you! Hahaha it's going right on her wall of "cards that too long to make so I'm never sending them to anyone...")