Friday, February 28, 2014

What's Cookin'? - Aidell's Meatballs

We found a new product that we are very happy with - Aidell's chicken meatballs
They are all natural - no fillers or preservatives. They also have a line of chicken sausage as well.

They had samples at the grocery store. We bought one pack on a whim.

I surprised myself with this purchase. Usually I cannot think outside the box. You see,  I'm a traditional meatball person - you know, serve them with spaghetti. I'm also very picky when it  comes to meatballs - only my mom's will do with pasta!

But these had such unusual flavors that I knew they weren't going to be the usual meatball with pasta. With that in mind, we made our first purchase: Teriyaki flavored meatballs.

Like other refrigerated or frozen meatballs, these just have to be heated for a short time before they are ready. This helps make for a quick weeknight meal!

So... what to do with teriyaki flavored meatballs.... Stirfry

A quick toss with fresh pineapple chunks, onion chunks and a bag of those mini peppers (the red, yellow and orange ones that are very popular right now). Just serve it over rice. Delicious! (We used our favorite brown rice/quinoa blend).

Next time I might add snow peas and water chestnuts for extra crunch. Easy and fast!
------
After that meal we knew wanted some more! They happened to be sampling the meatballs at Costco and we ended up buying a double pack, so we could try other flavors. In the combo pack was one pack of caramelized onion flavor and one pack of mango/jalapeño.

Hmmm... What to do, what to do....

We used the caramelized onion meatballs in this meatball sub casserole. 
I left directions for my boys to make this one night last year and they did. It was delicious, and easy enough for them to make. It gave them a chance to cook dinner for once! 

It was time that we had it again, and I knew that this flavor of meatballs would be a good substitute for the usual Italian-flavored meatballs.

1 loaf Italian bread, cut into 1-inch thick slices
8-oz. pkg. cream cheese, softened
1/2 c. mayonnaise
1 t. Italian seasoning
1/4 t. pepper
2 c. shredded mozzarella cheese, divided
1-lb. pkg. frozen meatballs, thawed
28-oz. jar pasta sauce
1 c. water

Arrange bread slices in a single layer in an ungreased 13"x9" baking pan; set aside. 

In a bowl, combine cream cheese, mayonnaise and seasonings; spread over bread slices. 

Sprinkle with 1/2 cup cheese; set aside. 

Gently mix together meatballs, spaghetti sauce and water; 

Spoon over cheese. Sprinkle with remaining cheese. (I added fresh parsley too)

Bake, uncovered, at 350 degrees for 30 minutes. Serves 4.

-------

I still had the mango/jalapeño meatballs left in the freezer. I searched the Aidell's website and Pinterest and came up empty-handed. It was so new (this flavor) that no one had posted anything yet. Time to be creative...

Mango Meatball Wraps

This flavor of meatball is really good but very spicy!

I cooked them in the frying pan and broke them up, so it resembled  taco meat. I served it on a tortilla with a salsa made of: fresh pineapple, frozen mango chunks (thawed), a little chopped cilantro and red onion. 

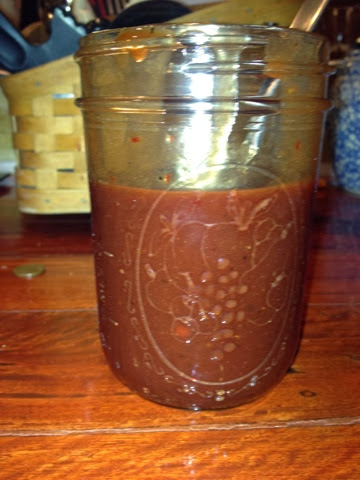
The finishing touch was the spicy chipotle barbecue sauce I had made to go with the sliders we had a few nights before. You can find that recipe here:

http://dandyspandy.blogspot.com/2014/02/what-cookin-spicin-it-up.html?m=1

There was some "heat" in this dish but it was very tasty. I served it alongside of some yellow rice. The combination of fruit salsa and yellow rice with the meat took away some of the heat. 


Yum! 
Keeper!


Thursday, February 27, 2014

"Throwback Thursday" Stamping project

According to my two teenage boys there is no such thing as "Flashback Friday".

"Mom - you know it's "Throwback Thursday" right, not "Flashback Friday"?"
Hmph... Well, I guess I invented it, then, when I did posts on my blog with that name! "See - I'm a trendsetter. I'm cooler than cool" I tell them, hiding my lack of social media knowledge. Damn kids these days.... 

So, today is THURSDAY..... 

Here's the "THROWBACK THURSDAY" project:

Ooooh.... Aaahhh....

We made these candlelight roses at stamp club a few years ago. You need a battery operated tea light, the (retired) ornament punch, a bunch of glue dots, and glitter! 

See how it illuminates the dust that it's been collecting, sitting on my stamp-classroom ledge for a few years... Haha

Actually it's too pretty to get rid of (I'm gradually "cleaning house") so I just moved it to my stamp room, where I'm sure I will enjoy it more!

If you have the ornament punch - try it one of these roses! They are so pretty!

And, if you are lucky enough to have that punch, don't forget that not only was it made to match a certain stamp set, but it can be used for other things too (it's especially cute at Christmas time as a pointy-chinned elf face)!

Be creative! That is what this hobby is all about!

Tuesday, February 25, 2014

Sneak Peek 2/5/15!

This month's card class (the 2/5/15) is going to feature cards made with stamps and accessories from the new Occasions and the Sale-a-bration mini catalogs.

Today was the cut-off for registration, so I could start cutting paper and creating the samples. I do this class every month, so if you like what you see, be sure to attend one! 

$15 will get you 10 cards; two each of five different designs. Envelopes are available optionally - 10/$2.

Cards are simple in nature. Most people make all 10 cards in about 1 hr. 15 min. This is a great class for beginners and seasoned stampers alike!

This is the first card that I have come up with:
I used the new stamp called Vivid Vases. It is a single stamp on wood. I stamped it on the white card in StazOn black ink. Then, I stamped it again on the Watercolors Wonder Designer Series Paper. I cut out the individual vases and glued them on the coordinating images (paper piecing).

I finished the card off with some quick coloring using my Crisp Cantaloupe marker and a few rhinestones.

I love this stamp and I've seen different things you can do with it. It lends itself well to using markers to omit parts of the stamp, and watercoloring. I'm hoping to make a few more samples with this stamp soon so that you can enjoy it as much as I do!

Here is the second card that I did today:
This card features two projects that you can get free during Sale-a-bration: The Banner Blast stamp set and the small banner punch

Remember, when you spend $50 (until the end of March) you can choose one item free from the Sale-a-bration mini catalog!

Back to the card.... I stamped three of the banners Melon Mambo, Daffodil Delight and Bermuda Bay inks. Cutting them out was a breeze with the new mini banner punch! I glued them all to a strip of Bermuda Bay card stock.

Above that is a piece of washi tape from the Gingham Garden collection. Stampers will have their choice of sentiment from the Four You stamp set, and there will be black ink out for them to use.

That was all done on a smaller piece of Whisper White card stock. I used Dimensionals to adhere it to the card base.

Done!

To view the Occasions mini catalog, the Sale-a-bration mini  or the annual Catalog & Idea Book ,please visit my website and click on "products":

February stamp club

This month instead of doing 3 cards we did 2 1/2!

I say that because we made two cards and then I walked them through how to make a "card in a box". They left with the instructions and the box-part of the card and then I presented them with a challenge:  to finish it on their own. I can't wait to see what everybody creates!

The first card we made was this easy and  fun card:
The card base is Calypso Coral and the layering pieces are Pacific Point and Whisper White. There is also a piece of the new Watercolor Wonder Designer Series Paper peeking out under the punched shape. 

Using punches made this a fast card to do! The largest punch we used was the Pansy punch
Then we stamped the small flower from the new Petite Petals stamp set (which  you can find in the Occasions mini catalog). We used Calypso Coral Ink to match the card base. Next, we punched out the flower using the new matching Petite Flower punch. You can get the stamp set and punch as a bundle and save 15%
We finished it off by stamping a sentiment from Sassy Salutations in Pacific Point ink. 
The main piece of white card stock and the small petite flower were "popped up" using Dimensionals. 

The final touch was adding a Candy Dot to the center of each petite punched flower. I love this embellishment! They look like brads but they are just flat "brad heads" and have adhesive already on the back of them. What makes it even better is that when you buy a pack (they come in packs of color families), you get 10 of each color! (Shown below are the Brights candy dots)
------
One of the perks of being a Demonstrator is that we get a magazine every other month from Stampin' Up! It is full of business pointers, product info, and creative projects, so we are never at a loss for how to run our business or for what to create !

The second card we made was CASEd directly from the Stamping Success magazine. It was from an article that spotlighted the work of a Canadian demonstrator, Alison Okamitsu.
Alison made five projects using the new Happy Watercolor stamp set (Occasions mini catalog). All five feature the colors Coastal Cabana, Whisper White and Brushed Gold (card stock).  There is also some gold embossing on each of the projects (check out how she embossed the entire doily on the upper right-hand side!) Here's a closer look at the card we copied :
What a pretty card!

We did some heat embossing and dry embossing with the Big Shot (you can see the dots on the Brushed Gold card stock). The Modern Label punched-piece (Coastal Cabana) was simply cut in half so it appears to be longer behind the white circle. The embellishments on this card are: a vintage faceted button, linen thread, ruffle trim ribbon (Coastal Cabana) and burlap ribbon.
-------

Interested in being a part of a stamp club? New clubs are forming all the time!

It's the best way to learn new techniques and use new products while whittling away at your long "wish list"! There is a $30 purchase requirement each month. Clubs usually have five people and one of  the months will be your turn to receive the free hostess benefits!  We have loads of fun while stamping ! Contact me if you're interested!

For all products shown here and much more be sure to visit my website! Quick "shop" in the upper right-hand corner to view all that Stampin' Up! has to offer!


Monday, February 24, 2014

What's cookin'? - Spicin' it up!

Who doesn't like hamburgers and French fries? It's the all-American meal!

Now they have miniature hamburgers called "sliders" that are all the rage for some reason. They are cute. They are mini. They are the perfect size if you are trying to watch your amount of food intake. Of course, for the men in my family, mini cheeseburgers means that you can eat more of them!

 I followed the directions that I saw online to make these Easy Cheeseburger Sliders and then topped them with Sweet Chipotle Barbecue Sauce. 

Instead of frying individual burgers, you put the ground beef mixture (chopped onion and breadcrumbs) in a square baking pan.

 Poke a few holes in the meat mixture for grease to escape. The burgers are baked at 400° for 30 minutes. Then, pour off all the grease. (Be aware that the meat will shrink and pull away from the pan after done baking!) Being in a square pan makes it easier to cut into individual, square, slider size. 

We topped each burger with cheddar cheese and put the pan back in the oven for a few minutes in order to melt the cheese. We used King's Hawaiian rolls as our slider buns - they are the perfect size!

We also topped this burger with a Sweet Chipotle Barbecue Sauce. This made the burger!

We love this sauce!

The recipe made extra, so I stored it in a mason jar. But, we have used it in so many things that is almost gone - and I just made it on Saturday!

To make it, you combine in a blender: 1 chipotle pepper and 1/2 cup grape jelly. Pulse on "chop" until pepper is almost completely pulverized. Next, add 8 oz. (one small bottle) barbecue sauce (we use Sweet Baby Ray's).
Yum!

If you've never used chipotle peppers, they add a spicy, yet smoky, flavor! Be careful though! You only need one pepper (and a little of the sauce) for this recipe. There are five or six packed in that little can, so I just put them rest in a Tupperware and store them in my fridge. They keep for a while.

The boys have been using the sauce for their afterschool snack of chicken nuggets. I used some tonight for my mango meatball wraps which I will describe in another post - Delicious!
-------
Thr French fries that I made were Oven- Baked Potato Wedges. Nothing really fancy - you probably already know how to make these.... but in case you don't, I'll share the link where I found the recipe:
http://www.sixsistersstuff.com/2011/08/baked-tater-wedges-and-utahs-famous-fry.html
 
We liked the potatoes because they were full of flavor and had a little crunch. They weren't greasy at all.

The recipe also includes a "Utah" sauce for dipping. We skipped that, as we are trying to avoid mayonnaise-based sauces.

This was a great, kid-friendly meal. And my husband was happy too, since it went well with a beer. It was a Saturday night, after all!


Sunday, February 23, 2014

Watercolor notecards

In every mini catalog Stampin' Up! comes out with at least one collection that I absolutely love. For the current Occasions mini catalog it is the watercolor collection: The Happy Watercolor stamp set, the Watercolor Wonder Notecards, the Designer Series Paper, the washi tape, the Fancy Foil vellum....

You have already seen a couple cards that I have made with the Happy Watercolor stamp set. Now let me show you a few that I have made with the Designer Notecard and Envelope set.

I surprised myself when I bought these. You see, I usually "boycott" notecards (and by boycott, I mean avoid) .... I don't know why. Are they hard to send through the mail or something? Do I feel that you have to hand them to people instead of mail them? Is it just because they are smaller in size? I don't know! How discriminatory!

It's kind of like how I don't buy anything that is French - like, if we have a stamp set that has the Eiffel Tower or French words - I usually won't buy it. I don't have anything against the French. But I am a Spanish teacher for goodness sake! So as  stylish as it may be, it's not happening.  (I have a similar hang up with realistic looking Mary and Joseph stamps at Christmas time. How do you know that's what they looked like?)

Silly, I know.

But, this time I ventured outside of "my box" and bought the notecards! ...And they didn't disappoint!

Not only were they pretty prints on watercolor paper, you get 20 cards and envelopes in the pack. That's a lot! There are five different designs and you get four  of each of the designs!

So, I set out yesterday to use them. I broke the pack open and again it crossed my mind - can you send these, or do you have to hand them to someone? 

The answer is yes you can mail them! Again, no idea why I had that idea in my head in the first place! 

So, anyway, yesterday I pulled them out  (not being able to mail them in mind) and I set out making a set of cards to hand someone - namely my husband. "Love notes" if you will, that I could periodically  leave on the table for him in the morning before he goes to work. He really does so much for us, and it is nice to be  thanked with a card. I make cards for everyone else - why not give him a card for no other reason than to let him know that I am thinking about him? Shame on me for not doing this more often all along.

So here are the four cards that I came up with:
One was inspired by our Stampin' Success magazine. Others are combinations of things that I have seenby  other demonstrators. I did not use the fifth design of the package (the rose).  I already had one card with flowers on it and that was pushing it! These cards are being given to a man, after all!

I had a particular method in mind when I made that flower card, though - using the Petite Petals punch in the center of the watercolor flowers of the designer series paper. 
It was a good tip shared on Pinterest. Just use that flowered paper and punch out the center of the flowers to get the more saturated color, but yet still get that watercolor look.

I also used the envelope liner framelits. Silly me! Because I don't usually make notecards (or those smaller 3 x 3 gift cards) I forget that they are included in that framlit set!
There they are! Same place as always!

I rarely cut out the whole envelope liners though. I save paper by only cutting out really what you can see when you open the envelope - the flap and a little bit past the envelope crease. 

There are so many things that I bet you can come up with! I know that in the future when I need a quick card I will have these on hand to finish. In fact, I have so many ideas already, I may just go ahead and make up bunch!

Try these for yourself and you'll see what I mean!

You'll find the Watercolor Wonder Designer note card set on page 22 three occasions Mini catalog.

Browse the mini catalog and more when you visit my website and click on "shop" in the upper right-hand corner:

Don't forget that when you spend $50 (until the end of March) you can choose something for free from the Sale-a-bration mini catalog!

Friday, February 21, 2014

What's cookin'? - Breakfast for dinner

I had stamp club today and by the time I was done there wasn't enough time to make what it wanted. It was a crock pot meal but it would take 4 to 6 hours.

No biggie.
Quick switch.

At our house breakfast food is always welcome at any time! So I had everything to make this meal, and it was a hit! 

Potato-Crusted Quiche is an egg bake that is different from the ordinary quiche in  that it has a crust made of hash brown potatoes instead of pastry.

 I just happened to have a bag of leftover hashbrowns in the freezer from another recipe. What luckOf course, I have to just call it an "egg bake" for my husband because if he hears me say "quiche", he'll say the old-line "real men don't eat quiche"!

I have to say, this was such a hit that both of my sons asked me to make it again! Homerun!

Not only that, it was e-a-s-y!

I served it with a great fruit salad. Any leftovers of the quiche can be reheated for tomorrow's breakfast, and the fruit salad can be eaten at any time - guilt free!


Potato-Crusted Quiche
•3 c Frozen hash brown potatoes, thawed (The shredded kind, not the cubed potatoes!)
• 4 T Butter
• 4Eggs
• 1/2 c Milk
• 1/2 c Sour cream
• 4 Green onions, sliced 
• 1 1/2 c Shredded cheese (I used cheddar)
• 5 Slices of bacon, cooked and 
crumbled

** preheat oven to 350°
** Pat thawed hashbrowns with paper towels to remove any excess water
** Melt butter. Toss gently with hashbrowns in medium bowl. Pour into a 9 inch pie plate. Press on bottom and up sides to form a "crust". Bake approximately 40 minutes. (Edges will be slightly browned.)

** In the meantime whisk together remaining ingredients.
** Remove crust from oven. Pour egg mixture into crust. Bake 40 to 45 minutes until center is set and crust is golden brown.
** Let stand five minutes before serving.


Thursday, February 20, 2014

More of "See Ya later"

My favorite free set of Sale-a-bration, as mentioned before, is See Ya Later.
I have already showed you two of the four stamps in a previous post. I wanted to show you the other two, in a couple of cards that I CASEd.

Hey they are! I hope you like them!

The first one uses Primrose Petals and Raspberry Ripple as the primary colors. Both are "In Colors" that will be discontinued as of June 1 - so be sure to stock up on paper, ribbon and ink refills!

This card also features the new embossing folder called Decorative Dots. It is one of the items that you can get free with a $50 purchase during Sale-a-bration. Love it!

The next card is a copy of one made by a demonstrator on our Artisan team. Isn't it cute?
Once again the Decorative Dots embossing folder was used, this time on the alligator head, which is made of a small circle punch and the pennant punch.

The main colors of the card art Old Olive and Soft Sky.

What a fun card!

You can get your soon-to-be-retired "In Color" supplies, plus all of your other stamping needs on my website:
Just click "shop" in the upper right-hand corner to place your order. Remember that during Sale-a-bration, if you place a $50 order you get to choose something free!

It's the best time of year at Stampin' Up!!
Don't miss it!

Tuesday, February 18, 2014

Another card in a box!

My mom is celebrating her 80th birthday!

I knew that I needed a very special card for this very special occasion.

Since I have been playing around with the "card in a box" I knew that one was what I was going to make for her. 

Browsing many samples online, I came across a beautiful one that I knew I had to CASE. Here is mine:

I love the colors of that Designer Series Paper - Afternoon Picnic

Plus, my mom loves roses, so Stipple Blossoms was the best choice of stamp set to use for her.
The colors used for stamping the flowers are: So Saffron and Crushed Curry, Wisteria Wonder and Elegant Eggplant, and Pear Pizzazz for the leaves. I "stamped off" first to get a lighter color ink on the solid, larger part of the leaf.

also used the Bring on the Cake set for the greeting, and Papillion Potpourri.
-----
 I used a Sizzliits alphabet set for the numbers and cut them out with my Big Shot. The Bitty Butterfly and the Elegant Butterfly punches coordinate with images from the Papillion Potpourri set, so I didn't have to worry about cutting those out.

I used the directions found here:
http://www.serenestamper.com/2014/01/card-in-box

I followed her directions for making a 6-inch card. I do like her instructions because she also offers directions on how to make a smaller card - one that will fit in a medium (or, A-2) envelope- like I posted previously. 

I used a different design from the same Designer Series Paper pack to make the matching envelope. I used the Envelope Punchboard to do this - it's so easy! (As you can see, this picture was taken in the car because I forgot to photograph it before I delivered it!) Hahaha
The card itself is easy, but a little time consuming. My tip is that you may want to either punch your elements out or use framelits to make the process a little faster; cutting each piece is what took me a while.

I used my Tombow glue for this project. 
 It offers an incredible bond but also, because it is a liquid glue, it allowed me a little time to reposition things if need be, while it was still wet.  This would not have been possible with Sticky Strip because as we all know, once you put a piece down with that, it's there to stay!

I have stamp clubs this week and next. I am going to walk them through the basics of the "card in a box", but offer them a challenge to finish it. I can't wait to see what they come up with!

Or, YOU, for that matter!

Try this fun fold and email me a picture! I can share your card on the blog for all to see and to be inspired by your creativity.

Have fun!


What's cookin'? - Ham BBQ (A Pittsburgh tradition)

 Ham Barbecue
Growing up in Pittsburgh, everyone knew what ham barbecue was, and almost everyone's mom made it. We ate it at picnics. We ate it during the Steeler games on Sundays. My mother-in-law still makes it when we come to visit.

I thought everyone knew what it was. My first realization that it was only a Pittsburgh dish occurred about 15 years ago when we lived in York, PA. I had some of my stamping downline group over for dinner and I made this easy, traditional dish in order to feed the masses. Everybody loved it!  My "upline"
was on the phone with her husband and told him that I had made "some sweet and sour ham sandwich thing" that was really good. I giggled, thinking that she had never eaten it before. Turns out no one there had ever heard of it before.

Well, I thought, chalk that up to the regional differences between South Central PA and Pittsburgh. Like "jumbo" and "gumbands". No one knows what the hell you are talking about!

Then we moved to Connecticut - even farther away!  

It was bad enough in York when I had to ask for "minced bologna" at the deli counter in order to get my beloved "jumbo " - now I have to pull my hair up in an "elastic" because no one has ever heard of a "gumband"! Hahaha

Anyway, I made my mother-in-law's ham barbecue recipe here for a stamping/ scrapbooking recipe swap a few years ago. Once again, everybody loved it but no one had ever heard of it!

If you are from Pittsburgh and you are reading this - you know exactly what I'm talking about! Go "dahn" to the "Shop and Save"  or "Gieagle" and get yourself some Isaly's chipped ham for this recipe because it's the best!

If you're NOT from Pittsburgh, you want to go to your deli and ask for chopped ham, but ask them to "chip" or "shave" it - whatever they use for really, really thin little pieces/slices. Get ready for them to look at you like you have three heads....

If you are like me, you buy Isley's chipped when you are home in Pittsburgh for a visit and take it back with you! That way, you save yourself the hassle of asking the person behind the deli counter to "chip" or "shave" 3 pounds of chopped ham for you! In Pittsburgh, they already have it prepared like that - they just reach in and grab it, throw it in a bag!

Here is the recipe that I use. It is from my mother-in-law and it is the best!

Ham barbecue is great for an informal dinner and/or feeding lots of people. Try it at your next get-together (or next year before a Steeler game)!

•  2 T butter
•  1/4 c onion, chopped
•  1/4 c ketchup 
•  1/4 cider vinegar
•  1 T Worcestershire sauce 
•  1 can tomato soup
•  1/2-1 c brown sugar
•  1/8 t ground black pepper
•  3 lbs. "chipped" chopped ham**(see note)

** In a large pot, melt butter over moderate heat. Add onions - cook until soft (about five minutes).
** Add all other ingredients except ham. Cook to a low boil, tasting to adjust amount of brown sugar. (I use almost a whole cup in mine.) 
** Add ham and stir. Cook until heated through.

Serve on buns. 

**note (edited 4/22/15)
 I've come to realize that 3 pounds of ham is more of a guideline.
The last two times I made this I have only used 2 pounds, and had 1 pound left over for regular sandwiches.
Maybe it's the "better to have more than enough then not enough" Italian way of thinking....

Or, if you really need to make that extra pound of meat - better have extra ingredients on hand, not quite doubling the recipe.

New weekly deals!

filter by:

  • SOURCE
image description

from the blog

WEEKLY DEALS

We hope you enjoy this week's Weekly Deals! In Color Dahlias Item # 127556 Regular Price: $7.95 US/$9.95 CAN Discounted Price: $5.96 US/$7.46 CAN Label Insert Pop' N Cuts Die Item # 130160 Regular Price: $21.95 US/$26.95 CAN Discounted Price: $16.46 US/$20.21 CAN Gold & Silver Stampin' Glitter  Item # 132205 Regular Price: $7.95 US/$9.95 CAN Discounted Price: $5.96 US/$7.46 CAN Silver Metallic Encore Pad Item # 132142 Regular Price: $9.95 US/$12.95 CAN Discounted Price: $7.46 US/$9.71 CAN Petals-A-Plenty Textured Impressions Embossing Folder Die Item # 116824 Regular Price: $7.95 US/$9.95 CAN Discounted Price: $5.96 US/$7.46 CAN 3/16 Inch Corner Punch  Item # 119871 Regular Price: $6.95 US/$8.95 CAN Discounted Price: $5.21 US/$6.71 CAN Etcetera Designer Series Paper  Item # 130129 Regular Price: $10.95 US/$13.50 CAN Discounted Price: $8.21 US/$10.13 CAN A Royal Day Ensemble - Digital Download Item # 130079 Regular Price: $14.95 US/$16.50 CAN Discounted Price: $8.97 US/$9.90 CAN

1 Comments37 Likes
image description
0 Comments0 Likes
image description
0 Comments2 Likes
image description
0 Comments0 Likes
image description
0 Comments70 Likes
image description

from mydigitalstudio

NEW DOWNLOADS 02-18-2014

Stampin’ Up! is committed to bringing you fresh, exciting digital content each and every week. Check out the latest downloads below. Click on the download title to see it in the store, or click on the images to get an even closer view. You can also click here to view a PDF with additional details about this week’s downloads.

0 Comments35 Likes
image description
0 Comments57 Likes

image description

from mydigitalstudio

WHEN YOUR IDEA ...

It's always an exciting day when we can sit at our computers and create with My Digital Studio.

0 Comments8 Likes

WHEN YOUR IDEA LIBRARY GOES ON HIATUS

FEB 17
image description
0 Comments20 Likes
image description

from soshelli

SLEEPING BEAUTY-- BALLET STYLE

Saturday afternoon all the Gardner girls (daughters PLUS granddaughters) who live in state headed to Ballet West’s performance of “Sleeping Beauty.” It was a fabulous performance and a wonderful afternoon!

1 Comments12 Likes

SLEEPING BEAUTY--BALLET STYLE

FEB 16