Thursday, January 30, 2014

Flashback Friday

Magic Card with Stella Stamper
This is a card that I made at a stamp club  when I lived in York - so it has to be over 10 years old!

What a great card for so many reasons! 

First of all, it features Stella Stamper - one of our earliest sets that addressed the stamp-a-holic syndrome! Don't you just love her? She has her Stampin' Up! Catalog in hand, several stamp supplies hanging out of her pockets and she's ready for and a long night of stamping in  her bunny slippers. Most of us can relate to that! LOL The only thing missing on Stella is "stamper's butt" - a lot of us suffer from that ailment - it comes from sitting too long stamping cards!

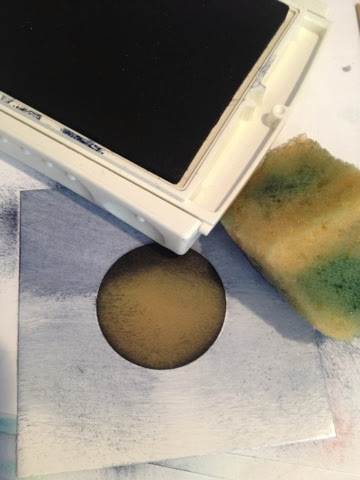
Second, it is a "magic" card.  It's not very often that we make one of these special cards! If you've never made one - it's the way you cut and fold the card stock so that you have an inner divider piece between a front and back panel. At first you see a plain image, which you stamp on a window sheet. When you pull up on the tab, the image magically becomes full of color! That's because you have stamped and colored the exact same image, which remains behind the divider panel until you pull up on the tab. 

The tutorial for magic card is still on  
under project tutorials.

But the third reason that this is such a great card really is the most special one.

My life has truly been enriched and has become more "colorful" since stamping has entered my life!

Back in 1996 I was on maternity leave from my teaching position. My neighbor (and dear friend) Carol had a Stampin' Up! party. I had never heard of it but after that night I was hooked! When I decided to stay home with my baby, (who is now a senior in high school!) and become a Stampin' Up! demonstrator ,I never imagined how important a role it would play in my life.

Stampin' Up! has been with me through many moves and a second child. I have traveled to many places attending conventions and leadership seminars (Salt Lake City, Orlando, St. Louis, Minneapolis, Los Angeles, Las Vegas...). My family and I (and even my girlfriends) have had trips of a lifetime as I have earned cruises and incentive trips (Alaska, Hawaii, The Caribbean, the Mexican Riviera...). I have been able to make a go of it no matter what - when we moved, when I was sick, when I had a baby-  it just works.

But what really is magic (like this card) is the amount of special people that have come into my life over the years - my uplines, my downlines, my "stampin'" friends.

One of my dearest group of friends come from stamping. One of the best trips I ever had in my life was a cruise to the Mexican Riviera with them, through Stampin' Up! I will never forget that trip or the laughs we had! I cherish the times we still have together, and I am thankful that Stampin' Up! has brought us together!

There are so many people that are special in my life because of stamping. 

Last year when I had a stroke, I was overwhelmed by the people I heard from  that I know from stamping. People from Pennsylvania that I haven't seen in a very long time sent emails, cards, and visited the Caring Bridge site.

My stamping friends from Connecticut did the same, but they also visited me in the hospital, brought meals to my family, and visited me at my house. They came to stamp clubs and classes when my cards looked  like you-know-what because of my shaky hand. They are always there to support me when I need it. They continue to join clubs and I love spending time with them! In fact, I look forward to it. Nothing is better than spending time with them, getting  to know them, laughing, stamping, and lending support to one another.

They are my friends. I can drop the "stampin'". 

Thank you for bringing the "magic" to my life!


NEW! From Stampin' Up!

Make an Impression

MAKE AN IMPRESSION

Make an impression with our Texture Impression Embossing Machine. It’s coming in our 2014–2015 annual catalog, but we have a limited supply available now. The Texture Boutique works with Textured Impressions Embossing Folders to transform ordinary cardstock, paper, metallic foil, or vellum into an embossed, textured masterpiece. This machine embosses only; it does not die cut. (item 132657)


Don’t forget to order the brand new Textured Impressions Embossing Folders that just came out in the Occasions catalog so you have everything you need to start creating with your new machine.

  • Ampersand Textured Impressions Embossing Folder (item 132970)
  • Arrows Textured Impressions Embossing Folder (item 132187)
  • Scallops Textured Impressions Embossing Folder (item 132971)


If you order the Texture Boutique Embossing Machine and all three of the new folders, you will qualify to get a FREE Sale-A-Bration gift. We highly recommend the Decorative Dots Textured Impressions Embossing Folder (Item #133520)! (You must order before March 31, 2014 to qualify for the free gift).

and click "shop" at the top of the page!

What's cookin'? - A Healthy Start

They say you should start the day off with a good breakfast. Many times in the past that meant me running out the door to work with a cup of coffee in hand -sometimes with a banana, sometimes a bagel - whatever I could manage to drive with!

Now that I'm home I have more time to devote to what goes in my mouth! If your morning is rushed, you could probably make many of these the night before so that you could have a good breakfast too! Say goodbye to that morning run to DD for that coffee and a muffin!

I've already shared with you that many mornings I have a Nutribullet smoothie. I am still trying out different combinations and I have a few others I will share with you real soon!

My other favorite healthy breakfast choices these days are egg mugs and different oatmeal creations.

What's an egg mug, you ask? Basically. it's scrambled eggs that you make in a  mug and cook in the microwave. 

I bought a cookbook about a year ago called  Hungry Girl - 300 Under 300. In it  are several recipe variations to the egg mug. My favorite is the Say Cheese! Egg Mug. It is so good, it's hard to believe that it is only 172 calories the way it is prepared in the book! 

Here's what you need:

The recipe calls for Egg Beaters. We don't buy those because my boys like to eat a lot of whole eggs. So what I do for the egg mug is use one whole egg and 2 egg whites.

*Scramble that up in your mug or small bowl. Put in the microwave for 1 minute.

*Add the following:
1 wedge Laughing Cow light creamy Swiss cheese
1 Baby Bel cheese round
1 T ricotta cheese (light)
1 t dried minced onion
Dash garlic powder
Dash black pepper

*Cook 1 minute in microwave.

*Add 1 t grated Parmesan cheese. Stir.

*Enjoy, then soak your mug/bowl immediately. They really stick on there! I'll nag you like I nag my husband!..."Soak your bowl!" Haha
------
Growing oatmeal

The cookbook also features several variations of the "growing oatmeal" bowl. They call it that because you only use a small amount of oatmeal, but when you double-up on the liquid and cook it for a longer time on the stove, you get a lot!

I love oatmeal, and sometimes I throw in frozen berries, nuts or even a little organic granola. I consider these oatmeal bowls a special treat because you throw in a little bit of indulgence foods - chocolate chips, peanut butter chips, mini marshmallows, etc. But they are such scant amounts that it keeps the recipe just under 300 calories. Sometimes for extra chocolate flavor the recipe uses a packet of 25 cal. hot cocoa mix (Swiss Miss makes this).

You always start off the same way:
1/2 c oatmeal (Slow cooking, not quick oats or instant)
Dash salt
1 c unsweetened almond milk
1 c water

* Mix starter ingredients together.
* Bring to boil.
* Reduce heat to low .Simmer 12 to 15 minutes.
*Add "extras" and stir.

The Banana Split Bowl: Add 1/2 sliced banana, 2 t chocolate chips, 1 t sugar-free strawberry preserves, and 2 t of a fat free whipped topping.

The Smores Bowl: Stir in a 25 cal. packet of hot cocoa in the beginning. When done, stir in 2 t chocolate chips, 2 t mini marshmallows,1quarter sheet of a graham cracker (crumbled).


The Almond Joy (my own creation)
Add 1packet of 25 cal. hot cocoa mix in the beginning. After cooking, add 2 t chopped almonds, 2 t chocolate chips, 2 t sweetened coconut flakes.

There are many more in the cookbook (Like peanut butter chips and chocolate - mmm!) and I'm sure you could also create your own, like I did. Oatmeal is great just be careful not to overdo it on the sweet things you add at the end!

Wednesday, January 29, 2014

January Stamp Club card #2


Whitewash Watercolor Technique

I loved everything about this card when I saw it! It is a CASE'd card - but I don't even know from whom anymore. Sorry!

I loved the colors, I loved the technique, I loved the paper, -  the whole shebang!   I'm happy, too, that both stamp clubs loved it as much as I did!

The card is made primarily of the colors Night of Navy and Gumball Green. (Reminder: If you are a fan of Gumball Green it will only be around until June! It is an "in color" from 2012 - 2013 and will be retired since it has been with us for two years. So, stock up now on ink pad refills, ribbon and card stock!)

The card measures 4 1/4 x 11, and we folded it in half at 5 1/2. We then opened the card up and cut the front flap in half at 2 3/4".

The Designer Series Paper is from a retired paper stack - that was glued on next. The Gumball Green stitched ribbon is wrapped all the way around the card and tacked down with adhesive.

We stamped a greeting from the stamp set Sassy Salutations onto Very Vanilla card stock. That was then layered onto a slightly larger piece of Gumball Green card stock. We also glued a Very Vanilla postcard on the inside of the card.

Doing the flowers was the fun part! We used the flowers and leaves from the Secret Garden stamp set. I have been wanting to try the technique called "whitewashing watercolor", and it works perfectly with this stamp set!

Here's what you do: (Son's video camera broken - so a picture tutorial will have to do!)

* Stamp image in VersaMark ink or white craft pad.  (We used Crumb Cake card stock) Sprinkle with white emboss powder and heat emboss.


* Drip white craft ink refill into pad lid or  other plastic container.

* Use aqua painter to "whitewash" (cover the whole image white). Do not squeeze your aqua painter! Don't worry about the image lines - just cover the whole thing white.

* When dry, apply lines of color with a marker -you do not have to color the whole image! Using your aqua painter, (Do not squeeze it !) blend the color from the lines.  As soon as the wet paintbrush hits the marker line, it spreads out! Instant artist! 

You can always go back and add more color and re-blend for more shading.

Don't worry about blending over the image lines. They are embossed, remember? Those lines are going to resist all of the ink application! 

Oh! PS: The middle of the flower was just colored in with Crushed Curry and Daffodil Delight markers - nothing fancy -no blending.

The beauty of this technique is that putting the whitewash down first does two things:
a) It enables you to add color to even dark card stock!
b) Even after adding more color and blending with more water from aqua painter, the card stock does not "pill"! (Did you ever have that happen when you blended something with a blender pen too much and the paper gets too wet and little balls of paper form?)

** After applying the whitewash it must be dry before adding marker. You can speed up the process by using a heat gun, but be careful not to overheat, causing you to "deflate" your image lines.

Flowers and leaves were cut out using the matching Secret Garden framelits  for the Big Shot. (Thank goodness for the magnetic platform on this one!)

Glue them all on, popping up the center flower. Tie the card shut with ribbon, and you're good to go!

One of the videos I viewed said that you could also use a blender pen for this technique. I tried it but did not have good luck, so I stuck to my aqua painters. You don't need too much water - that is why keep repeating not to squeeze them!

You can find everything you need to make this card on my Stampin' Up! website!

And click "shop" at the top.

Any questions?
I'm happy to help you!


Sale-a-Bration has begun!

Time to Sale-A-Brate!

TIME TO SALE-A-BRATE!


Earn FREE, exclusive products during Sale-A-Bration, our annual sales event with perks for shopping, hosting a party, or joining Stampin’ Up! You can take advantage of all Sale-A-Bration has to offer from January 28−March 31.


Make sure you don’t miss out on your FREE gift with each $50 US/$60 CAN purchase! We’ve made it easier than ever to get your free gift; just order one of our Sale-A-Bration bundles (US/CA) and then pick your exclusive gift!


Talk to your demonstrator today to get in on the action.


Weekly deals!

Jan 28Weekly Deals

WEEKLY DEALS

We hope you enjoy this week's Weekly Deals!


Wisteria Wonder Classic Stampin' Pad
Item # 126985

Regular Price: $5.95 US/$7.25 CAN
Discounted Price: $4.46 US/$5.44 CAN


Daffodil Delight 1/2" Seam Binding Ribbon
Item # 125583

Regular Price: $6.95 US/$9.50 CAN
Discounted Price: $5.21 US/$7.13 CAN


Labels Collection Framelits Die 
Item # 125598

Regular Price: $26.95 US/$32.95 CAN
Discounted Price: $20.21 US/$24.71 CAN


Flower Garden Textured Impressions Embossing Folder Item # 123113 
Regular Price: $7.95 US/$9.95 CAN
Discounted Price: $5.96 US/$7.46 CAN


Pool Party Classic Pad Item #126982
Regular Price: $5.95 US/$7.25 CAN
Discounted Price: $4.46 US/$5.44 CAN


Pear Pizzazz 3/4" Chevron Ribbon 
Item # 130011

Regular Price: $8.95 US/$12.50 CAN
Discounted Price: $6.71 US/$9.38 CAN


Winter Wonders Kit Item # 132567
Regular Price: $9.95 US/$10.95 CAN
Discounted Price: $5.97 US/$6.57 CAN

Tuesday, January 28, 2014

What's cooking? - Sausage and Artichoke Stew

I have been stamping a lot lately and in fact, I'm getting ready for my stamp clubs. I promise to post lots in the next week!

Of course cooking is something I do on a daily basis so I have lots to post for that!

I want to share with you another recipe from my Quick From Scratch Italian  cookbook that I use often. 


I made this the other night.  My oldest son loves this, So I make it especially with him in mind. We call it sausage and artichoke stew. In the cookbook it's called "sausages, potatoes and artichoke hearts in tomato  broth". That's too long to say! 

This is especially good on a cold, winter's night. Make sure you have some good, crusty Italian bread to soak up the broth that's left in the bowl! 

Sausage and artichoke stew
*olive oil (About 2 T)
*1 1/2 lbs. mild Italian sausages (can   substitute hot if you like it spicy!)
*3 cloves garlic, thinly sliced
*About 5 red-skin potatoes, cut into 1 inch chunks
*1/2 t dried thyme
*1/3 c white cooking wine
*1 1/4 cups chicken broth
*1 c canned crushed tomatoes
*One 14 ounce canned artichoke hearts- drained, rinsed and halved
*6 T chopped fresh parsley
*1/2 t salt
*1/2 t fresh ground black black pepper

In a large pot, Heat oil over moderately high heat.

Add sausages and brown well (this takes about 10 minutes)

Remove sausages from pot and drain off all but 1 T of fat.

Reduce the heat to moderate. Add the garlic, potatoes and thyme . Cook, stirring occasionally, until the potatoes are lightly browned (about five minutes). Add the wine and boil until it's reduced to about 3 T (this will take only 2 to 3 minutes).

Stir in the broth, tomatoes, artichoke hearts, 4 T of the parsley, the salt, & the sausages. 

Simmer and cook, partially covered, until the potatoes are tender (about 30 minutes).

Before serving, add the remaining 2 T of parsley and the black pepper.

Enjoy!

Monday, January 27, 2014

January stamp club project #1

This is a card that we made in this month's stamp club. 

We are getting ready for Valentine's Day!

It is a CASE of a card by a demonstrator named Janice Sinko. (If you are not familiar with this term that I use regularly, CASE stands for "copy and share everything.)

Isn't it a romantic looking card?

We used very vanilla card stock for the base and also the other two pieces- the postcard layer and the lattice piece that was cut out with the Big Shot.

We used the heart framelit set for the Big Shot to cut out the frame in the postcard layer and the other two small hearts. The larger of the two is made of a retired designer series paper that I had downstairs. The smallest heart, on the front of the card, was made out of cherry cobbler core'dinations card stock.

We ran the vanilla postcard through the Big Shot with the elegant fan embossing folder.

We glued the lattice piece behind the open-heart  frame on the postcard layer.

The small heart was embossed with the dotted embossing folder. Since it was done with the core'dinations card stock we could then sand away some of the color on the raised dots and on the edges for a vintage look.

After gluing everything down and layering the postcard with dimensionals, we added embellishments and such as: a pearl, ribbon roses, and lace ribbon.

We added a Valentine sentiment inside using cherry cobbler ink.

This card is pretty - too pretty to give to a man! Don't you think ? Maybe I will send it to my mother and make another one for my husband!

As always if you have questions just send me an email or leave a comment on this blog.

For ordering product,you can go to my website and click on "store". Go to: 


And why you're there, don't forget that new weekly specials were announced today!

Today is also the first day of our annual Sale-a-bration event! Spend $50 and you get something from the brochure FREE!(available for viewing online) 

Happy Stamping!

What's cookin'? - Mexican "stoup"

What is "stoup"?

It's a thick soup - almost a stew.

Tonight I made this Black Bean Chicken Chipotle Soup and we all loved it! I'm calling it a "stoup" from now on because of the thickness of it. I guess if you wanted it a little more "liquid-y", you could just add some chicken broth. 


I found the recipe on Pinterest and it was supposed to be an easy, throw together, all-day crockpot meal. It ended up being an easy, throw together, quick dinner! The best part about it is that it uses a rotisserie chicken that you just pick up from the grocery store - cooking the chicken is already done for you. It's a keeper!

It uses several canned goods so be sure to buy that BPA -free kind, so you don't have to worry about corrosion-protecting chemicals leaching into your veggies from the can liner (yuk!). Also, because it uses a lot of canned goods, those of you watching your sodium intake may not want to try this one. You use the corn and beans with their juices - no draining, no rinsing. If you're okay with that, throw caution to the wind and go for it!

The other ingredient that this "stoup" uses is chipotle peppers in adobo sauce.
They are a wonderful add-in in many recipes. If you've never used them you'll find them in your grocery store near all of the taco stuff (they are in the little half-can). Anyway, they lend a great smoky flavor and the spicy kick to this dish. Be careful to heed my directions because they are spicy! You're going to have leftover peppers, but don't worry! They keep well in the fridge for a long time. For ideas on how to use them try: chowhound.chow.com  and type in "chipotle peppers on adobo" in the search box. You're welcome.

I served this along with a corn muffin -  and it was the perfect complement! My son recommended tortilla strips (which you can find near the croutons in the produce section)- that would be good too.
-----
Black Bean Chicken Chipotle Stoup
* olive oil (about 1 tablespoon)
* 1 onion, chopped
* 4 cloves garlic, chopped
* 3 cans black beans
* 2 cans corn
*1 can chipotle peppers in adobo sauce
* 1/2 rotisserie chicken, shredded
* Mexican blend shredded cheese
* sour cream
* chopped fresh cilantro


Heat oil over moderately high heat. Add onion and sauté until soft. Add chopped garlic, sauté until soft.

Add whole can of chipotle peppers with sauce.

Pour the liquid from corn into pot, 
rinsing the peppers of their sauce. Remove all but one of the peppers (Trust me on this one! They smell like barbecue sauce -  yummy - but they are really spicy!)

Add the corn and the cans of unrinsed, undrained beans. 

Add chicken and cook until heated through. 

Serve with shredded cheese, a dollop of sour cream, and fresh cilantro.

Qué rico! Yum!


Thursday, January 23, 2014

Throwback Thursday....

I've seen this concept on Facebook where people put old pictures or post old songs -whatever- just to make you think of a time gone by. Well, I think I will occasionally use this concept or maybe even "Flashback Friday" because I find things in my stamp room all the time that I don't even know I have!

The other day I found this pin:
 Good grief!
I must have been a real country bumpkin back in the "stay-at-home mom" days! Just out in my garden every day.... LOL

Who remembers making this with me?

It probably goes back at least 15 years.

I'm sure we did it at a make and take either at my house or at the San Carlos Inn/ The Hop in York. Remember? I used to do those make and takes a couple times of year with my up line Michelle and some members of my downline? You would pay about $25 and make five cards/projects. 

This was one of them, I know. We tea- dyed muslin and put batting between squares of the fabric and just stitched the corners for you. It was meant to show how to stamp on fabric with our fabric pads. Then you colored using fabric markers, and did a quick stitch around the image. Then you cut it out, hot glued a pin on the back and... voila! - an ugly pin that you would never wear anywhere (except in your garden while wearing bib overalls!) Yee haw!

I can't believe I still have this! But then again if you would see my stamp room it wouldn't surprise you at all. Even though it's much more organized than it has been in the past, I still have things hiding in bins that pop out at me every now and then!

I think it will be fun to revisit these projects. It might just show us how far we've come with this craft. Every now and then  I think we'll hit up on a good one! Maybe a technique  that we haven't seen in a while, beloved stamps that have since retired, a fun fold, etc. will make a special appearance.

Enjoy!

PS: if you still have this pin it's time to throw it away!

Tuesday, January 21, 2014

What's cookin'? - Italian chicken

Did you ever have a recipe for which you have been known? 

For my mom it's eggplant Parmesan, meatballs and Manaste (an Italian soup).

For my mother-in-law it's ham barbecue (Pittsburgh- style), potato salad and the ever - requested strawberry Jell-O salad.

My husband, he makes killer stuffed cabbage rolls.

For me, it has become this dish we just call Italian chicken.

It's actually called "Braised Chicken Thighs with Olives and Basil", and it comes from a cookbook that I bought at one of the boys' Scholastic book fairs years ago - Food & Wine's Quick from Scratch Italian cookbook.

I use this cook book so much it's full of  folded pages and stains from using its pages as a spoon rest!

I've made this recipe so often that I know it by heart. It's one of those - you just do it now - you don't even have to look at the book. I've made it for the four of us, served it to company, and even made it for the masses at a picnic. I always get requests for it and it never disappoints!

My husband will never leave me because if he did, he'd have to say goodbye to this chicken - and that's not a sacrifice he's willing to make! Hahaha

Italian chicken
2 tablespoons extra virgin olive oil
8 chicken thighs, with skin
1 onion, chopped
12 whole cloves garlic, peeled
1/2 cup white cooking wine
2 teaspoons fresh rosemary
1/2 cup chicken broth
1 large can crushed tomatoes
Black olives, sliced (about 1/3 cup)
1 teaspoon salt
1/3 cup chopped fresh basil
Black pepper
****
In a large skillet heat olive oil, over moderately high heat.

Season chicken on both sides with salt and pepper. 

Brown chicken on both sides (about eight minutes each side).

Remove chicken from pan and place on a serving dish.

Drain off all but 1 tablespoon of the fat.

Add onion and garlic cloves. Sauté until onion is soft (about two minutes).

Add wine and rosemary. Scrape off browned bits from bottom of pan. Let wine simmer until reduced to about 1/4 cup.

Add broth, tomatoes, olives, salt and chicken (skin side up )with all accumulated juices to the pan.

Cover and simmer about 20 minutes until chicken is cooked all the way through.

Push chicken aside and mash each clove of garlic with a fork.

Add basil and  a sprinkling  of black pepper.

Ready to serve!

--------
Like the picture above shows, we always serve it with roasted green beans. It just seems to go well together and, hey, we like it!

Roasted green beans
Toss fresh green beans with extra-virgin olive oil, a dash of sea salt and dried thyme. Roast in oven at 425° for about 20 minutes or until beans begin to brown.

Delicious!


Sunday, January 19, 2014

Masking and reverse masking


One of the first techniques I learned as a stamper was masking. That's when you stamp something first and then protect it with a "mask" so you can stamp around it and not get the lines of the other images in it. It's the same principle used when we do house painting - You apply masking tape to your woodwork so that you can protect it.

In this case you'll see that I made a mask with the punched circle so that I could protect the card stock and it would be a setting sun.


What is different is, once I was finished sponging all the sky colors, I removed the mask and I reversed-masked. That simply means that I took the original piece of paper from which the circle was punched  and I used it as the mask. Now everything around the circle was protected but the circle was open. Then I was able to sponge my colors on for the setting sun.


This was all done on white glossy card stock. Glossy card stock allows you to  easily swipe colors.

Then I stamped the tree branch image from Serene Silhouettes and the sentiment from Simply Sketched hostess set in black Staz On ink.

Under my stamped piece, I layered a slightly larger piece of black card stock. I finished the card off by running the card Soft Sky card base through the Big Shot using my Tulip Frame embossing folder. 

This card was a case of a card by Wendy Noble. I found it on Splitcoaststampers.com.

Friday, January 17, 2014

Healthy eating - Mmmm...

 I told you before that I am trying to eat better. I really watch what I have during the day and then I cook a normal dinner for the four of us. Sometimes that is higher in fat or contains meat because my boys are not ready to go completely "lean". They are teenagers and they're not done growing yet. They are both thin but my oldest one especially is trying to have more protein in his diet to bulk up a little with muscles. Sometimes I can fool them - like the cheesy rice we had the other night (see recipe below). Other times, I can't quite pull the wool over their eyes, like the time I substituted tofu for chicken in a meal that we have often. It was quite humorous watching them chew the "chicken" and realize it was a different texture - not saying anything,  afraid of hurting my feelings.

The two recipes I want to share with you today are a part of my "watch what I eat diet". They both contain quinoa, which is recognized as a" super"food. Is actually a seed, not a grain, and it's very high in fiber and protein. I have cooked it several times. Some recipes have been great and others have been not so good!

Here are two that I have tried recently and I think they are super! 

 Garlic rice /quinoa With creamy cauliflower sauce
(That's my mom's recipe country ribs on the plate with it ! Major Yum !)

I found the recipe on Pinterest and it is a brown rice dish made with a creamy cauliflower sauce. I have never had anything with cauliflower sauce but I keep seeing recipes, so I thought it was time to give it a try.

I changed the recipe up just a little by taking some shortcuts. I used this brown rice /quinoa packet that I got at Costco, instead of using all brown rice.


 Following the recipe for the sauce I ended up using three packets of the rice /quinoa mixture! Holy smokes! The original recipe calls for, I think, only  a cup and a half of brown rice. It's all good, though! Yes, I had leftovers but it was so good that I ate it for lunch and so did my husband!

Here's the link to the original recipe:
http://pinchofyum.com/creamy-cauliflower-garlic-rice


Because my packet already was flavored with garlic I skipped the part of making the butter and garlic sauté. So basically I made the cauliflower sauce as directed, made the rice /quinoa packets in the microwave (which was super easy), stirred it together, then added some cheese at the end.

That site also has another link arecipe for   Alfredo sauce made with cauliflower. We enjoyed what we ate so much that I think I might have to try that one too! 
_________
Quinoa Breakfast Bowl - From Hungry Girl (this recipe makes one serving)


In a large sauce pan combine:
1/4 c Quinoa
1 Stevia packet
1/8 teaspoon cinnamon
3/4 c Unsweetened almond milk
1/3 c Water
dash Salt

Cook over moderate heat until boiling. Reduce heat and simmer 12 to 14 minutes until most of liquid is absorbed and quinoa is fully cooked, stirring occasionally. ( When quinoa is fully cooked you'll see these little string- like things from the seeds!)

I added chopped strawberries, blueberries and bananas.

Super yummy change- up to oatmeal!