

In this case you'll see that I made a mask with the punched circle so that I could protect the card stock and it would be a setting sun.
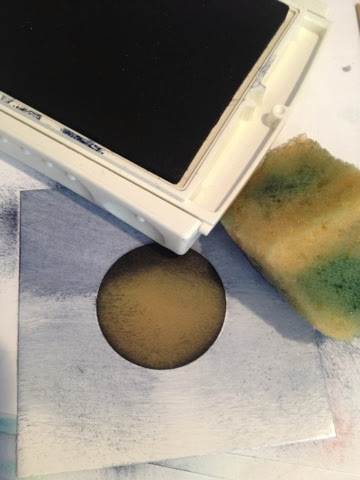

What is different is, once I was finished sponging all the sky colors, I removed the mask and I reversed-masked. That simply means that I took the original piece of paper from which the circle was punched and I used it as the mask. Now everything around the circle was protected but the circle was open. Then I was able to sponge my colors on for the setting sun.


This was all done on white glossy card stock. Glossy card stock allows you to easily swipe colors.
Then I stamped the tree branch image from Serene Silhouettes and the sentiment from Simply Sketched hostess set in black Staz On ink.
Under my stamped piece, I layered a slightly larger piece of black card stock. I finished the card off by running the card Soft Sky card base through the Big Shot using my Tulip Frame embossing folder.
This card was a case of a card by Wendy Noble. I found it on Splitcoaststampers.com.
No comments:
Post a Comment