(Below, the beginning of a previous post is repeated. I am doing so to let you all know about stamp clubs!)
Every month, once a month, 3-5 women gather in my home for Stamp Club. Their obligation is to purchase $30 (or $50 if they are in the summer club) of catalog merchandise each month. In doing so, I can submit at least a $150 show from each club, therefore garnering hostess benefits! One month each participant get a turn at collecting thefree hostess benefits, because each club will meet for as many months as there are participants.
How a stamp club will benefit you:
•It is a way to whittle away at your wish list.
•It is a way to learn how to use new product (or different ways to use that which you've already bought!)
•It is a monthly gathering of women (so you know it's fun!), many of them form friendships that last a lifetime all because they met at a Stamp Club!
I always try to teach something different - a new fold or technique - each month. I also try to introduce new product, especially if it's seasonal.
Stampin' Up! is always offering something new! Clubs are a way we can talk about all the specials that are going on.
If you're local and interested in joining a Club, please just send me an email and I will add you to a list. When I get five participants (or three for theSummer Club) I will let you know. At that time we can discuss which times/days work best for all of you.
Here are a few projects from past Stamp Clubs:
I have often entertained the idea of a long distance club.
Even though I have lived in Connecticut for 10 years now, I still have customers in Pennsylvania and elsewhere. (Now that's what I call loyalty!)
I could send you all the materials you need pre-cut/pre-stamped. You would be able to view a private YouTube video to assemble the projects.
That dream has not yet come to fruition. But, perhaps I only need a little bit of prodding....
------
This one has to be my favorite! It's called that because it resembles one of those room divider screens - know what I mean?
This is another easy card to make but it looks like a masterpiece!
I viewed several tutorials online. All were easy, but they were different! One made only made a three-panel card. A couple used different dimensions, so you would make a larger or wider card. In doing so, you would use a different punch than I did for the bottom and would also have to make your own envelope using the envelope punch board.
Knowing that this 20-minute card would end up taking an hour doing it with a group, I opted for the easiest solution! That doesn't mean my groups are slow (LOL), that just means that we are all sharing and passing the same supplies so it takes longer!
• I started, then, with a standard card size 8.5" x 5.5".
• Fold it in half, like you always do, in the middle - at the 4 1/4" mark.
• Next, you fold each half of the card backwards, in half again, to meet the crease. Now you have your four-panel card, folded in a zig-zag fashion! (To make it even easier we used the Simply Scored tool! I had the markers already set in place at 2 1/8", 4 1/4", and 6 3/8".)
We used a border punch on top to make it prettier....
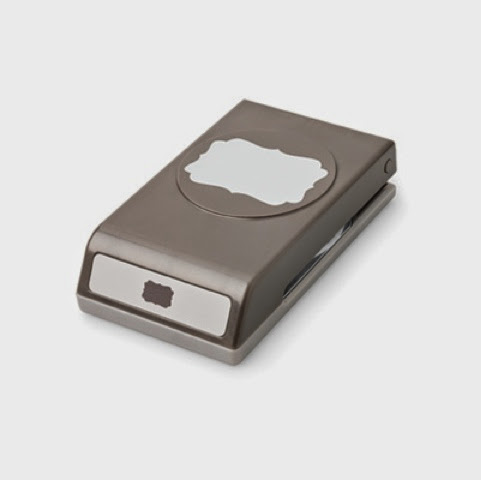
The bottom "legs" are created, in this case, by using the Curly Label punch. Put the card stock only halfway in the punch each time!
(On the larger/wider cards I viewed, the Decorative Label punch was used instead.
Just "eyeball" it to get it in the middle of each panel! Now you have the "legs" of the screen.
We used the retired stamp set Secret Garden on the card. This allowed me to feature just one small item (flower) that we would color in using the new Blendabilities markers.Since there are matching framelits to Secret Garden, we could also quickly cut out the flower after we colored it.
We even colored a pearl with the Blendabilities before adhering it to the flower!
A stamped and punched sentiment, along with some Itty Bitty-punched and "pearled" flowers added to the femininity of this card.
Look for more posts in the future featuring the Blendabilities markers! Although they won't be available to purchase until August, my stamp club members are practicing now with these new alcohol-based pens.
Not only that, they had a chance to try the new Fast Fuse adhesive, and benefit from my latest stamping tips: why to start using the paper-piercing mat and the silicone craft mat!
Now don't want to be in a Stamp Club too?
Contact me now!
Dandyspandy@sbcglobal.net


No comments:
Post a Comment