

As the winter in New England dictates, my classes for February are only being offered on a "to go" basis.
It's too cold to go out and we have a lot of snow up here (with limited parking).
Getting together to "yuk it up" while stamping will have to wait until it gets a little warmer.
But you don't have to miss out on fabulous cards!
These are the cards I created for the February "Over the Hill" punch card class.
All three are birthday cards meant for "older" recipients (or, sadly, my age bracket!)
For just $10, you will receive in the mail an unassembled kit (and envelopes ) for creating the three cards you see here!
You can leave a comment below or email me with your request. I will need your $10 check, payable to me, Danielle George, no later than March 7.
I will also need your address (!) so that I can mail the kit out to you.
Here are notes about each card so that when you're you get your kit you can refer to this blog post:
Card #1:

The penguin is made from the owl punch!
Here is a step-by-step picture tutorial on how to create the penguin: (Please excuse the gold glitter on my silicone mat!)
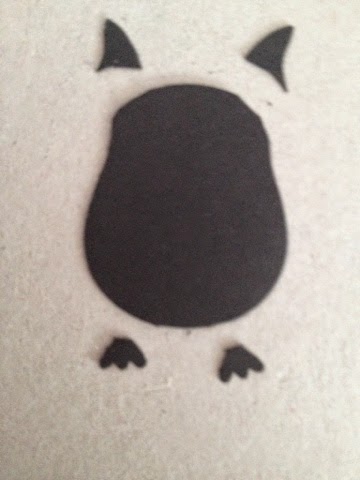


•Add a white "vest" and an orange heart (pieces made with the owl punch)


• Add white eyes and make black pupils with a marker. (The punch also can make these but they are just too small to handle!)

• From a second black owl, cut out wings as shown:

• Tear a piece of white card stock and half to appear as a snowy hill!

This one is easy peasy!
•Glue a colored 1/2" card stock circle to the black 1 1/4" circle, then make a hole right in the middle with either a paper piercing tool or a 1/16 " hole punch.
•Add a small brad.
•Attach to card with dimensionals.
Card #3:

Each balloon requires that you cut 1 foot off of an owl. Leave yourself a little piece to adhere glue!

I talked baker's twine with a glue dot. Each balloon was then attached to the silver glimmer paper with a Dimensional.


A glue dot holds all the balloon strings in place before the bow is attached.


No comments:
Post a Comment