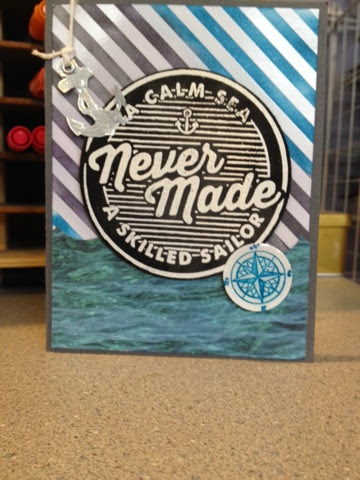
Monday, January 26, 2015

My Paper Pumpkin (revisited)

Usually, when my monthly MPP kit arrives I do a couple of the projects - enough to take some photos and blog about it - I don't finish the whole kit.

The last couple of months though, I have been getting together with friends to work on the kit (so much more fun!). In doing so, I have been able to finish a couple of the MPP kits. I do the projects exactly how they are described in the instructions - no thinking outside the box.

But there is so much left over! You are almost forced to create!

It is at this time I consult my Pinterest boards to see what other people have done with their leftover supplies.

The January MPP kit "All Shook Up" is a prime example of this.  We made all nine cards that the kit intended to make, but there was so much left over and I couldn't throw it away!

I followed some examples that I saw and wanted to share them with you to show you that you really do get a lot for your money with these monthly kits!

In a previous post I showed you a few of  the nine cards you could make with the "All Shook Up" kit:

Here's what I did with the leftover pieces from which the "confetti" stars were punched:
 The used coordinating card stock and ink for the kit stamps. Behind each of the star cut-out strips were pieces of metallic (gold or silver) foil paper. I finished it off with either gold or silver ribbon.

This set will make it cute gift for someone after I include envelopes (perhaps lined with the metallic foil paper like I used on the cards ) and put it in a pretty package!

Similar to the ones above, but I really liked this color combo of the pistachio and wisteria! Matching wisteria baker's twine completes the card.

The following sample was shown on the Stampin' Up! blog. I just made my own:
A Clean And Simple card made with the kit stamps . That little heart you see is actually a sequin from last year's in-color embellishments.

 Here is a similar card, but this time I used a new trick with heart punches (that I will explain in a different post):
The greeting stamps included in this kit are so versatile. I'm sure I will get a lot of use out of them.

And finally, another card using the star punch-out strips, one of the stamps, and some of the sequins from the kit:

Wow! Believe it or not, I still have more "leftovers" sitting on my stamp room desk! I put them aside for a rainy (or snowy day). Next week we are getting together to do the January kit, which is little Valentine packages  - I can't wait!

Right now during Sale-a-Bration, which ends March 31, you can save $5 on a 3 month pre-paid subscription AND qualify for a free gift from the Sale-a-Bration brochure !!

Click on this link to find out more!

Sign up to receive my paper pumpkin kids each month! Then, come over my house to enjoy the company of others wow putting together the kit. Or, get together with your own group of friends for a great time!

Sunday, January 25, 2015

What's cookin'? - Stuffed Pepper soup!


Yesterday we got about 4 inches of snow here where I live in Connecticut.

This Tuesday the weather forecast is for  blizzard-like conditions!

Did I ever mention to you that I hate winter?

HATE IT!!

That's right! All capital letters!

I can only hope that my husband makes good on his promise of moving somewhere warmer when he retires (at least for half of the year)!

Those of you who read this blog regularly know that when it's cold, I make soup!

Nothing warms me up more then sitting by our woodstove with a nice, warm bowl of soup.

In fact, it doesn't even have to snow for me to make it. The temperature just has to drop a little below 40 degrees!

I've been making so much soup lately that my oldest son asked me, "Mom, what's up with all the soup lately?"

My response was simply, "It's cold."

DUH! 

Doesn't everybody resort to making soup when it's cold?


A little background info before sharing the recipe .... As most of you know, I am a Stampin' Up! Demonstrator, and have been, for going on 18 years!

We used to sell 6 x 6 scrapbooks.
For several years I hosted a recipe "swap" a couple of times during the year, where you would choose one recipe to share make a 6x6 scrapbook page of that recipe.  You would make multiples of the page, so that everyone would receive one.

When the due date arrived, you were invited to bring your cooked creation to share as well as your pages to swap.

Here are a few examples:

I have gathered tons of great recipes over the years - about four scrapbooks worth! 

Today I share with you a recipe  that I have used over and over again.

It was given to me by my friend Marie S., and it is the only one I ever consult for making stuffed pepper soup. It's awesome!

Stuffed Pepper Soup


This is a HUGE batch that feeds 4 adults with plenty of leftovers.

•2 pounds ground beef
•1 large onion chopped
•4-5 bell peppers (I only used 3 the other day) any color (we usually
usually use green and red) chopped
•1 large can diced tomatoes (I used whole tomatoes and chopped them myself)
•1 carton beef broth
•3-4 cans of tomato soup
•1 small can/jar of tomato sauce (or what ever you have on hand)....OR
just add more tomato soup
•4 Tablespoons brown sugar
•Water (I usually just eyeball it)
•Salt & Pepper to taste
•Uncooked White Rice (3/4 cup or more, again just eyeball it)

-Brown and drain the ground beef. 
-Add onions and peppers. Cook until tender.
(Doesn't this look so colorful and pretty?)

 -Add tomato soup, tomato sauce (or more tomato soup), tomatoes,
beef broth and water. Bring to a boil.

 -Add brown sugar and rice. 

-Add salt and pepper to taste.
-Reduce heat to low and simmer for 45 minutes. You may need to add more
broth or water depending on thickness.

***This is really a forgiving recipe. You can add more or less of anything and end up with the same result***

YUM!!!!

Thank you, Marie! This is a wonderful soup!


Punch class preview-"Love is in the air"


Here is a preview of the cute "love" cards that I'm doing Wednesday night.

Or, at least I hope to be doing them Wednesday night!

The weatherman have said that we're going to get a massive snowstorm on Tuesday.... I have a feeling we're going to still be digging out on Wednesday.

Only time will tell.
They've been wrong before!

That said, let me use this blog post as a reminder of the class that I intend on doing this Wednesday night, 6:30PM.

$8 for these three great cards and envelopes!

BUT (and this may be an important "but" right now, in light of the weather forecast), as with all of my recent punch classes this one is available "to go".

For $10, you will have mailed to you the card kit - UNASSEMBLED - and the three envelopes!

On Thursday my blog post will talk about each card in particular and little tips you may need to know in order to assemble them.

You can RSVP for the punch class or the to go version either by commenting on this blog post or by sending me an email at: Dandyspandy@sbcglobal.net

"To go" kits Will be sent out on Monday, February 2. Your  cash/check payment is gladly appreciated before then.

Let's keep our fingers crossed! THESE ARE TOO CUTE TO MISS!

I'm definitely looking forward to warm weather!


Saturday, January 24, 2015

Truly irresistible!

Product spotlight
Irresistibly Yours Designer Series Paper

Doesn't look like much, I know!

But you are going to love this paper! It is being offered as one of the free selections in this year's Sale-a-Bration brochure!

The paper is 12 x 12, and each sheet has a glossy white design on white card stock. Glossy areas will resist ink once applied ("emboss resist"). Therefore, you can customize this paper any way you want!

There are six different designs and two sheets of each. That  gives you plenty of area to cut down and to use on your cards or scrapbook pages.

In my last post I included this as one of the two most popular free selections this year. THIS IS MY PREDICTION, as I just love what you can do with this paper, and I think you will too!

Let me show you how to use it first. Then, I will showcase each pattern in use on cards that I have created.

HOW TO COLOR YOUR IRRESISTIBLY YOURS DSP:

After doing my research (as I always do) by scouring Stampin' Up!, Pinterest and YouTube for other demonstrators and what they're doing,  AND THEN TRYING IT FOR MYSELF, these are the best ways I have come up!

#1 Stamping Spritzer
•Fill a spritzer bottle with rubbing alcohol and add drops of ink refill to achieve your desired color. 
•Spritz paper lightly from a distance of about 5 inches.
•(As with other methods) you'll want to have a paper towel or tissue nearby to remove excess ink from glossy areas.
**The paper will not hold an excessive amount of water! Spritz lightly!
**This method works well with different colors being used and you can alternate the intensity of the spritzing!

#2 Brayer
If you want even, intense color - this is the method you should use!
** Remember when using a brayer be sure to ink it and use it rolling, repeatedly, in ONE DIRECTION! Going back and forth only uses about 1 inch of your roller - think about it!

#3 Sponge
(MY FAVORITE!) It doesn't matter if you prefer a sponge or a dauber - just apply ink until desired color consistency is reached and wipe off excess.

In the picture below, I have done the left-half of the strip of paper with a brayer and the right-half with a sponge dauber:

(#4) Blendabilities alcohol markers
I put this method in parentheses because I'm not 100% sure about it - try it if you like it!

•Just scribble on the DSP with your marker and then wipe.

A couple things I found with using the Blendabilities method to color DSP are:
1) The glossy areas absorb some of the marker color and do not, when buffed, completely reveal bright white. (Some demonstrators are saying, though, that if you apply it and quickly wipe away excess you will get white!) 

Here is a picture compared to the brayer/sponge so you can see the difference in the glossy areas:


2) If you do not color in the same direction you'll see your color lines!

-----
Here are some cards that I made, using each of the patterns.

BTW, I did something that I haven't done in a very long time - that is, I got so carried away playing with my new stamps, that I went to bed at almost 3 AM! That's what I used to do when my kids were little! It was the only time I had to myself after they went to bed, so I would "lock" myself in my stamp room!

Last night my oldest son came down about 1:30 (as he was getting ready to retire for the night ) and said, "Geez Mom, go to bed!"

How are roles are beginning to reverse...

Anyway, here are my cards:

Here are the vines again. 
New set: Indescribable Gift


I also used it in this card from my last blog post, (so you can see the flower design here, too):
New set: Lotus Blossom (free SAB)


Here is the paper with the stars- this was a card inspired by a very similar one that I saw on alystamps.com:
New set: Simply Wonderful (free SAB), Best Year Ever DSP (free SAB)


The dotted paper was cut out with the balloons framelits and then sponged on this one:
New bundle: Celebrate Today stamp set and Balloon framelits (also shown:  Bash Specialty DSP)


A Valentine card done with the scalloped design - I have two alternatives - feminine (more bling-y with a large rhinestone on the "fork bow") and masculine (with a mini metallic clothespin):
New set: You Plus Me (also shown: Stacked With Love DSP stack, Calypso Coral Pom-pom trim)


And, finally, the stripes...:
New set: Adventure Awaits  (also shown: Adventure Bound DSP stack)

I had so much fun playing with the Irresistibly Yours DSP and also many of my new products that I purchased from the Occasions catalog!

I hope to continue sharing ideas with you in future posts.

If you are interested in purchasing any product, please contact me through this blog or email: Dandyspandy@sbcglobal.net
You can also visit my online store and shop  24/7 at: http://www.stampinup.net/esuite/home/dandyspandy/

Remember: until March 31, during Sale-a-Bration, with each $50 subtotal of your order you get to choose one free product. I'm betting that Irresistibly Yours DSP will be one of your choices!


Thursday, January 22, 2015

January stamp club

I am so excited about the new Occasions catalog and the free product offered this year in the Sale-a-Bration brochure! At stamp club this month I was sure to use all new product so that everyone could be as excited as me!

Remember, Sale-a-Bration is a very special time of the year for Stampin' Up!.  For each $50 subtotal of your order (you do not have to split your order up) you will earn one free choice from the mini brochure!

And this year the choices are spectacular! There are stamp sets, 2 Designer Series Paper packs, an accessory pack and all current Blendabilities are available as a free selection (one three pack per free selection)!
Example:


Here's what we made in stamp club this month:

Card #1:
A quick card, really.

We tried our hand at the "chalkboard" technique - we used the new chalkboard paper as well as a new chalk pad!  (The greeting is from the new set Big on You) Details were drawn with our white chalk marker (available in our main catalog). I will describe further this  EASY "chalkboard" technique in an upcoming post!


Also used on this card was a piece of the Best Year Ever DSP (a free selection from Sale-a-Bration), and the new, clear Itty Bitty Accents epoxy stickers - can you see one there on the heart?


I was rather boring - cutting our new washi sheets into strips so that it resembled plain, ol' washi tape! It will be a lot more fun once I get a hold of some framelits to use on the sheets of washi tape paper and cut it into shapes!


Card #2:
My prediction: the two most popular choices of free Sale-a-Bration product this year... the Lotus Blossom stamp set  and the Irresistibly Yours DSP pack.

I plan to feature the stamp set in just a few days, so I will explain and show you by pictures how this is a three-step instead of a two-step stamp set. GORGEOUS!

The Irresistibly Yours DSP doesn't look like much when you see it in the brochure... that's because it's white paper with different white embossed images. The magic of this paper is adding color - the embossed images will resist color!

For example, on this card we applied Wild Wasabi ink to the leaf piece and Pink Pirohuette ink to the shorter piece. The white vine/flower is the result of the "emboss resist" technique! (you can view my info about this technique by clicking here:http://dandyspandy.blogspot.com/2014/01/so-lets-get-this-party-started.html?m=1)

A touch of gold finishes it off - gold baker's twine and sequins.

Card #3:
This card was inspired by a card I had seen by Deb Valder: 
I used the new butterfly thinlit dies and also a piece of the Painted Blooms DSP.


It looks as though the butterfly is just filled in with white card stock when in fact, it's on and a window sheet, so it appears to be floating!
The butterfly is cut out, as I mentioned before, using the new butterfly thinlits.

You can visit my last post for a quick release tip of this detailed die:http://dandyspandy.blogspot.com/2015/01/new-love-butterfly-basics-bundle.html?m=1

A window sheet/acetate is glued behind the opening with glue dots. The butterfly is then placed back in the opening and actually glued to the window sheet- we used a two-way glue pen to do this.
Another favorite new set of mine is Painted Petals from the Occasions catalog! We used just a few stamps from that set to decorate the inside. LOVE THIS SET!


We tied a "double fork bow" to the front of the card to finish. Again, I used the help of another demonstrator's video. Here is the link that we used:  http://youtu.be/VWou4GtMD-Q 
Also note that you can make a smaller or larger "fork bow", and they each have their own video!

I can't wait to give you further details on some of these feature products! I plan on doing so in future posts.

It's easy to spend $50 with all the great  products featured in the Occasions catalog! If you order before March 31, you will be able to pick a free Sale-a-Bration item per $50 total.

You can view both of those mini catalogs here: http://www.stampinup.com/ECWeb/default.aspx

If you did not receive one in the mail at the end of December, but you would like one, please contact me, either by way of this blog or through email, and I will see that you get on!. (If you have a regular demonstrator I will ask that you contact him/her first.)

You can always order online 24/7 on my online store! http://www.stampinup.net/esuite/home/dandyspandy/
Click here and once you're on my web page, click "shop" in the upper right-hand corner.

Have fun!

PS: There will be no clubs held in the month of February. I would like to start new rounds of clubs in March. If interested in this monthly meeting of five ladies please contact me, either through this blog or by email! (Dandyspandy@sbcglobal.net)


Friday, January 9, 2015

NEW LOVE! Butterfly Basics bundle

The Occasions catalog is out and there is so much to love about it!

One of my favorite purchases so far is the Butterfly Basics bundle. It's a stamp set and a coordinating thinlit die set. Best thing? You have your choice of all three types of stamps: wood, clear, photopolymer! 

I have a feeling that this one is going to be VERY popular!

Here are a few cards that I made quickly - of course it helps to be "pinspired"!
This card also features one of the fresh new designs from the Best Year Ever DSP. It is one of the free choices when you spend $50 during Sale-a-Bration!

I am loving the color combination featured in this paper: Calypso Coral, Coastal Cabana, Crushed Curry, Sahara Sand, Soft Suede, and Whisper White.


Because the Butterfly Basics set is a collage set, it easily lends itself to fast, easy cards. It took my symmetrica- self a while to get used to "collage stamping" over the years. But now I have come to appreciate the "willy nilly "style with no apparent rhyme or reason!

Don't you just love the butterfly?

I will share a fantastic tip that I recently learned with you in just a moment.... 


This third card also uses paper from the same DSP free pack. I also used the Gorgeous Grunge set,

in addition to a different butterfly thinlit that comes in the set, which matches one of the stamp images. The smaller, stamped (and embossed) butterfly also comes in the stamp set and matches our Bitty Butterfly punch. BONUS!


There is also a larger "swallowtail" thinlet that comes in the set which I have not used yet. I'm sure you will see it in future posts as I continue to play with new product!
-----

Now.... for my helpful hint that I learned this week by watching a video by demonstrator Deb Valder. In the video she credits one of her downline members -Jeanie Hall- with this technique.

Whoever came up with this - THANK YOU!

This is a very helpful technique for the butterfly framelits or any other intricate thinlit that has many details, like the NEW Hello You thinlits, 

the words from Wonderful Wreath, Little Letters,  Darling Doily etc. (I have the old Delicate Doily die  - which is not a metal framelit. As you can see below, there are a few small pieces remaining in the diecut but, WAY better than before!)


These tend to be a royal pain if not used with at least wax paper, because of all of the little shapes that you have to punch out after they have been cut with the Big Shot. If you have ever tried to practically gouge out card stock from inside one of the metal framelits, then you know what I'm talking about!

This technique solves those problems - I swear! It's one of the few techniques that I had to try right away - immediately after watching the video!

It involves dryer sheets.

Yes. You read that correctly. Another household item that you need to purchase for your hobby rather than it's originally intended purpose! (Non-housekeepers UNITE!)

You'll want to pick up the cheapest you can find - unscented if the scent bothers you-  just for use in your stamp area.

• Take 4 sheets, stack them on top of one another, then fold them in half.

• Run your paper with the framelit as you normally would through your Big Shot. (I prefer using the magnetic platform with all metal framelits or thinlits.) Make your "sandwich" with cutting pads as usual.


• The card stock is usually stuck inside the framelit at this point. This is where you would frustratingly get out your paper piercer and use the little holes in the framelit to push out your card stock and/or poke out all remaining small detail pieces.


However, you no longer have to do that if you follow my tip! Yaaaay!

• Run your framelit, with the card stock still stuck inside, through the Big Shot AGAIN - this time, place it facedown on the folded dryer sheet stack (including included in your "sandwich")


• Remove the framelit and SMILE, noticing that your framelit is completely free small paper bits!

• Carefully peel off the originally intended die cut. ALL SMALL PIECES SHOULD STICK TO THE DRYER SHEETS STACK!


•Reuse the dryer sheet again and again, unfolding and refolding each time so you are using another layer.


You're welcome!

***(edited 1/10)
And I need to say, THANK YOU to my dear friend Denise! This morning she sent me a video by Patty Bennett demonstrating what she does with these intricate thinlits....
platform, cutting pad, one dryer sheet, card stock, waxed paper, cutting mat.

By using only one dryer sheet, she reduces the tension when the framelit passed through the Big Shot - therefore eliminating the little dots that you see on mine! It wasn't as tight as a squeeze! Using the waxed paper still allows you to have a paper-bit free framelit.

Also, she was mass- producing butterflies, and she was able to get six out of one half sheet of card stock. Here is the link to her video:


Enjoy making butterflies! They are beautiful!