Showing posts with label Stamp club. Show all posts

Thursday, June 19, 2014

June stamp club - My Paper Pumpkin!

For June I have three projects that we are making at Stamp Club: the Work of Art In Color card (which I have already posted about), the dividing screen card (which I have yet to do a post about), and a treat bag made with the June My Paper Pumpkin kit.

I am really excited to show you the My Paper Pumpkin kit!

When it first began last year, I didn't join, thinking that I already had too much stuff to do!

I have a customer who joined early on and was dissatisfied because of the elementary skill level of the first kit. She's an "advanced stamper", so I could understand.

But, then I started to see samples that people had created online using their monthly kit, and I noticed how each kit got better and better....

They were different every month.... A card, a journal, a banner, a piece of framed art... I liked what I saw!


Stampin' Up! has really "upped" the value of each monthly kit!

I realized that maybe I was missing the point of the kit... They've referred to it as "creativity in a box", delivered to your doorstep each month.

It wasn't always a card like I usually make  - it was a paper crafting kit.

Wouldn't this be fun to do with friends?

Everything is included that you need to make their monthly project (except scissors)!

After my friend Nancy showed me a "Paper Pumpkin" project that she had completed with her granddaughter, I was sold!  It was a cute, decorated gift bag.

Like I said before, I was approaching the concept the wrong way.... It is a monthly craft kit with some stamping involved!

So when Stampin' Up! made an offer I couldn't refuse, I signed up to start a monthly subscription.

I love this kit! It is so nice to have everything I need, including instructions (there is even a video), to assemble the projects! I don't have to spend time creating, cut paper, or plan!

This kit had everything I needed to complete 24 patriotic pinwheels! 24 cello bags, 24 jumbo brads, 24 sturdy "straws", 24 mini clips, an ink spot, 3 photopolymer stamps, baker's twine, 24 pre-cut, ( and pre-punched!) pieces of paper (heavy!), white card stock diecut banners, 96 glue dots (!) and instructions!

Because it was my first month they also included a clear block for use with all future kits.


This all arrived, mind you, in a cute red box! When I opened it up it was wrapped in Pool Party tissue paper and sealed with a sticker!


I felt like it was Christmas in June!

My hope is that my "locals" will join in on the fun! Then, I can set aside one night a month to get together and do My Paper Pumpkin with them!

Fun, right?

Of course, I already have some long-distance customers enjoying their monthly kit. I feel like I have missed out on so much!

Now with prepaid subscriptions being offered, I'm sure many will take advantage of this value as a gift for the Paper crafter!
--------
MONTH-TO-MONTH SUBSCRIPTION

It’s convenient and low risk—you can put it on hold or cancel anytime. Visit MyPaperPumpkin.com to sign up for just $19.95 a month (shipping included). Once there, you'll have the opportunity to choose me as your demonstrator.

AND NOW we are offering prepaid subscriptions! You can purchase for yourself OR AS A GIFT!

If that isn't fantastic enough, your purchase will go towards your workshop or club total! You just use the following codes and it will be entered with your show or club. Then you will receive an email with your special enrollment code that you can start at any time!

PREPAID SUBSCRIPTION

Simply enjoy the fun every month.

ITEM

PREPAID SUBSCRIPTION

PRICE

(shipping included)

137858

1-month

$19.95

137859

3-month

$59.85

137860

6-month

$113.70—save $1 per month

137861

12-month

$215.40 - $2 per month 

Try My Paper Pumpkin today! It will be the best half hour of your month!

Wednesday, June 18, 2014

June stamp club (#3) - Dividing Screen card


(Below, the beginning of a previous post is repeated. I am doing so to let you all know about stamp clubs!)

Every month, once a month, 3-5 women gather in my home for Stamp Club. Their obligation is to purchase $30 (or $50 if they are in the summer club) of catalog merchandise each month. In doing so, I can submit at least a $150 show from each club, therefore garnering hostess benefits! One month each participant get a turn at collecting thefree hostess benefits, because each club will meet for as many months as there are participants.

How a stamp club will benefit you:
•It is a way to whittle away at your wish list.
•It is a way to learn how to use new product (or different ways to use that which you've already bought!)
•It is a  monthly gathering of women (so you know it's fun!), many of them form friendships that last a lifetime all because they met at a Stamp Club!

I always try to teach something different - a new fold or technique - each month. I also try to introduce new product, especially if it's seasonal. 

Stampin' Up! is always offering something new! Clubs are a way we can talk about all the specials that are going on.

If you're local and interested in joining a Club, please just send me an email and I will add you to a list. When I get five participants (or three for theSummer Club) I will let you know. At that time we can discuss which times/days work best for all of you.

Here are a few projects from past Stamp Clubs:
I have often entertained the idea of a long distance club.

Even though I have lived in Connecticut for 10 years now, I still have customers in Pennsylvania and elsewhere. (Now that's what I call loyalty!)

I could send you all the materials you need pre-cut/pre-stamped. You would be able to view a private YouTube video to assemble the projects.

That dream has not yet come to fruition. But, perhaps I only need a little bit of prodding....
------
This month we made a treat bag with  the My Paper Pumpkin kit, an easy card featuring the new In Colors, and this Dividing Screen card.

This one has to be my favorite! It's called that because it resembles one of those room divider screens - know what I mean?

This is another easy card to make but it looks like a masterpiece!

I viewed several tutorials online. All were easy, but they were different! One made only made a three-panel card. A couple used different dimensions, so you would make a larger or wider card. In doing so, you would use a different punch than I did for the bottom and would also have to make your own envelope using the envelope punch board.

Knowing that this 20-minute card would end up taking an hour doing it with a group, I opted for the easiest solution! That doesn't mean my groups are slow (LOL), that just means that we are all sharing and passing the same supplies so it takes longer!

• I started, then, with a standard card size 8.5" x 5.5".

• Fold it in half, like you always do, in the middle - at the 4 1/4" mark.

• Next, you fold each half of the card backwards, in half again, to meet the crease. Now you have your four-panel card, folded in a zig-zag fashion! (To make it even easier we used the Simply Scored tool! I had the markers already set in place at 2 1/8", 4 1/4",  and 6 3/8".)
You have the card base so .... let the decorating begin!

We used a border punch on top to make it prettier....

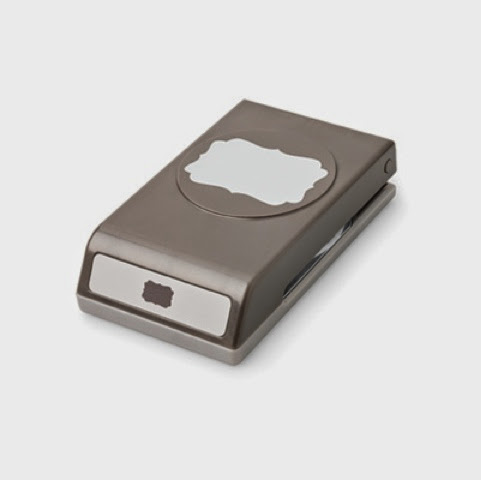
The bottom "legs" are created, in this case, by using the Curly Label punch. Put the card stock only halfway in the punch each time!
(On the larger/wider cards I viewed, the  Decorative Label punch was used instead.
Just "eyeball" it to get it in the middle of each panel! Now you have the "legs" of the screen.

We used the retired stamp set Secret Garden on the card. This allowed me to feature just one small item (flower) that we would color in using the new Blendabilities markers.

Since there are matching framelits to Secret Garden, we could also quickly cut out the flower after we colored it.

We even colored a pearl with the Blendabilities before adhering it to the flower!
A stamped and punched sentiment, along with some Itty Bitty-punched and  "pearled" flowers added to the femininity of this card.

Look for more posts in the future featuring the Blendabilities markers! Although they won't be available to purchase until August, my stamp club members are practicing now with these new alcohol-based pens.

Not only that, they had a chance to try the new Fast Fuse adhesive, and benefit from my latest stamping tips: why to start using the paper-piercing mat and the silicone craft mat!

Now don't want to be in a Stamp Club too?

Contact me now!
Dandyspandy@sbcglobal.net


Monday, March 31, 2014

March stamp club cards

By now you've probably seen the post about our "masterpiece" card from March club. I referred to it as that because it took the longest amount of time to make!

We made two other awesome cards as well! Two that can easily be mass-produced!
This card was made using the Circle Thinlit die for the Big Shot, which creates a "flip" card.
Here is a link to an awesome video by Stampin' Up! which shows how to use that the Thinlit and all that comes with it:

The sun was made with a large circle punch and the free banner punch from Sale-a-bration!

The clouds were cut using the Word Bubble framelits:
(shown with the matching Just Sayin' stamps, available in new Occasions catalog)

Finally, we embossed a sentiment from the Sale-a-bration set See Ya Later.

The colors this card are Tempting Turquoise, Pumpkin Pie, Daffodil Delight and Whisper White.

The second card we did was a CASE of another demonstrator, Kay Kalthoff.

It's called a "tiled background", and it was so quick and easy!

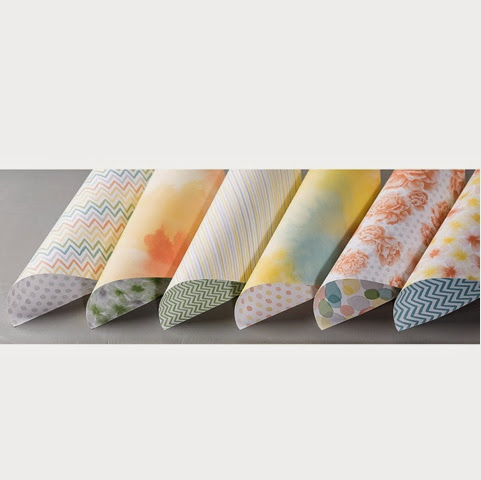
First, I had cut out 10 squares of the Watercolor Wonder DSP (Occasions catalog)using my square 1 1/4" punch. Everybody had a different piece of DSP and they all looked terrific!
They were glued onto a card of Gumball Green starting with the outer-most corners so that you can judge even spacing. There are no squares in the middle of the card - only around the edges.

Next, on a piece of white card stock, we stamped the Blessed Easter single, wood stamp using black StazOn ink.

Not wanting to color in the tulips, we used the "wash" from the Happy Watercolor stamp set (Occasions) in Daffodil Delight, Crisp Cantaloupe and Gumball Green. We stamped "off" each time so that our card received a lighter version of the original ink color.
A piece of Gumball Green stitched ribbon and a few gold sequins were added to complete the look!

Once we glued that to the front of the card, we added a piece of white card stock trimmed with matching DSP to the inside so that we could easily write a message!


We have a great time at our monthly stamp clubs, - learning new techniques, using current Stampin' Up! products and enjoying each other's company! 

Clubs are made up of five participants and run for five consecutive months. Each participant has the one-time opportunity to receive the free hostess benefits of the workshop order placed at the club.

New clubs are forming all the time!

Contact me if interested!

Sunday, March 16, 2014

March stamp club - "masterpiece" card

A card was shared recently by one of my sidelines named Brianna Thompson. (A "sideline" means we are members of the same group somehow - not necessarily recruited by the same person.) Anyway, she made such a beautiful card that I knew I wanted to make one just like it. We included it in our March stamp club lineup.

 Here's her card:
Isn't it gorgeous? I loved the way she used the Chevron border punch to create a lattice background simply by turning one upside down and overlapping them.

Of course, the one thing standing in my way is that I don't own that punch!

What to do?...  What to do?

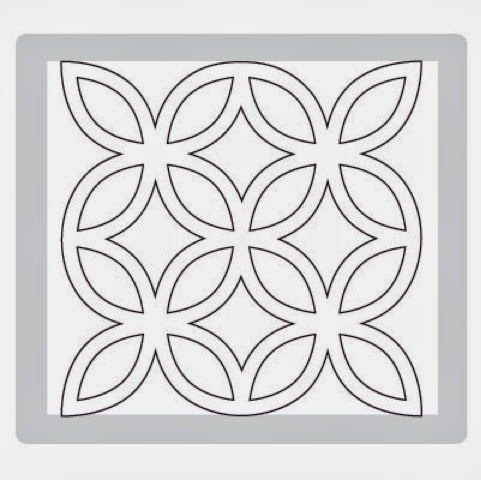
Wait! We have the Lattice Bigs die! 

It hardly ever gets any use around here so it's about time I started using it! I did use it at stamp club to make a valentine, remember?
For this card, we simply adhered it behind the cut out heart window frame. I have seen other cards with it like that behind other frames. I want to try that too!

Back to the card I was copying...
(Here's my card without a greeting!)

I cut out the Lattice die with my Big Shot and cut it in half. At this point, I could glue it right to the card vertically to create a lattice.

But I really liked the look of the lattice behind a frame! Hmmm...  I could take a piece of white card stock and punch out squares repeatedly to get an open window...
But when I did that there was no way to see if I had my punch evenly spaced on the card stock.

So I used my paper trimmer and cut out the window.

I will explain to you how I did it. I hope it makes sense!  I know that it would be so much easier to follow with a video but my son's video camera broke!  So it will be picture tutorials until we get a new one!

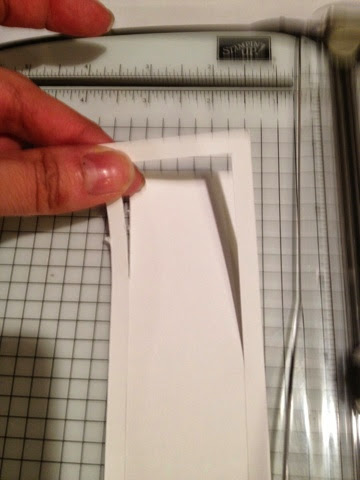
I used a piece of white card stock that measured 2" x 5.5". On my paper cutter, I moved the left side of the white card stock down a quarter of an inch to 5 1/4". I lifted the ruler and moved the cutting blade so that it was on the 1/4" mark - that way it wouldn't cut the end of my paper but rather start 1/4" inward. I then cut with the blade, moving it downward, but stopped 1/4" shy of the end (at 1 3/4 " on the ruler). 

By the way, be sure to use the dark gray cutting blade on your Stamping Trimmer! That is the one that cuts. The lighter one is for scoring.

I continue to do that three more times rotating the white card stock each time (so that the third cut is the same as the first , and the second and fourth cuts are at these measurements :
Left side at 1 3/4", start the blade again at the 1/4" mark. You can also use the little gray point of the cutting blade to match up with your previous cut - that's what I do a lot of times! 

On the second and fourth cuts, you drag the cutting blade down to 5 1/4 inches - stopping 1/4" shy of the end.
When I was done making all four cuts , I ended up with a rectanguler frame. 
Next I glued my lattice pieces to the backside of the frame. For such a small detailed piece, my Tombow glue really came in handy, because it has that pointy pen-like tip on one end.
I also found that using my silicone craft sheet works wonders when using any kind of adhesive, because nothing sticks to it!
If I got a little glue on it, I just waited until it was dry and it rubbed right off! No glue to worry about on my workspace underneath! 

Ha! This is one of those items that has been in a drawer for two years and I am finally using it and appreciating what it does!

You've got to get one!

Even the snail adhesive didn't stick to it if I glued my card together on top of it! No sticky grid paper to worry about! I wish I could get one at every station at the 2/5/15 class, so no one would have to worry about adhesive being on the paper from the last person who was at that station.

A girl can dream...

I stamped a piece of Crumb Cake with the new Hardwood background stamp In Soft Suede ink.
Before the lattice piece was ready to officially be added to the card I added a piece of Midnight Muse stitched ribbon. 

I knew that I wanted to use this color combination:
(If you have never visited this website go there now! "ColorQ" it's awesome!)

So now for the stamping...  I used the Petite Petals stamp set with the coordinating punch ( from the Occasions catalog) in Marina Mist and So Saffron inks.
I also used Old Olive card stock to cut out the leafy branches. That was done using the sizzlet called Little Leaves (for the Big Shot).
I added each flower with a dimensional. I also stuck a medium pearl in the middle of each.
I call this card a "masterpiece" because it was not as quickly done as the other two card we made. I have to hand it Brianna, life would be a lot easier if I had that Chevron Border punch!


But, when there's a will there's always a way! 

Just because you don't own something and you see it used on the card don't give up! There is usually always something else you can substitute and come up with something similar.

(Oh! By the way, take a good look at Jen's card in the top picture because she'll never send it to you! Hahaha it's going right on her wall of "cards that too long to make so I'm never sending them to anyone...")