Showing posts with label Petite Petals. Show all posts

Sunday, March 16, 2014

March stamp club - "masterpiece" card

A card was shared recently by one of my sidelines named Brianna Thompson. (A "sideline" means we are members of the same group somehow - not necessarily recruited by the same person.) Anyway, she made such a beautiful card that I knew I wanted to make one just like it. We included it in our March stamp club lineup.

 Here's her card:
Isn't it gorgeous? I loved the way she used the Chevron border punch to create a lattice background simply by turning one upside down and overlapping them.
Of course, the one thing standing in my way is that I don't own that punch!

What to do?...  What to do?

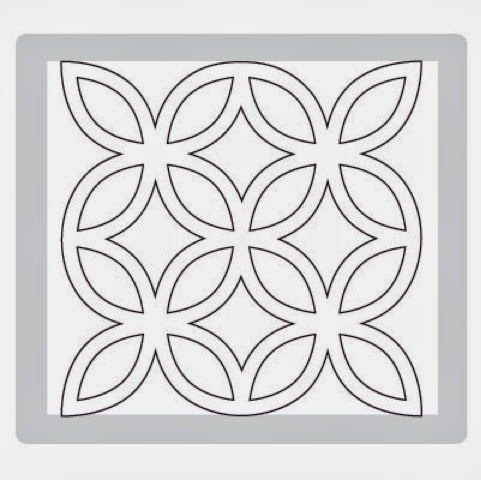
Wait! We have the Lattice Bigs die! 

It hardly ever gets any use around here so it's about time I started using it! I did use it at stamp club to make a valentine, remember?
For this card, we simply adhered it behind the cut out heart window frame. I have seen other cards with it like that behind other frames. I want to try that too!

Back to the card I was copying...
(Here's my card without a greeting!)

I cut out the Lattice die with my Big Shot and cut it in half. At this point, I could glue it right to the card vertically to create a lattice.

But I really liked the look of the lattice behind a frame! Hmmm...  I could take a piece of white card stock and punch out squares repeatedly to get an open window...
But when I did that there was no way to see if I had my punch evenly spaced on the card stock.

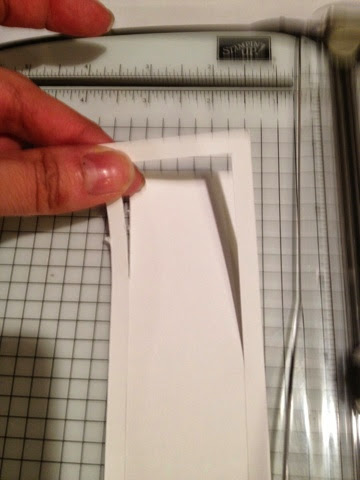
So I used my paper trimmer and cut out the window.

I will explain to you how I did it. I hope it makes sense!  I know that it would be so much easier to follow with a video but my son's video camera broke!  So it will be picture tutorials until we get a new one!

I used a piece of white card stock that measured 2" x 5.5". On my paper cutter, I moved the left side of the white card stock down a quarter of an inch to 5 1/4". I lifted the ruler and moved the cutting blade so that it was on the 1/4" mark - that way it wouldn't cut the end of my paper but rather start 1/4" inward. I then cut with the blade, moving it downward, but stopped 1/4" shy of the end (at 1 3/4 " on the ruler). 

By the way, be sure to use the dark gray cutting blade on your Stamping Trimmer! That is the one that cuts. The lighter one is for scoring.

I continue to do that three more times rotating the white card stock each time (so that the third cut is the same as the first , and the second and fourth cuts are at these measurements :
Left side at 1 3/4", start the blade again at the 1/4" mark. You can also use the little gray point of the cutting blade to match up with your previous cut - that's what I do a lot of times! 

On the second and fourth cuts, you drag the cutting blade down to 5 1/4 inches - stopping 1/4" shy of the end.
When I was done making all four cuts , I ended up with a rectanguler frame. 
Next I glued my lattice pieces to the backside of the frame. For such a small detailed piece, my Tombow glue really came in handy, because it has that pointy pen-like tip on one end.
I also found that using my silicone craft sheet works wonders when using any kind of adhesive, because nothing sticks to it!
If I got a little glue on it, I just waited until it was dry and it rubbed right off! No glue to worry about on my workspace underneath! 

Ha! This is one of those items that has been in a drawer for two years and I am finally using it and appreciating what it does!

You've got to get one!

Even the snail adhesive didn't stick to it if I glued my card together on top of it! No sticky grid paper to worry about! I wish I could get one at every station at the 2/5/15 class, so no one would have to worry about adhesive being on the paper from the last person who was at that station.

A girl can dream...

I stamped a piece of Crumb Cake with the new Hardwood background stamp In Soft Suede ink.
Before the lattice piece was ready to officially be added to the card I added a piece of Midnight Muse stitched ribbon. 

I knew that I wanted to use this color combination:
(If you have never visited this website go there now! "ColorQ" it's awesome!)

So now for the stamping...  I used the Petite Petals stamp set with the coordinating punch ( from the Occasions catalog) in Marina Mist and So Saffron inks.
I also used Old Olive card stock to cut out the leafy branches. That was done using the sizzlet called Little Leaves (for the Big Shot).
I added each flower with a dimensional. I also stuck a medium pearl in the middle of each.
I call this card a "masterpiece" because it was not as quickly done as the other two card we made. I have to hand it Brianna, life would be a lot easier if I had that Chevron Border punch!


But, when there's a will there's always a way! 

Just because you don't own something and you see it used on the card don't give up! There is usually always something else you can substitute and come up with something similar.

(Oh! By the way, take a good look at Jen's card in the top picture because she'll never send it to you! Hahaha it's going right on her wall of "cards that too long to make so I'm never sending them to anyone...")


Thursday, March 6, 2014

Playing with Petite Petals

Last week you saw a card that we did in stamp club that had a little flower from Petite Petals. 

I decided that it was time I played with this new set a little more.

So, of course I went to my Pinterest board and found a card that I wanted to straight out copy (CASE). 

And this is it:
Anything with a rainbow of colors is really catching my eye days! 

The background lines are made with a stamp from the set Gorgeous Grunge. It was stamped in Smoky Slate.


The flowers were stamped in the colors (from left to right): Real Red, Tangerine Tango, Crushed Curry, Pear Pizzazz, Soft Sky, Island Indigo, and Smoky Slate. Then they were each punched out with the coordinating punch, adhered with Dimensionals so they pop up, and a rhinestone was added to each for a little bling.

You will find Petite Petals (and more!) in the Occasions mini catalog. You save 15% when you purchase the bundle (the stamp set and punch)!
The second card I made was a CASE too, but I change things up a bit.

Here's the original card made by demonstrator Michele Reynolds:

And here is mine:
Thank you, Michelle for the inspiration!

I loved how she used the negative space from the punch on the strips of her card! I knew right away that I wanted to do that.

I had seen this done before with both hearts and butterflies, and loved the way it looked, but I had never tried it myself. There is a first time for everything, right?

I had just received the Sweet Sorbet accessory kit as a free gift from Sale-a-bration, so I knew I would copy her use of the Crisp Cantaloupe twine. 

Based on the color of the twine I had to choose a color combination for the card. For this, I consulted my trusty Color Coach

I picked the top combination on the card and I was on my way!

Instead of using the polka dot embossing folder, I chose the retired Vine Street embossing folder so it looked like the flowers had stems with leaves.

I used this little trick to get them perfectly aligned on the embossing folder:
I used Dotto repositionable adhesive to hold them where I wanted them to be on the folder before sending it through the Big Shot!

After glueing them to the card, I popped the punched flowers with Dimensionals and added a jumbo pearl to each one.

The greeting is from Delightful Dozen.

You can find all these products on the Stampin' Up! online store or in your catalogs.

For online viewing, be sure to visit my website and click on "shop" in the upper right-hand corner. You'll find both the Occasions mini and the Sale-a-bration brochure in the left-hand column once you get to the store!


While you are at the store,  it's always fun to check out the Stampin' Up! blog for tons of creative ideas! Just look for the word "blog" along the top banner, Or click the Stampin' Up! logo in the upper left-hand corner.

Have fun!

Tuesday, February 25, 2014

February stamp club

This month instead of doing 3 cards we did 2 1/2!

I say that because we made two cards and then I walked them through how to make a "card in a box". They left with the instructions and the box-part of the card and then I presented them with a challenge:  to finish it on their own. I can't wait to see what everybody creates!

The first card we made was this easy and  fun card:
The card base is Calypso Coral and the layering pieces are Pacific Point and Whisper White. There is also a piece of the new Watercolor Wonder Designer Series Paper peeking out under the punched shape. 

Using punches made this a fast card to do! The largest punch we used was the Pansy punch
Then we stamped the small flower from the new Petite Petals stamp set (which  you can find in the Occasions mini catalog). We used Calypso Coral Ink to match the card base. Next, we punched out the flower using the new matching Petite Flower punch. You can get the stamp set and punch as a bundle and save 15%
We finished it off by stamping a sentiment from Sassy Salutations in Pacific Point ink. 
The main piece of white card stock and the small petite flower were "popped up" using Dimensionals. 

The final touch was adding a Candy Dot to the center of each petite punched flower. I love this embellishment! They look like brads but they are just flat "brad heads" and have adhesive already on the back of them. What makes it even better is that when you buy a pack (they come in packs of color families), you get 10 of each color! (Shown below are the Brights candy dots)
------
One of the perks of being a Demonstrator is that we get a magazine every other month from Stampin' Up! It is full of business pointers, product info, and creative projects, so we are never at a loss for how to run our business or for what to create !

The second card we made was CASEd directly from the Stamping Success magazine. It was from an article that spotlighted the work of a Canadian demonstrator, Alison Okamitsu.
Alison made five projects using the new Happy Watercolor stamp set (Occasions mini catalog). All five feature the colors Coastal Cabana, Whisper White and Brushed Gold (card stock).  There is also some gold embossing on each of the projects (check out how she embossed the entire doily on the upper right-hand side!) Here's a closer look at the card we copied :
What a pretty card!

We did some heat embossing and dry embossing with the Big Shot (you can see the dots on the Brushed Gold card stock). The Modern Label punched-piece (Coastal Cabana) was simply cut in half so it appears to be longer behind the white circle. The embellishments on this card are: a vintage faceted button, linen thread, ruffle trim ribbon (Coastal Cabana) and burlap ribbon.
-------

Interested in being a part of a stamp club? New clubs are forming all the time!

It's the best way to learn new techniques and use new products while whittling away at your long "wish list"! There is a $30 purchase requirement each month. Clubs usually have five people and one of  the months will be your turn to receive the free hostess benefits!  We have loads of fun while stamping ! Contact me if you're interested!

For all products shown here and much more be sure to visit my website! Quick "shop" in the upper right-hand corner to view all that Stampin' Up! has to offer!