Showing posts with label Blendabilities. Show all posts

Monday, August 4, 2014

A card for my son!


Those of you who come to my classes or are friends with me know that my youngest son recently had to have surgery. 

He was hit in the face with a pitch while up at bat during one of his games two weeks ago tomorrow. He suffered a broken cheekbone, with fractures in three places.

( ...love the tongue depressor-contraption for the bleeding nose...)

As a testament to his toughness, he got hit with the pitch and he didn't drop to the ground - instead, he tried to go to first base! (Normally, when you get hit with the ball you automatically go to first.)

Thank goodness his coaches stopped him and sent him out of the game!

We ended up taking him to the closest emergency room where they did a CAT scan and discovered his fractures.

Poor baby!

It could have been a lot worse. I am thankful that he didn't hurt his eye or get hit in the head!

Needless to say, he had surgery to repair it this week, complete with titanium plates and screws to put everything back in place.

So, now he spends his last month of summer recuperating.

This all seems too familiar....

Last summer it was the same kid who had knee surgery in August!

That time the sport was ice hockey, and the injury a torn meniscus.

Geesh!

I always say that "this one should live in a bubble"! He's always the one who gets hurt. If can happen to someone, it will happen to him. (I mean, the kid had to get stitches from tripping while BOWLING for goodness sake!)

Lord, give me strength!

So, with all this going on with him (and also a high school reunion trip to Pittsburgh), I haven't done a blog in a couple of weeks!

Sorry!

But now, things are getting back to "normal".

We are all catching up on sleep we missed during our time away to PA and the hospital stay!

I finally headed down to my stamp room tonight. I thought I would cheer him up by making a "Get Well" card for him. I didn't put any money in it though - that was Grandma's thing! (Can you believe he got $20 for having surgery? And the older one got 20 bucks too because he had poison ivy! Aaah... Grandmothers are the best!)

I told her recently that, since I had a stroke, that should trump all, so where's my card with $100? She just laughed. Guess daughter-in-laws don't rank as high as grandchildren.

Oh well.
I tried.

Anyway, I just got this new photopolymer set Dear Heart, and couldn't wait to use it!
It is the male counter-part to the popular Sweetie Pies photopolymer set from Stampin' Up!
You won't see either set in any catalog. You can only view them on the online store, under "photopolymer" stamps. Just go to my website and click in the upper right-hand corner where it says "shop".

You'll see the word "stamps" in the far left-hand column. Once you click on that, you'll go to the "photopolymer" icon.

Unfortunately, the Sweetie Pies set has sold out! Hopefully we will see it again in a future catalog!

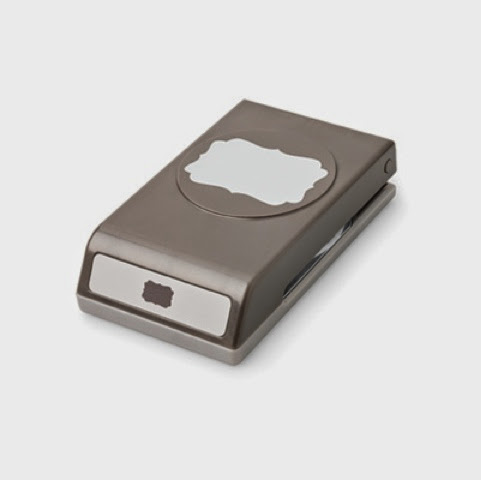
For my card tonight, here are the "players":


I also got a lot of use out of my Big Shot and magnetic platform! I used the Circle Collection and Banners framelits and the Circle Card thinlets:

The Circle Card thinlet comes with several elements besides the "flip card" itself. I used the "xoxo" for the inside of the card and the chevrons for the baseball stitching.

The colors of cardstock I used were: Whisper White, Basic Black, Real Red, and a piece of my favorite retired color - Ballet Blue.

I used Night of Navy ink for the baseball background, and the same color marker to touch up in a few spots where I had applied uneven pressure.


See, there's always a way to hide or fix our mistakes!


You've heard me sing the praises of this glue:
The fine-point tip end really comes in handy when I have small pieces to work with! Where would I have been without it when it came to placing all those "stitches" on the baseball or the "XOXO" sentiment?

I used my new Blendabilities skin-tone marker assortment to color the boy. (Of course, I used the recommended Memento ink pad). I used the shades of Nude, Ivory, and Natural in order to achieve his tanned book - my son's current skin tone!

His hair was colored using the Blendabilities as well. I used the Mocha from the skin tones, and the "dark" shade from the Daffodil Delight set.


The final touch was a red Candy Dot on the banner!

The perfect card for this situation!

It's always fun to make your own cards!
Let me show you how!

Subscribe to receive email notifications of my blog posts! You'll get the "inside scoop" on all posted cards/projects, and have access to yummy recipes as well!

Even better, if you are local, come stamp with me at a class or club! Sign up to receive my emails so you don't miss out on any fun!  I send emails monthly with class schedules and specials.
Dandyspandy@sbcglobal.net


Monday, July 14, 2014

July stamp club!

There usually is always a method to my madness when I plan the projects that we do each month at stamp club.

This month, I particularly wanted to focus on using framelits for the Big Shot and  the skin tone Blendabilities alcohol markers.

When I gave out catalogs in June, I included a coupon page that I had created. My July coupon is for framelits (and a free pack of glimmer paper!)

Since Stampin' Up! made six colors of Blendabilities available (and the skin tone assortment) on July 1, I decided to go ahead and honor the coupon for August (which is for the markers) as well as the July framelit coupon.

Therefore, our three projects revolved around using those products. 
These are the framelits we used: stars, banners and the window frame collection.

For our first card, I wanted to use the cute photopolymer set Sweetie Pie that I bought a few months ago. 
In our new catalog, there are more photopolymer sets available and they will be available all year! They come in a plastic case like our other stamps.

Sweetie Pies, however, is a set that was unveiled in our Online Store. They announce these, it seems, once a month - you just have to keep watching the Stampin' Up! blog!

You can put a photopolymer set that was announced online on any order but you can only view it online.

It will not come in a plastic case,  but rather a clear plastic envelope.

And unfortunately, as I have found out, they can sell out and no longer be available!

That is what happened with this set! It was announced and available for purchase for two months, if that. It was so popular that it's sold out right after I bought it!

I still wanted to use it, after all, it was brand new! Plus, it was the perfect set to use with the skintone Blendabilities.

I was sad to tell everyone that we were using a set that you could mo longer buy.

Hopefully, will see you somewhere again in the future! It's so stinkin' cute!

In the meantime, just last week they announced a new set called Dear Heart, which is a boy version of Sweetie Pie!
If you love this set as much as I do don't delay - buy it NOW  before it sells out too!

But I digress... back to club and Sweetie Pies...

(By the way, the Sweetie Pie Frames stamp set  is still available!)

Colors: Smoky Slate, Melon Mambo, Whisper White 
Ink: Smoky Slate, Melon Mambo, Memento Tuxedo Black, Blendabilities skin tone assortment

This was my guide for coloring her skin -please excuse my almost illegible scrawl! (At least it's better than this time last year!)

The finishing touch was a flower punched with the new Itty Bitty Accents punch pack.
Next, was a card I CASEd (and slightly changed) from Dawn Olchefske.


Colors: Real Red, Daffodil Delight, Marina Mist
Accessories: star framelits, banner framelits, NEW jumbo dots embossing folder, Dazzling Dismonds glimmer paper, rhinestones, chevron ribbon
Stamps: Pictogram Punches (images match the Itty Bitty Accent punch pack!)
Last but not least, a slightly tweaked version of a card that is in our catalog! 

I had a lot of help on this one! Check out this video by Wendy Cranford:

Colors: Lost Lagoon
Stamps: Endless Birthday Wishes photopolymer 

Paper: Moonlight DSP Paper Stack and Dazzling Diamonds glimmer paper 
Other: banner framelits, Basic Gray ink, rhinestones, Tombow Liquid Glue
A "Godsend" in this case! We applied the glue to EDGES of the inner star!

All in all, this card isn't as difficult as it looks. It's really very easy - just be sure to have a scoring tool nearby!

I'm happy to give credit to the demonstrators that created these projects originally! I'm even happier to share them with my club members and all of YOU!

Join a club today so that you can learn how to make great cards and projects like these! 
NEW CLUBS FORMING NOW!


Wednesday, June 18, 2014

June stamp club (#3) - Dividing Screen card


(Below, the beginning of a previous post is repeated. I am doing so to let you all know about stamp clubs!)

Every month, once a month, 3-5 women gather in my home for Stamp Club. Their obligation is to purchase $30 (or $50 if they are in the summer club) of catalog merchandise each month. In doing so, I can submit at least a $150 show from each club, therefore garnering hostess benefits! One month each participant get a turn at collecting thefree hostess benefits, because each club will meet for as many months as there are participants.

How a stamp club will benefit you:
•It is a way to whittle away at your wish list.
•It is a way to learn how to use new product (or different ways to use that which you've already bought!)
•It is a  monthly gathering of women (so you know it's fun!), many of them form friendships that last a lifetime all because they met at a Stamp Club!

I always try to teach something different - a new fold or technique - each month. I also try to introduce new product, especially if it's seasonal. 

Stampin' Up! is always offering something new! Clubs are a way we can talk about all the specials that are going on.

If you're local and interested in joining a Club, please just send me an email and I will add you to a list. When I get five participants (or three for theSummer Club) I will let you know. At that time we can discuss which times/days work best for all of you.

Here are a few projects from past Stamp Clubs:
I have often entertained the idea of a long distance club.

Even though I have lived in Connecticut for 10 years now, I still have customers in Pennsylvania and elsewhere. (Now that's what I call loyalty!)

I could send you all the materials you need pre-cut/pre-stamped. You would be able to view a private YouTube video to assemble the projects.

That dream has not yet come to fruition. But, perhaps I only need a little bit of prodding....
------
This month we made a treat bag with  the My Paper Pumpkin kit, an easy card featuring the new In Colors, and this Dividing Screen card.

This one has to be my favorite! It's called that because it resembles one of those room divider screens - know what I mean?

This is another easy card to make but it looks like a masterpiece!

I viewed several tutorials online. All were easy, but they were different! One made only made a three-panel card. A couple used different dimensions, so you would make a larger or wider card. In doing so, you would use a different punch than I did for the bottom and would also have to make your own envelope using the envelope punch board.

Knowing that this 20-minute card would end up taking an hour doing it with a group, I opted for the easiest solution! That doesn't mean my groups are slow (LOL), that just means that we are all sharing and passing the same supplies so it takes longer!

• I started, then, with a standard card size 8.5" x 5.5".

• Fold it in half, like you always do, in the middle - at the 4 1/4" mark.

• Next, you fold each half of the card backwards, in half again, to meet the crease. Now you have your four-panel card, folded in a zig-zag fashion! (To make it even easier we used the Simply Scored tool! I had the markers already set in place at 2 1/8", 4 1/4",  and 6 3/8".)
You have the card base so .... let the decorating begin!

We used a border punch on top to make it prettier....

The bottom "legs" are created, in this case, by using the Curly Label punch. Put the card stock only halfway in the punch each time!
(On the larger/wider cards I viewed, the  Decorative Label punch was used instead.
Just "eyeball" it to get it in the middle of each panel! Now you have the "legs" of the screen.

We used the retired stamp set Secret Garden on the card. This allowed me to feature just one small item (flower) that we would color in using the new Blendabilities markers.

Since there are matching framelits to Secret Garden, we could also quickly cut out the flower after we colored it.

We even colored a pearl with the Blendabilities before adhering it to the flower!
A stamped and punched sentiment, along with some Itty Bitty-punched and  "pearled" flowers added to the femininity of this card.

Look for more posts in the future featuring the Blendabilities markers! Although they won't be available to purchase until August, my stamp club members are practicing now with these new alcohol-based pens.

Not only that, they had a chance to try the new Fast Fuse adhesive, and benefit from my latest stamping tips: why to start using the paper-piercing mat and the silicone craft mat!

Now don't want to be in a Stamp Club too?

Contact me now!
Dandyspandy@sbcglobal.net