Showing posts with label recipe. Show all posts

Tuesday, April 22, 2014

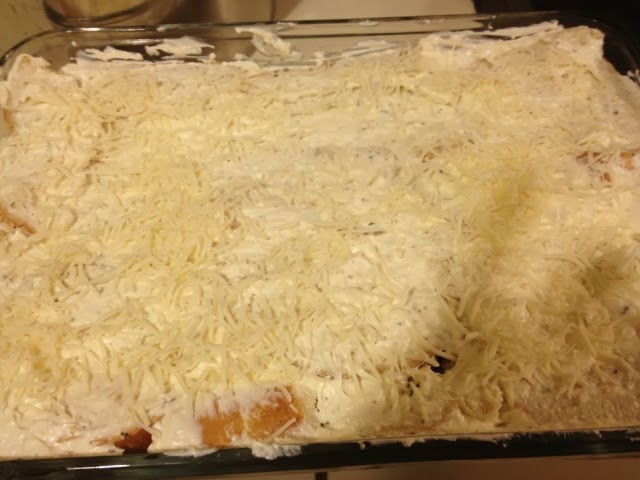
What's cookin'? -Macaroni and cheese -All Grown-up!

Before we left for spring break vacation we had the most delectable meal....


Mac & Cheese with Roasted Chicken, Rosemary, and Goat Cheese

O..... M..... G......

I will definitely be making this again!

It came from a website called mybakingaddiction.com . I highly recommend that she has lots of yummy stuff over there!

Anyway in my house, homemade macaroni and cheese is a tried and true winner especially with the boys!

What I liked about this recipe was that not only did they like it but, we enjoyed it too! It had a more sophisticated flavor with the addition of earthy rosemary. Also, it was more filling because of the chicken. Not only that, the goat cheese adds a slightly tangy difference from the ordinary cheddar.

Just use caution! The sauce is cream-based, so be sure to make it when you are having a light eating day!

INGREDIENTS:


1 tablespoon olive oil
1 pound rigatoni
1 quart heavy cream
2 tablespoons chopped fresh rosemary
1 clove fresh garlic, crushed
8 ounces goat cheese
2 cups shredded roasted chicken (I used a rotisserie chicken!)
salt and pepper to taste


DIRECTIONS:

1. Place a large pot of salted water over high heat and bring to a rapid boil. Add the oil and rigatoni to the water and cook according to the directions on the package, 10-12 minutes.
2. While you are waiting for the water to boil, pour the cream into a large sauce pan over medium heat. Add the rosemary and garlic to the cream and bring it to a simmer - take care not to let it boil over. Allow the cream to reduce by about half.
3. Stir in the goat cheese and chicken and continue cooking cooking it till the cream coats the back of a spoon.
4. Thoroughly drain the pasta. Add the pasta to the sauce. Coat the pasta in the sauce and simmer over low heat for a few minutes. Serve hot.

Go for a l-o-n-g walk....


Monday, April 7, 2014

What's cookin'? - Cuban sandwiches

I promised that I would tell you how they turned out...

The other night I made a Chipotle-honey-lime pork roast:
It was mentioned in a post dated April 3, if you would like that recipe.

We had some left over meat so I had planned  ahead to make traditional Cuban sandwiches. Now mind you, I didn't know what a traditional Cuban sandwich was until I read the post for the pork, above. The website that I had visited mentioned that they used the leftover pork in various recipes, including the Cuban sandwich.

Of course I was curious, so I scoured the Internet. 

What is a Cuban sandwich?

A traditional Cuban sandwich is a variation of a grilled ham and cheese. It has roast pork (the essential ingredient!), ham, Swiss, pickles, yellow mustard, and (sometimes) salami. It is on a traditional Cuban bread (similar to a French baguette or Italian bread) that has been grilled and pressed flat.

I decided to give it a whirl. The closest thing I could find to the bread I wanted were the "tortas" that they sell at Costco. They are crusty yet somewhat flat.

I layered the required ingredients and buttered both sides of the torta. I grilled it in a pan, pressing down much as I could.

The result?
A man-pleasing sandwich!

Important ,because I live with three guys!

Seriously, utter deliciousness!

I will surely will make this again when I make a pork roast or pulled pork! It's a great use of leftovers.

Thursday, April 3, 2014

What's cookin'? - A Tropical(?) Meal!

Our dinner last night had a Mexican/ Caribbean/ tropical feel to it. Why not? The sun was shining and I wished that I was on a tropical island in the Caribbean! But really, I had the recipe for the meat and since I always try to serve things that go well together, the side dish and dessert complimented my main course.
I had a pork roast in the freezer. My favorite way to cook a pork roast is to bake it in the oven with cloves of garlic hidden in multiple slits that I make in the meat. Then, I lay two slices of bacon on top and slow roast it. The bacon provides a juiciness and slight flavor. 

The picture below shows this. The last time I made it I cooked it in my crockpot. I balled up aluminum foil so it was raised up and didn't lay in all the drippings (I didn't have a small rack).
But recently I wanted something different so of course, where did I look? Pinterest!

On my board "What's for Dinner" I had pinned a Chipotle-Honey-Lime Pork Tenderloin. 

Pork marinated in the tangy juice and zest of lime, the sweetness of honey, and the spice of a chipotle pepper in adobo sauce. Doesn't that just sound like summer? I'm there!

 It called for the tenderloin to be grilled. I had a pork roast. I knew that it was too thick of a cut to be grilled. So, I improvised...

Here is the link to the original recipe:

http://tideandthyme.com/chipotle-honey-lime-pork-tenderloin/


I followed the recipe exactly with one substitution - I used agave syrup instead of honey. It's a recent sweetener switch for us!

I marinated it as directed, and as I said before, I knew it was too big for grilling so I seared it on both sides in a pan, then transferred it to the oven. I basted it occasionally with the leftover marinade. All in all, it took about 1 1/2 hours in a 425° oven.

All four of us loved it! We had leftovers and I had already planned ahead to make traditional Cuban sandwiches for tonight's dinner. I'll let you know how those turn out!
-------
For a side dish I served this Black Bean and Corn Pasta Salad:
This salad is definitely going to be a hit at summer cookouts, especially when we do anything with a Mexican flair! It's such a nice change from the traditional pasta salad that I usually make.

Or, I could see adding grilled chicken to it for a main dish salad!

For this salad you mix together and then chill:
• cooked and drained tri-color rotini
• 2 cans black beans, drained and rinsed
• 1 small bag frozen corn, thawed
• 1 can Rotel
• 4 green onions, sliced
• 1/2c white onion, chopped
• 1/2c red pepper, chopped
• 3T fresh cilantro, chopped
• 8oz. bottle Zesty Italian dressing
------
And for dessert?
I got creative.

We had leftover rice from Chinese takeout over the weekend. I cooked it on the stovetop over low heat in one can of coconut milk for about 20 minutes, so that it got soft and fluffy.

I cubed some fresh mangoes and threw them on the rice. A sprinkle of flaked coconut, and it was ready to go!

Mmmm.... All that's missing is my fruity drink!


Saturday, March 29, 2014

What's cookin'? - "Impossible" Pie

The other day I had a hankering for something sweet.

I looked through all the recipes I had pinned on Pinterest to see if I had anything I could easily make with what I had on hand at home.

I came across a recipe for "Impossible" Coconut Pie.
At first I was a little afraid!

After all, it was called impossible!

Why would you even post a recipe if it's something that is impossible to make?

After reading how to make it, I found out that it wasn't even remotely impossible to make! The fact that it's called "impossible" refers to its ability to  transform from a liquid mixture into a delicious pie!

A pie you make in the blender? Yep!

It could just be the simplest thing I've ever made! It's unbelievably fast and easy!

Really!  You just mix all the ingredients in a blender and pour it into a pie pan to bake! That's it! I'm not kidding!

And we loved it! 

The flour will settle to form a crust. The coconut will rise to form a topping. The inside will be a custard-like texture.

Try it for yourself! It does not disappoint!

"Impossible" Coconut Pie

In a blender mix together:
•4 eggs
•1 stick butter, melted
•1c sugar
•1/2c flour
•2c milk (I used coconut almond milk because he had it!)
•2t vanilla
•1c Coconut
• nutmeg (optional, for sprinkling on top before baking)

Pour mixture into a greased pie plate.
Bake 350° for 1 hour. Center of pie should be barely set and edges starting to pull away from crust.
Cool.
Serve warm or chilled (I prefer chilled)


Tuesday, March 25, 2014

What's cookin'? - Corn Pudding

One of my new favorite side dishes is corn pudding.
We usually eat a lot of vegetables as side dishes. I like most everything, so it could be anything: artichokes, asparagus, beets, carrots, greens, you name it -I'll eat it! Roasted, raw, baked, steamed... any way you serve it, it's fine with me!

Getting my boys to eat vegetables? Well, that's another story!

I prepare a variety of vegetables, and in different manners hoping to find one that appeals to their immature sense of taste. I know that it's not hopeless - geez, when my husband and I first started dating he only ate corn. Now he eats anything I put in front of him! So I keep plugging away....

I don't always please both sons, but the next day I try to appeal to the other one! Like this one - three out of four of us love it - the other one doesn't like corn ! (Sigh) If he would just try it, I know he would like this one. Maybe someday....

I found this recipe on the Internet and I have made it now three times. Once was at Thanksgiving  (yes, it's special enough to make it to that meal) and the other two times, well, you know, we just needed some comfort food!

That's how I would categorize this side dish. It's definitely not your steamed veggies that you have alongside your fish every night. It's a stick-to-your-ribs kind of side dish.

Take my word for it - it's super yummy! I could just eat it out of the casserole dish with a spoon!

Soft corn bread? Better!
Corn Pudding

• 1 can cream-style corn
• 1 can whole kernel corn, drained
• 2 eggs, slightly beaten
• 1 stick butter, melted
• 1 box Jiffy brand corn muffin mix
• 1 c sour cream

Mix all ingredients well in a casserole dish. Bake 350°, 45 to 55 minutes depending on your size of dish, until edges start to turn golden brown.

Be careful not to eat it all at one sitting!

Monday, March 24, 2014

What's cooking? - Sauce!

A wise Italian man (my father) once said, "Hon, sauce is the key!" 

He said this as we were discussing why Del's Restaurant, in the Bloomfield section of Pittsburgh, has always been our family favorite.

He was right, of course. 

As any Italian knows - the sauce can make or break you!

With that in mind, I do have my tried and true marinara sauce. But, I also serve pastas with many other types of sauces.

Some are creamy white sauces. Others are red. A couple are a combination of the two!

"Variety is the spice of life", they say!

Here are two red sauces with meat that we enjoy (both come from the Quick From Scratch Italian cookbook). Feel free to serve over any type of pasta you wish! 

Sardinian Meat Sauce (served with cavatelli)

• 3T olive oil
• 1 lb. Italian sweet sausage (casings removed)
• 1/4 t dried red-pepper flakes
• 1 onion, chopped
• 3 cloves garlic, minced
• one 28 oz. can crushed tomatoes in thick purée 
• 3 T chopped fresh mint
• 1/3 c chopped fresh parsley
• 1/4 c water
• 1 1/4 t salt
• 1/4 c chopped fresh basil
• 3 T grated Parmesan cheese

1) In a large hot heat oil over moderate heat. Add sausage and cook, breaking up with meat, until it is no longer pink (about 5 minutes).

2) Reduce the heat to moderately low and stir in onion and garlic. Cook, stirring occasionally, until the onion is translucent (about 5 minutes).

3) Add: tomatoes, mint, parsley, water and salt. Simmer until thickened (about 15 minutes).

4) Toss your cooked, drained, pasta with meat sauce, the basil and cheese. If sauce is too thick add some of the pasta water (up to 1/2 cup).

Serve with additional Parmesan or Pecorino Romano cheese.

** The recipe says that the mint is optional. I have made it both ways and I say include it if you can - it makes a difference!

(That's vegetable focaccia bread I bought at a local supermarket bakery - Yum!)
------
Here's one that's wonderful on Fridays during Lent!

Arrabbiata Sauce with Tuna (a little spicy!)

(The original recipe calls for 1 pound cod fillet, cut into 1- inch chunks, but I have always used tuna)


• 1/4 c olive oil
• 2 cloves garlic, minced
• one 28 oz. can crushed tomatoes in thick purée
• 1 large tomato, peeled and chopped (or 1 can diced tomatoes with juices)
• 1 3/4 t salt
• 1/2 t dried red-pepper flakes
• two 6 oz. cans tuna, drained
• 3 T chopped fresh parsley

1) In a large pot, heat the oil over moderate heat. Add the garlic and cook, stirring, for 1 minute. Add: the crushed tomatoes, fresh tomato (or your diced, canned tomatoes), salt and red-pepper flakes. Simmer until sauce is thick (about 30 minutes).

2) Add the tuna and 2 tablespoons of the parsley to the sauce. 

3) Stir tuna into the tomato sauce and warm for about a minute.

4) Toss sauce with your cooked, drained pasta. Top with remaining parsley and Parmesan cheese (if desired).

My picture shows rigatoni, because that's what we had. Sometimes I use penne pasta if we have it , but really, you can use anything!

**note: I do use fresh herbs, if I can, in my cooking. If you don't have fresh, you can substitute dry herbs - but only use 1/3 the amount called for. Dried herbs are more potent!

Thursday, March 13, 2014

"What's cooking?" - Flavored Water

There are so many reasons that you should drink more water throughout the day! 

I have been so guilty of not drinking enough water in the past. I would have my morning cup of coffee and during lunch at work I would only have about one cup of water. I would have a drink at dinner (sometimes water, sometimes soda) and that was about it.

What am I, a camel?

Fatigue has always plagued me.

I had a stroke, for goodness sake!

Suffering from joint pain during my road to recovery (especially walking) has NOT been fun.
Now, I have to do everything in my power to get better and staying hydrated is one of those things! 

One cup of coffee in the morning is fine, I like my coffee! But for me, the rest of the day is water, water, water! Very rarely do I have soda or any other sweetened drink any more.

I have been able to make this simple change because of my new-found fascination with flavored water! 

Not the kind you buy that has sugar or artificial sweetener, but the kind you make!

I realized that half of my problem is that I don't really care for our plain well water. I bought a Brita pitcher, for filtered water, after I got tired of taking empty water bottles to the recycling center. You have to do that, too if you want to get your money back! Here in Connecticut, we pay a bottle deposit charge every time we buy them. I know I didn't have to do that back in Pennsylvania! 

Drinking filtered water ... that still didn't do the trick. Water for me is just "blah"!

So now I flavor my water with fruit, and sometimes, herbs. It's more interesting to me, and I find that I drink a whole 2-quart  pitcher every day!

If you're like me, and find drinking water a forced task, maybe you'll try these combinations and drink more water! Your body needs it!

These are the ones I've tried so far:

Blackberry /sage
Watermelon/ rosemary
Strawberry/ cucumber/ mint
Lemon /cucumber/ mint
Orange/ rosemary
"Detox" water: lemon, cucumber, mint, grapefruit, lime

Here are some tips I've learned:

•Be sure to clean your fruit well so it is free of pesticides! They say that soaking fruit in a solution of vinegar and water usually removes all the bad stuff.

•Sometimes I peel my oranges, sometimes I don't. Sometimes I add herbs, other times I do not. Be creative with your own combinations, or check the internet (or my Pinterest board, "beverages") for suggestions!

•Try to drink all of your water in one day. Citrus fruits, especially, get bitter if left soaking for a long time.

•Dump fruits/ herbs when done with water.  I have found no uses, so far, for soggy fruit!

•Check the Internet for healing properties of certain foods! You'll be amazed!

•Be sure to "muddle" your herbs and fruits for best flavor! (ie. bruising, smashing a little)

There are so many other combinations I want to try- especially the ones that use basil.

Here is a great website to reference:

It has not only a fantastic article (and sugar comparison chart of drinks) but also many water flavor suggestions. I love it!

Just thought I'd share! Maybe some of you out there are just like me. 

Cheers!


Monday, March 10, 2014

Getting ready for Easter?

Easter is still a month away but I am just craving my traditional Easter dish - Ham. 

I can't wait! 

I prefer ham more than the other holidays' traditional turkey. In fact, in my family we always had ham at Christmas (with ravioli, of course) and Easter. Turkey was only for Thanksgiving.

Instead of baking a whole ham for a weeknight dinner though, I opted for ham slices. I simply pan fried them. What made them exquisite was the raisin sauce that I prepared.


I wanted something out of the ordinary - not just plain ham slices. I remembered seeing a recipe for raisin sauce in one of my favorite cookbooks. I refer to this book several times a year. It's an oldie but goodie.  My mother-in-law gave it to me years ago and I still use it! There are several recipes in there that I swear by ("Swiss steak" and "Gourmet porkchops", to name a couple). I also consult it for roasting or baking times/temperatures. 

1969, baby!

Look at the wooden salt and pepper shakers! Oh my Lord!

Let me show you the back cover of this book, just because:

Okay, what is that God-awful thing at the top? Are those hotdogs sticking out of that? What about those hamburger things at the bottom - are those cinnamon apples on top?

Needless to say, I don't use every recipe that's in this book! But there are some good ones, like I said!

Not only that, whenever I get some cut of meat that I don't know how to cook - it's in there! It explains the different cuts of meat and how to cook them. It is after all,  called "The MEAT  Cookbook"!

It even has a section on what I call "the gross stuff". You know, things that my father (or grandfather) probably liked - I just find them so gross like: "Chicken-fried Heart", "Scrambled Brains", - Oh! and here's one of my favorites - "Cheesy Tongue on Rice". 

Eeeewwww.

Anyhoo, back to the raisin sauce... if you can focus back on the good stuff, after that!)

• 1/2c Brown sugar
• 2T Cornstarch
• 1t Dry mustard
• 1T Vinegar
• 1c Raisins
• 1/4t Grated lemon peel
• 2T Lemon juice

* In a sauce pan, mix together: the brown sugar, cornstarch and dry mustard.
* Slowly add vinegar, the raisins, lemon peel, and lemon juice.
* Add 1 1/2 cup water.
* Stir over medium heat until thick and bubbly.
* Serve hot, pouring over your ham.
(Makes 2 1/2 cups)

We had leftover sauce so we got creative and used it the next morning in our oatmeal! Yum!

Moral of the story: Don't judge a book by its cover.

Really!


Thursday, March 6, 2014

What's cookin'? - Tomato Tortellini Soup

Oh.... My... Goodness....
This one is a winner!

It was Ash Wednesday so I knew we had to have a meatless meal. I was in the mood for soup (again), but I wanted something.... different - something... new.

I searched my Pinterest board "Soups On!" and came up with tortellini soup. My mother-in-law had given me a recipe for tortellini soup that she just loves. I found that, and compared the two.

One had a cream base, one did not. One used spinach, the other did not. Hmmm... I had some leftover baby spinach in the refrigerator from a meal I cooked the other night.... The creamy soup used sun-dried tomatoes - my husband would love that...

What's a girl to do?

Combine both recipes and come up with your own, that's what!

I'll share the recipe and how I made it. I really think that this soup would also be wonderful with little sausage "meatballs" added. Many of the recipes for tortellini soup that I found called for sausage, so I think that would make for a logical and delicious addition, but you can be the judge of that.

Oh! Before I give you the recipe - did you notice that grilled cheese sandwich perched on the edge of the bowl? That's what I served it with - a grilled cheese sandwich made with Italian bread. I knew that just having soup wouldn't fill my guys up. Dunking it in the soup or breaking it apart to form croutons - either way it's the perfect combination!

Tomato Tortellini Soup

• One package of refrigerated (or frozen) cheese tortellini 9-13 oz.
• Two cans condensed tomato soup
• 2c Chicken broth
• 2c Milk
• 2c Half and half
• 1/2c Chopped sun-dried tomatoes,  packed in olive oil (The kind I used already had Italian spices added)
• 1t Onion powder
• 1t Garlic powder
• 1t Dried basil leaves
• 1/2t Salt
• 1/2c Parmesan cheese
• (Optional) 5 ounces fresh spinach

Directions:
Cook tortellini according to package directions. 

Meanwhile, in a large stock pot, combine the soup, broth, milk, cream, tomatoes and seasonings. Heat through, stirring frequently. 

Add spinach, cook a few minutes until wilted. 

Drain tortellini and carefully add to soup. 

Stir in cheese. 

Sprinkle each serving with additional cheese if desired.

Makes about 8 servings.


Tuesday, March 4, 2014

What's cookin'? - Dessert, dessert, dessert!

Three desserts in one post? Am I crazy?

I have been meaning to talk about these for a couple of weeks now, but always managed to get sidetracked by something else.

Well, it is "Fat Tuesday", after all!

So choose one and have at it!

Chocolate Eclair Cake
This is not my picture. It is a picture that I found online. Mine looked exactly like this, except that when I realized I had to take a picture of it for the blog, it was already in my belly! Hahaha

It was surprisingly easy to make, even though it called for a crust that I had never encountered. Let's just say, now I know how they make creampuffs! It was easy too! Bring them on!

I found the recipe here:

If you want to make this cake I think it is best that you follow this link and visit the site. She does a good job explaining it and has pictures to follow.

I do want to add that I took the easy way out in that I used Cool Whip and Hershey syrup instead of making homemade whipped cream and chocolate fudge sauce.

Yum!
--------
Black Forest Cake
This dessert  is really easy to make! 

The recpie originally called for cupcakes. 
Since I didn't have any cupcake liners on hand I just made it into a 9 x 13 cake.
It all taste the same going down, right?

First, you let your son bake, I mean, you bake a devil's food chocolate cake - I used the boxed kind. Only on special occasions do I make a cake from scratch!

Anyway, just bake the cake like it says on the box. Let it cool completely.

Using a mixer, mix one 8 oz. package of softened cream cheese, 1 c powdered sugar and 1 t vanilla. When that is all blended and smooth, fold in one 8 oz. container of thawed Cool Whip. Spread on top of the cake.

Evenly distribute the contents of one can cherry pie filling over top of cake.
 
We ate it as soon as I did that and it was really good.

But , after being in the refrigerator overnight it was even better! (Don't ask me how I know!)

The original recipe does say to refrigerate until it is ready to be served. That's good advice. But, in my house, as soon as I slapped on those cherries it was down our throats!

Also, because of the cream cheese and Cool Whip in the frosting, be sure to refrigerate any leftovers if there are any!
------
Peanut Butter-Chocolate Ice Cream "Cake"
I have to admit, this was just something that I threw together because I had a craving. I love the combination of peanut butter and chocolate! And sometimes... once a month... you just have to have it! You know what I mean, ladies?

I made the crust with a 1 lb. package of Nutter Butter cookies +1/2 stick melted butter. Mix them together and then press, using your fingers, to the bottom of a  greased baking pan. I used a 13 x 9 pan for this cake, but my husband and I both agreed that next time I should use a smaller pan - maybe 8 x 8. That way, the ice cream portion of the cake will be a little bit thicker. We like our ice cream!

On top of the crust I added one half- gallon of softened vanilla ice cream.

Then, I slathered on one 8 oz. container of thawed Cool Whip.

I drizzled chocolate ice cream sauce across the top.

I had a bag of those Reese's mini peanut butter cups in my stash (for emergencies, of course).  This was, by all accounts, considered to be an emergency!

I put those in a Ziploc gallon bag and hit it with a meat mallet to break them into little pieces. This, by the way, was a good way to get out your monthly aggressions too. Picture someone you'd like to hit with the meat mallet (hahaha). See... This is what they call "dessert therapy"!

Sprinkle them on the top and you are done!

Return to freezer long enough for the ice cream to re-set. 

Yeah, you heard me right. You have to return it to the freezer - so put that spoon away! 

Although, now that I think of it... we could just call the recipe Peanut Butter-Chocolate Ice Cream "Soup"! 


Friday, February 28, 2014

What's Cookin'? - Aidell's Meatballs

We found a new product that we are very happy with - Aidell's chicken meatballs. 
They are all natural - no fillers or preservatives. They also have a line of chicken sausage as well.

They had samples at the grocery store. We bought one pack on a whim.

I surprised myself with this purchase. Usually I cannot think outside the box. You see,  I'm a traditional meatball person - you know, serve them with spaghetti. I'm also very picky when it  comes to meatballs - only my mom's will do with pasta!

But these had such unusual flavors that I knew they weren't going to be the usual meatball with pasta. With that in mind, we made our first purchase: Teriyaki flavored meatballs.

Like other refrigerated or frozen meatballs, these just have to be heated for a short time before they are ready. This helps make for a quick weeknight meal!

So... what to do with teriyaki flavored meatballs.... Stirfry! 

A quick toss with fresh pineapple chunks, onion chunks and a bag of those mini peppers (the red, yellow and orange ones that are very popular right now). Just serve it over rice. Delicious! (We used our favorite brown rice/quinoa blend).

Next time I might add snow peas and water chestnuts for extra crunch. Easy and fast!
------
After that meal we knew wanted some more! They happened to be sampling the meatballs at Costco and we ended up buying a double pack, so we could try other flavors. In the combo pack was one pack of caramelized onion flavor and one pack of mango/jalapeño.

Hmmm... What to do, what to do....

We used the caramelized onion meatballs in this meatball sub casserole. 
I left directions for my boys to make this one night last year and they did. It was delicious, and easy enough for them to make. It gave them a chance to cook dinner for once! 

It was time that we had it again, and I knew that this flavor of meatballs would be a good substitute for the usual Italian-flavored meatballs.

1 loaf Italian bread, cut into 1-inch thick slices
8-oz. pkg. cream cheese, softened
1/2 c. mayonnaise
1 t. Italian seasoning
1/4 t. pepper
2 c. shredded mozzarella cheese, divided
1-lb. pkg. frozen meatballs, thawed
28-oz. jar pasta sauce
1 c. water

Arrange bread slices in a single layer in an ungreased 13"x9" baking pan; set aside. 

In a bowl, combine cream cheese, mayonnaise and seasonings; spread over bread slices. 

Sprinkle with 1/2 cup cheese; set aside. 

Gently mix together meatballs, spaghetti sauce and water; 

Spoon over cheese. Sprinkle with remaining cheese. (I added fresh parsley too)

Bake, uncovered, at 350 degrees for 30 minutes. Serves 4.

-------

I still had the mango/jalapeño meatballs left in the freezer. I searched the Aidell's website and Pinterest and came up empty-handed. It was so new (this flavor) that no one had posted anything yet. Time to be creative...

Mango Meatball Wraps

This flavor of meatball is really good but very spicy!

I cooked them in the frying pan and broke them up, so it resembled  taco meat. I served it on a tortilla with a salsa made of: fresh pineapple, frozen mango chunks (thawed), a little chopped cilantro and red onion. 

The finishing touch was the spicy chipotle barbecue sauce I had made to go with the sliders we had a few nights before. You can find that recipe here:

http://dandyspandy.blogspot.com/2014/02/what-cookin-spicin-it-up.html?m=1

There was some "heat" in this dish but it was very tasty. I served it alongside of some yellow rice. The combination of fruit salsa and yellow rice with the meat took away some of the heat. 


Yum! 
Keeper!


Monday, February 24, 2014

What's cookin'? - Spicin' it up!

Who doesn't like hamburgers and French fries? It's the all-American meal!

Now they have miniature hamburgers called "sliders" that are all the rage for some reason. They are cute. They are mini. They are the perfect size if you are trying to watch your amount of food intake. Of course, for the men in my family, mini cheeseburgers means that you can eat more of them!

 I followed the directions that I saw online to make these Easy Cheeseburger Sliders and then topped them with Sweet Chipotle Barbecue Sauce. 

Instead of frying individual burgers, you put the ground beef mixture (chopped onion and breadcrumbs) in a square baking pan.

 Poke a few holes in the meat mixture for grease to escape. The burgers are baked at 400° for 30 minutes. Then, pour off all the grease. (Be aware that the meat will shrink and pull away from the pan after done baking!) Being in a square pan makes it easier to cut into individual, square, slider size. 

We topped each burger with cheddar cheese and put the pan back in the oven for a few minutes in order to melt the cheese. We used King's Hawaiian rolls as our slider buns - they are the perfect size!

We also topped this burger with a Sweet Chipotle Barbecue Sauce. This made the burger!

We love this sauce!

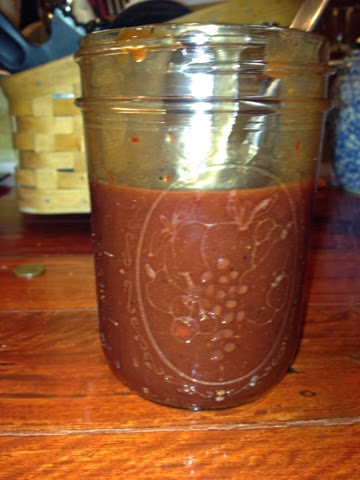
The recipe made extra, so I stored it in a mason jar. But, we have used it in so many things that is almost gone - and I just made it on Saturday!

To make it, you combine in a blender: 1 chipotle pepper and 1/2 cup grape jelly. Pulse on "chop" until pepper is almost completely pulverized. Next, add 8 oz. (one small bottle) barbecue sauce (we use Sweet Baby Ray's).
Yum!

If you've never used chipotle peppers, they add a spicy, yet smoky, flavor! Be careful though! You only need one pepper (and a little of the sauce) for this recipe. There are five or six packed in that little can, so I just put them rest in a Tupperware and store them in my fridge. They keep for a while.

The boys have been using the sauce for their afterschool snack of chicken nuggets. I used some tonight for my mango meatball wraps which I will describe in another post - Delicious!
-------
Thr French fries that I made were Oven- Baked Potato Wedges. Nothing really fancy - you probably already know how to make these.... but in case you don't, I'll share the link where I found the recipe:
http://www.sixsistersstuff.com/2011/08/baked-tater-wedges-and-utahs-famous-fry.html
 
We liked the potatoes because they were full of flavor and had a little crunch. They weren't greasy at all.

The recipe also includes a "Utah" sauce for dipping. We skipped that, as we are trying to avoid mayonnaise-based sauces.

This was a great, kid-friendly meal. And my husband was happy too, since it went well with a beer. It was a Saturday night, after all!