Showing posts with label Dessert. Show all posts

Saturday, May 23, 2015

What's cookin'?- Amish oatmeal pie

Here is an easy dessert or any night of the week!

(As you can see, we don't care if it has a pretty crust or not, we still eat it!)


Amish Oatmeal Pie
It fulfills all three of my dessert requirements:

1.  It's yummy!
2.  Simple ingredients, usually already on hand.
3.  "Easy as pie" to prepare!


Are you ready?

Don't blink!
Recipe from: http://www.tastesoflizzyt.com/2015/04/06/amish-oatmeal-pie-recipe/


Mix together in mixing bowl, low speed:

•3 eggs
•2/3c white sugar
•1c brown sugar
•2/3c milk
•2/3c rolled oats (Old fashioned, not quick-cook)
•2T softened butter
•1t Vanilla

Pour mixture into unbaked single pie crust (I just use the store brand, roll out)

Bake on 350° for about 50 minutes or until center is set.

Top of pie is crusty like an oatmeal cookie yet the inside is soft and gooey. You'll notice some "syrup" when you cut into the pie - this is normal and is delicious on top of ice cream!

Original blogger likens this pie to pecan pie. To tell the truth, I haven't had that enough in my life to know. Regardless, this pie is delicious!


Monday, February 2, 2015

What's Cookin'? - Cannoli Cake!

So, this happened today....

Can I just say, "YUM!!!"?

It snowed all day today.
Of course I made soup - an Italian soup that I grew up with called "Manaste". 


It's an odd concoction of ingredients (country ribs, pepperoni, escarole, white beans, tomatoes) and I love this soup.

Before my youngest son tried it (and liked it!), he named it "mah-nasty".

Funny, but unfair!

He later retracted that comment....

My mom used to make this soup a couple of times each year. I haven't made this soup in years! I was due. Today was the day.

Of course, we had to have an "Italian" dessert as well!

I found this Cannoli Poke Cake here:
http://lemon-sugar.com/?s=Cannoli+cake

I followed her recipe with a few variations:

-I did the substitutions "to make a boxed cake better", and 
- in the end I added some coconut milk instead of sweetened condensed milk.

This was a wonderful cake! We all enjoyed it! The frosting is divine- tastes just like cannoli filling!

If you prefer a cake with a sweet, buttercream frosting - this it is not the cake that you're looking for.

But, believe me when I say you won't be sorry for making this one!

Cannoli Poke Cake

• boxed white cake mix plus ingredients to make cake as directed on box (or follow my instructions below to "make any boxed cake better")
--------
•1 1/2 c ricotta cheese
•1 container (8 ounces) marscapone cheese
• 1t vanilla
• 1c powdered sugar (10x/confectioner's)
• 1/2t cinnamon
• 2 cans sweetened condensed milk (I used 1 can and 1/2 cup of coconut milk)
• 1/2c(?) mini chocolate chips

Bake white cake as directed. (Here is where I followed the directions I found on the Internet to "make any boxed cake better": I added one additional egg than called for on the box - in this case it was one additional egg white, I substituted an equal amount of milk for water, and I substituted an equal amount of softened butter instead of using the oil that it called for on the box)


When the cake, is done remove from oven and allow to cool completely.

When cake is cool, poke holes using a straw or end of a wooden spoon all over the cake about 1 inch away from each other.


Pour one whole can of sweetened condensed milk over cake, allowing milk to fill in holes.


Cover and chill 1 1/2 to 2 hours.


Prepare frosting:
Using a mixer with whip attachment, blend together ricotta cheese, marscapone cheese and vanilla.

Add in one cup sugar and 1/2 teaspoon cinnamon.

Turn to high-speed ,beat in 1/2 cup sweetened condensed milk (you will not use the whole second can; this is where I substituted the 1/2 cup coconut milk, simply because I did not have a second can of the SCM!)

Frost cake (all of the sweetened condensed milk that you poured on initially should now have seeped into the cake).

Sprinkle with mini chocolate chips. (Really? Who measures chocolate chips in this situation? Just sprinkle on as many as you want, I say!)


Keep refrigerated until ready to serve.

For the whole "cannoli experience", sprinkle each piece with powdered sugar just before serving.


Try not to eat the whole cake!

Wednesday, November 26, 2014

My favorite NEW fall recipes!

Because I'm late posting this, chances are you've already done your planning for tomorrow's dinner.

I apologize for that!

BUT if you have these items on hand and can make any of them tomorrow, please do!

Or just make them any day

Winter doesn't officially start until December 21 or so (even though it's snowing outside and looks like winter today!)

Here are my favorite new fall recipes that I've tried this year:


Autumn Squash Soup (Panera copycat recipe)

This would be a great starter to your Thanksgiving feast!

I had the soup at Panera and new I had to make it! I searched the Internet high and low or a copycat recipe. This one nailed it! I found it at:
(Seeves 6)
  • 1 large butternut squash, peeled, seeded and chopped (or 20 oz package precut)
  • 1 tablespoon canola oil
  • salt and pepper to taste
  • 1 15 oz can pumpkin
  • 1 cup vegetable broth
  • 1 cup apple cider
  • 1 cup half and half
  • 1 1/2 tablespoon honey
  • 1/4 teaspoon curry
  • 1/2 teaspoon cinnamon
  • 1 1/2 teaspoons salt
  • 1/4 teaspoon black pepper

Instructions

  1. Heat oven to 450. Toss chopped butternut squash with canola oil and salt and pepper.
  2. Roast for 25 minutes. Let cool 5 minutes.
  3. Using a potato ricer, press squash through ricer. (Or puree in blender if you don’t have a ricer)
  4. In a large food processor, blend pureed squash and pumpkin, pouring vegetable broth, apple cider and half and half through the top while blending.
  5. Pour into sauce pan and heat over medium to a gentle boil. Add honey and spices.
  6. Simmer on low for 10 minutes and serve with roasted pumpkin seeds.
**NOTES: 
     •Too thick? Just add more broth or apple cider!
     •I used yellow curry powder. It was readily available in the spice aisle.
     •Buy pre-cut and peeled squash! (ever try to cut a whole one? I swear, you need a  hatchet!)

------
Creamy Pumpkin-Sausage-Sage Pasta

This recipe I found here:

It is great as a weeknight dinner but also would be great as a Thanksgiving side dish! 

  • 1 pound ground sausage (sage flavor, if available; otherwise use 2 to 3 fresh sage leaves, chopped)
  • 8 oz. mushrooms, sliced
  • 3 garlic cloves, minced
  • 2 cups chicken broth
  • 1 (15oz.) can pumpkin
  • 1 (8 oz.) package cream cheese (regular or reduced fat), cubed
  • 1 cup shredded Swiss cheese
  • Dash ground nutmeg
  • Salt & Pepper to taste
  • 1 lb. pasta (any shape)
Instructions
Bring a large pot of water to boil for pasta.
•Meanwhile, add sausage, mushrooms, and garlic (and sage leaves, if using) to a very large skillet over medium-high heat. Crumble sausage with fork, and cook everything, stirring frequently about 4-6 minutes or until mushrooms are soft and sausage is no longer pink. Drain off excess fat.

•Add chicken broth and pumpkin to pan and stir to combine. 


•Mix in cubes of cream cheese and Swiss cheese and stir to combine until cheese has all melted and mixture is smooth. It might appear chunky for a little while, but keep stirring and it will come together. 


•Add nutmeg, salt, and pepper. Lower heat to keep sauce warm.

•When sauce is just about done, cook pasta according to package directions to al dente. Drain pasta and add to sauce. Stir to combine.

Maybe a garnish of fresh sage leaves?

This was delicious! It tasted like something you would get at a restaurant!

Since I got all ingredients from Aldi, (except the sage, which was still growing outside in my deck container) it was a really inexpensive meal as well! BONUS!
-------


And don't forget my favorite pumpkin dessert creation from this fall - Pumpkin Spice Cheesecake Enchiladas! You can find the recipe here: http://dandyspandy.blogspot.com/2014/10/pumpkin-spice-cheesecake-enchiladas.html?m=1

Enjoy !
Happy Thanksgiving!


Monday, October 27, 2014

Pumpkin Spice Cheesecake Enchiladas (with caramel drizzle)


Oh.... my.... Gee....
These were great!

So... fall has officially been welcomed in all of its capacities here at the George house... Cooler weather means that the heat has been turned on despite my husband's protests, endless falling leaves from the woods cover the long driveway and yard in hopes of someday maybe being raked, my Longaberger Fall Foliage dishes have replaced the red, white, and blue "summer" dishes (don't judge), and all sorts of  "fall-flavored" food and drinks are being prepared.

I do like some pumpkin flavored foods and drinks, but I'm not one of those people that have to have everything pumpkin-flavored come fall. I like to bake with a lot of apples at this time of year too...  squash... just baked goods, in general, I guess, and warm comfort foods. 

Fall is, after all, "sweater weather".... So, maybe my "sweaters" are made of extra pounds? I'll have to watch that...

Anyhoo, this recipe IS for the pumpkin lovers out there!

Sooo easy! Sooo delicious!


Pumpkin Spice Cheesecake Enchiladas

Yield: 9-12 servings

1 pkg.  (8 oz.) cream cheese, softened
1 cup  canned pumpkin
1/2 cup  sugar
1/2 tsp.  pumpkin pie spice
2½ cups Cool Whip, thawed
18-24 Flour tortillas
6 tbsp. butter, melted
2 tsp. sugar
2 tsp. cinnamon
Caramel sauce

In a large bowl, beat the cream cheese, pumpkin, sugar and pumpkin pie spice with electric mixer on medium speed until well blended. Gently stir in the whipped topping. 

**Divide the cream cheese mixture evenly between the tortillas. Roll each tortilla up and put on serving plates. In a small bowl, combine the butter, sugar and cinnamon. Brush the mixture over the over the rolled tortillas. Top with caramel sauce. 


** (this is the exact recipe that I found on Pinterest.  It comes from the website  http://www.lovebakesgoodcakes.com/2013/10/pumpkin-spice-cheesecake-burritos-with.html?m=1

The only thing I changed is this:

Before filling tortillas: brush each tortilla with melted butter, cinnamon and sugar mixture. Place in a hot frying pan and cook, maybe, 30 seconds on each side.
Frying the tortillas first before filling makes them a little more firm, so they are not flopping around when you fill them or try to eat them. (an old Spanish teacher trick!)
YUM!

There you have it!

A no-bake, fancy-looking dessert for fall that every one will love!

You're welcome.

Tuesday, July 22, 2014

What's cookin'? - Blueberry Cobbler


What to do with all of those blueberries I have?

Usually, I make blueberry pie.

Tonight, though, I made a homemade blueberry cobbler.


I got brave and tried a new recipe... It was superb (and really easy) - that was a bonus!

Ingredients:

• 1c flour
• 1 1/4c + 2 T sugar
• 1 1/2t baking powder
• 1/2t salt
• 1c milk
• 1/4 lb. (1 stick) butter, melted
• approx. 2c fresh blueberries (rinsed and patted dry)

Directions:

*Whisk together 1 cup sugar, 1 cup flour.
*Add baking powder, salt and milk.
*Stir until all dry ingredients are incorporated.
*Stir in melted butter.
*Pour batter in a GREASED 9x13" bake pan.
*Top batter with blueberries, sprinkle evenly with 1/4 cup sugar.

(This is as evenly sprinkled as a shaky hand can do!) LOL
*Bake at 350° for 45 minutes. (uncovered)
*Remove from oven. Sprinkle additional 2T sugar evenly over cobbler, return to oven and bake 10 more minutes.

Let cool a bit but serve warm with ice cream!


Mmmmm...

Monday, May 5, 2014

What's cookin'? - it's cinco de mayo!


It is May 5 - or, el cinco de mayo in Spanish.

That is how you say the date. And no, the month is not supposed to be capitalized like in English!

It is an important date in Mexican history, but no, it is not Mexican Independence Day! (That is September 16.)

As a Spanish teacher it is my duty to give you a quick history lesson... Back in 1861 the French, under the rule of Napoleon III, came to Mexico to collect debts. When Mexico couldn't pay they sent Maximillian and established a monarchy, occupying the country. The Mexicans fought French troops, and celebrated an unlikely victory in the town of Puebla, on May 5, 1862. This date remembers that victory and is celebrated throughout the country as well as parts of the United States. 

There you have it in a nutshell - the meaning of cinco de mayo. 

You're welcome.
Many Americans, not affected in any way by Mexican heritage, just see it as another opportunity to have Mexican food and down some margaritas!
Okay, I'm down with that. 

As I have grown older I have come to the realization that not everybody studies Spanish or finds Mexican culture as fascinating as I do.

I forgive you.

Anyhoo, so as I do every year, I have to make Mexican food for dinner. 

This year I made Chipotle Chicken Black Bean Soup otherwise known as Mexican "stoup".  I featured this on my blog before. I hope you will check it ou!t it is listed under the date: Jan. 27.
Of course, I also made a dessert!

I made Mexican Chocolate Sopapilla Cheesecake!

Is this an authentic Mexican dessert?

No, not really.

Although, it does incorporate two authentic Mexican flavors - Mexican chocolate and sopapillas.

If you have ever experienced Mexican hot chocolate (for dipping churros) you know that it has a somewhat spicy flavor. The chocolate in this dessert mimics that with a pinch of cinnamon and a pinch of cayenne pepper, both added to the chocolate.

A sopapilla is a  common Mexican dessert. It is a flaky, lightly fried, "pillowy" pastry sprinkled with cinnamon and sugar. It is often served with honey for drizzling.
Sooooo.... These  components are American-ized into this wonderful dessert!


The chocolate is spiced up and added to a cheesecake mix. The pastry part comes from Pillsbury crescent dough!

Ingredients

  • 2 cans Pillsbury crescent rolls
  • 2 packages (8 ounces) cream cheese, softened
  • 1 cup sugar
  • 1 teaspoon vanilla
  • 1/2 cup semi-sweet chocolate chips, melted
  • 1/8 teaspoon cayenne pepper
  • 1/2 teaspoon cinnamon
  • Topping
  • 1 tablespoon cinnamon
  • 1/4 cup sugar
  • 1/4 cup butter, melted

Instructions

  1. Preheat the oven to 350 degrees.
  2. Unroll one can of the crescent roll cans and spread the whole sheet on the bottom of an ungreased 9x13 pan.
  3. In a medium sized bowl, mix the cream cheese, sugar, and vanilla together until combined.
  4. In a separate bowl melt the chocolate chips according to the package directions. Then stir in the cayenne pepper and the 1/2 teaspoon cinnamon. Add to the cream cheese mixture and mix until combined.
  5. Spread the cheesecake mixture on top of the crescent roll.
  6. Unroll the remaining crescent roll and spread the whole sheet on top of the cheesecake layer.
  7. Spread the melted butter on top of the crescent roll layer and sprinkle with the combined cinnamon sugar mixture.
  8. Bake for 20-30 minutes or until the crescent is golden brown.

    What's cookin'? - "Crack" Cake

    This past Friday night I followed the recipe that I had found on Pinterest. It was for "Crack" Cake.

    No! There are no illegal substances used in this cake! My husband wouldn't allow that ,now would he?

    But the name implies that it is addicting like crack!

    Let me just say that I made this cake in the evening on Friday. By noon on Saturday it was gone.

    One family of four devoured the "crack" cake. I'm embarrassed.

    I am glad I didn't witness them sneaking to eat it or having the shakes or anything....

    Seriously though, this cake was easy to make! It will be a hit when ever you choose to serve it!

    For the cake:

    • 1 box yellow cake mix 
    • 1/4 cup brown sugar
    • 1/4 cup white sugar
    • 1 box instant vanilla pudding mix
    • 2 teaspoons cinnamon
    • 4 eggs
    • 3/4 cup water
    • 3/4 cup oil
    • 1/2 cup white wine (ANY kind; "real" or "cooking" wine)

    For the glaze:

    • 1 stick butter
    • 1 cup white sugar
    • ¼ cup white wine 
    ** Let me just say right here- you cannot taste the wine in the finished product! (For some that may be a bad thing - LOL - on the other hand, for me it was a good thing! )

    ----
    •Mix all cake ingredients together.
    •Pour into a greased bunt pan. (That's what I used, but I'm sure you could use another kind of pan.)
    •Bake on 350° for one hour (or until toothpick inserted in the middle comes out clean)

    •Mix ingredients together for the glaze.

    •While cake is still hot pour on the glaze.
    Yes! it's a lot!

    •Let cool completely.
    •Loosen sides of cake from Bundt pan as much as possible (trust me on this one! - This is why you see a picture of the finished cake that came from the Internet! But, I guess in the long run, it didn't matter what it looked like!)

    •Flip onto serving plate.

    •Take a picture of it because it won't last long! Hahaha

    Saturday, March 29, 2014

    What's cookin'? - "Impossible" Pie

    The other day I had a hankering for something sweet.

    I looked through all the recipes I had pinned on Pinterest to see if I had anything I could easily make with what I had on hand at home.

    I came across a recipe for "Impossible" Coconut Pie.
    At first I was a little afraid!

    After all, it was called impossible!

    Why would you even post a recipe if it's something that is impossible to make?

    After reading how to make it, I found out that it wasn't even remotely impossible to make! The fact that it's called "impossible" refers to its ability to  transform from a liquid mixture into a delicious pie!

    A pie you make in the blender? Yep!

    It could just be the simplest thing I've ever made! It's unbelievably fast and easy!

    Really!  You just mix all the ingredients in a blender and pour it into a pie pan to bake! That's it! I'm not kidding!

    And we loved it! 

    The flour will settle to form a crust. The coconut will rise to form a topping. The inside will be a custard-like texture.

    Try it for yourself! It does not disappoint!

    "Impossible" Coconut Pie

    In a blender mix together:
    •4 eggs
    •1 stick butter, melted
    •1c sugar
    •1/2c flour
    •2c milk (I used coconut almond milk because he had it!)
    •2t vanilla
    •1c Coconut
    • nutmeg (optional, for sprinkling on top before baking)

    Pour mixture into a greased pie plate.
    Bake 350° for 1 hour. Center of pie should be barely set and edges starting to pull away from crust.
    Cool.
    Serve warm or chilled (I prefer chilled)


    Tuesday, March 4, 2014

    What's cookin'? - Dessert, dessert, dessert!

    Three desserts in one post? Am I crazy?

    I have been meaning to talk about these for a couple of weeks now, but always managed to get sidetracked by something else.

    Well, it is "Fat Tuesday", after all!

    So choose one and have at it!

    Chocolate Eclair Cake
    This is not my picture. It is a picture that I found online. Mine looked exactly like this, except that when I realized I had to take a picture of it for the blog, it was already in my belly! Hahaha

    It was surprisingly easy to make, even though it called for a crust that I had never encountered. Let's just say, now I know how they make creampuffs! It was easy too! Bring them on!

    I found the recipe here:

    If you want to make this cake I think it is best that you follow this link and visit the site. She does a good job explaining it and has pictures to follow.

    I do want to add that I took the easy way out in that I used Cool Whip and Hershey syrup instead of making homemade whipped cream and chocolate fudge sauce.

    Yum!
    --------
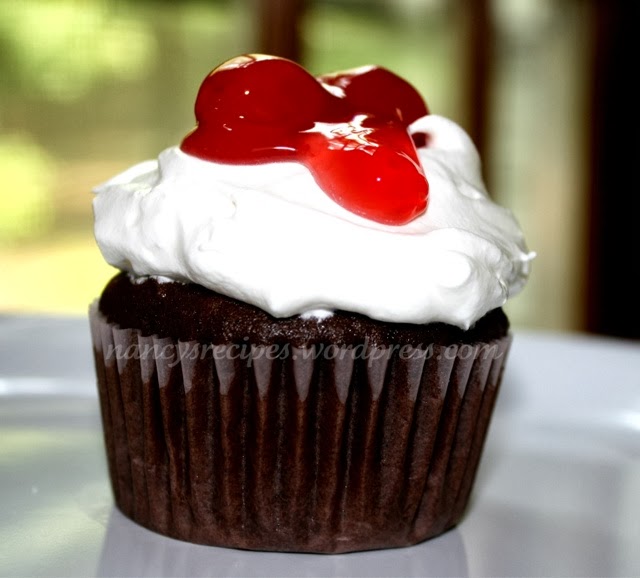
    Black Forest Cake
    This dessert  is really easy to make! 

    The recpie originally called for cupcakes. 
    Since I didn't have any cupcake liners on hand I just made it into a 9 x 13 cake.
    It all taste the same going down, right?

    First, you let your son bake, I mean, you bake a devil's food chocolate cake - I used the boxed kind. Only on special occasions do I make a cake from scratch!

    Anyway, just bake the cake like it says on the box. Let it cool completely.

    Using a mixer, mix one 8 oz. package of softened cream cheese, 1 c powdered sugar and 1 t vanilla. When that is all blended and smooth, fold in one 8 oz. container of thawed Cool Whip. Spread on top of the cake.

    Evenly distribute the contents of one can cherry pie filling over top of cake.
     
    We ate it as soon as I did that and it was really good.

    But , after being in the refrigerator overnight it was even better! (Don't ask me how I know!)

    The original recipe does say to refrigerate until it is ready to be served. That's good advice. But, in my house, as soon as I slapped on those cherries it was down our throats!

    Also, because of the cream cheese and Cool Whip in the frosting, be sure to refrigerate any leftovers if there are any!
    ------
    Peanut Butter-Chocolate Ice Cream "Cake"
    I have to admit, this was just something that I threw together because I had a craving. I love the combination of peanut butter and chocolate! And sometimes... once a month... you just have to have it! You know what I mean, ladies?

    I made the crust with a 1 lb. package of Nutter Butter cookies +1/2 stick melted butter. Mix them together and then press, using your fingers, to the bottom of a  greased baking pan. I used a 13 x 9 pan for this cake, but my husband and I both agreed that next time I should use a smaller pan - maybe 8 x 8. That way, the ice cream portion of the cake will be a little bit thicker. We like our ice cream!

    On top of the crust I added one half- gallon of softened vanilla ice cream.

    Then, I slathered on one 8 oz. container of thawed Cool Whip.

    I drizzled chocolate ice cream sauce across the top.

    I had a bag of those Reese's mini peanut butter cups in my stash (for emergencies, of course).  This was, by all accounts, considered to be an emergency!

    I put those in a Ziploc gallon bag and hit it with a meat mallet to break them into little pieces. This, by the way, was a good way to get out your monthly aggressions too. Picture someone you'd like to hit with the meat mallet (hahaha). See... This is what they call "dessert therapy"!

    Sprinkle them on the top and you are done!

    Return to freezer long enough for the ice cream to re-set. 

    Yeah, you heard me right. You have to return it to the freezer - so put that spoon away! 

    Although, now that I think of it... we could just call the recipe Peanut Butter-Chocolate Ice Cream "Soup"!