Showing posts with label Side dish. Show all posts

Wednesday, February 4, 2015

What's cookin'? - Loaded Baked Potato Casserole

What can I say about this?


Hmmm... SO WORTH THE EXTRA CALORIES!

This was a different side dish for the steaks we were having. I highly recommend this if you are enjoying a steak dinner and are tired of the usual baked potato! If you're going to load it with all that fattening goodness anyway, you might as well make a whole bunch of it. 

"Go big or go home", I say!


I found this recipe here:

I call it "loaded baked potato casserole" because it looks like a "loaded baked potato" more than "twice baked potatoes". Do you know what I mean? "twice baked potatoes" are usually mashed and then rebaked?

That's just me being fussy - you call it whatever you want!

Loaded Baked Potato Casserole

•4-5 large russet potatoes
- clean potatoes
- rub skin with olive oil
- rub coarse sea salt over outside skin
- bake in 400° oven about 45 minutes until can be easily pierced with a fork- flip halfway through baking time 

** I baked my potatoes the old-fashioned way - in an oven. I usually use the microwave for this! But, by putting them in the oven, I got a nice, crispy skin. Since these potatoes won't be peeled before adding them to the casserole, I found this to be essential!

- Remove potatoes from oven. Allow to cool at least 15 minutes. REDUCE OVEN TEMPERATURE TO 350°

-In the meantime, cook 3/4 lb. bacon. Drain grease by placing the bacon on paper towels. When cooled, crumble.

-Chop 5 to 6 green onions.

-(Set aside about 2 T onion, 2 T bacon and 1/3 c shredded sharp cheddar cheese for topping)

-In a large bowl, mix together: 
•3/4c mayonnaise
•1/2c sour cream
•Chopped green onions
•Bacon
•Remaining shredded cheddar cheese

-Cut potatoes into chunks, leaving skin on. (it's perfectly natural for them to fall off or even for the potatoes to fall apart somewhat!)

-Add potatoes to mixture, pour into a 13 x 9" pan.


-Bake covered on 350° for one half hour.
-Remove cover during last 10 minutes.
-Sprinkle top with remaining cheese, onion, and bacon before serving


Run a lap!


Tuesday, September 2, 2014

What's Cookin'? - Fresh Corn, Tomato, and Cheddar Pie

To those of you who read my blog posts faithfully: I apologize!

End of summer activities... mini vacation, school shopping, etc... has been keeping me busy. So busy that I didn't have the energy to even do a blog.

But I did take pictures along the way in future hopes of sharing with you!

I just can't keep this recipe to myself any longer, SO I'M BACK!

Fresh corn, tomato, and cheddar pie


I have now made this twice in the last week or so.  One time I made it for dinner and the other, because it was so good, I made it to bring to a Labor Day picnic.

My husband told me this ranks up in the top 10 of things I've cooked!

Guess he liked it!

This was a great way to use the fresh tomatoes that we had grown in our garden!

I think I had previously shared a recipe I dubbed "taste of summer pasta"...  Well, this trumps that on the "taste of summer"!

Seriously, if you are not growing corn in your garden, (we're not) just buy three ears of fresh corn on the cob at the grocery store, cook it and remove the kernels for this recipe. Don't use canned or frozen. You won't be sorry! (if you must use frozen and let it drain/thaw in a colander for an hour before assembling)

And those of you who have so many tomatoes you don't know what to do with - this is an answer!

The original recipe calls for a homemade crust. I'd given up on that years ago when I discovered that you can buy the store brand roll-out kind, and they taste just as good!

Here's the link to the original recipe:

Just be sure to seed almost all of your tomatoes so as not to make the pie too watery! (My Beefsteak tomatoes are different from Roma tomatoes, as I couldn't just halve them and squeeze out the seeds - I had to slice them and push out the seeds with my finger!)

But this is an important step, so don't skip it! Don't want to end up with a watery pie or a mushy crust!

Before adding the top crust you add a "sauce", which is a mixture of mayonnaise and lemon juice. I know that sounds strange but it actually makes it quite tasty, just a little bit of tartness, balancing out the chives perfectly!

The best thing about this pie? (besides the flavor, that is) It is good right out of the oven, but even better at room temp! Perfect to bring to a picnic or make ahead!
-------
Fresh corn, tomato, and cheddar pie

• 4-5 tomatoes, sliced (3/4 of all seeded)
• 3 ears of corn cooked, kernels removed
• 1 1/2-2c shredded mild or sharp cheddar cheese
• one package of store-bought roll out pie crusts (you will use both crusts - one for top, one for bottom)
• Salt and pepper
• 2T fresh lemon juice (juice from one lemon)
• 1/3c mayonnaise 
• 3T fresh chives
• 2T butter, melted


Preheat oven to 350°.

Place bottom crust in pie plate. (I use a deep dish one for this)

Layer half of the tomato slices, half of the corn, half of the cheddar, salt and pepper, half of the chives.

(no cheese yet here on this picture- I just had to take a picture because it looked so pretty!)

Repeat with the remaining ingredients.


Whisk together lemon juice and mayonnaise. Pour evenly over top layer.

(notice in my picture that I put on the sauce before I added the cheese- I don't think that really matters!)

Top with second pie crust. Cut holes to vent.


Brush with melted butter.

Bake 25 to 35 minutes until crust is golden brown.

Try not to eat it all in one sitting!

You're welcome!

Wednesday, May 21, 2014

What's cookin'? - Beef and homemade "refried" bean burritos

I love refried beans!
Growing up, I always had them with my mother's homemade Spanish rice (my grandfather was from Mexico) and tortillas. But they were out of a can...
 If that's not enough, refried beans are typically made with lard. 

Fattening, fattening, fattening!

Maybe refried beans are an acquired taste - I don't know. My family doesn't share my affection for the legumes. They're always the food item that's left on the plate at a Mexican restaurant (at least in my family). I usually take my guys' plates and scoop them up! I use a fork, spoon, tortilla chip - whatever! I'm the opposite of them - I leave the rice behind because it never compares to my mother's recipe!

Of course with two boys (three, if you count my husband) this always spurs a chorus of "Beans, beans they're good for your heart..." 

Never a dull moment in my family, I tell ya.

When I  was studying in Mexico, on my way to becoming a Spanish teacher, I grew accustomed to refried beans at ever almost every meal. We ate them aside meat dishes. They are a staple in traditional dishes like tostadas or chilaquiles. They showed up, too, in the most odd places... along side your fried eggs... 
on top of tortilla chips as a free appetizer at the bar.... 
And I thought, "hey, aren't you supposed to get salsa with those chips?" Apparently it's beans. Nationwide. That never changed.

And why not? Beans are cheap. It's easy to cook them, mash them up, and cook them again with some lard.

Well, I stumbled upon a recipe that made my beloved refried beans without all the fat and added ingredients that come in the can! Even better, they are made in the crockpot!

You can't go wrong with these "refried" beans made in the crockpot! Try them!

*Beans are full of fiber!
*Beans are packed with proteins!
*Beans are fat free!
*Beans are cheap! (Dried, in a bag)
*"Refried" beans freeze well, so you can make a big batch and use them in all different kinds of meals!

Yaaa!

First, I will give you the recipe for the crockpot beans. Then I will share with you how to use them in a meal - beef and bean burritos. You'll love them both!
------
"Refried" beans in the crockpot
As you can see we got this picture from the website from which I also found the recipe. You really should check out this girl's blog! She is a very frugal and healthy cook! She usually gives you to breakdown cost of each serving! (Math is definitely not my strong point so I will refrain from doing that!)


*Makes about 16 cups

INGREDIENTS
2 lbs pinto beans
1 large onion, chopped
4 Tbsp. jarred minced garlic
*Up to 2 1/2 Tbsp salt (This is the absolute max if you don't pre-soak your beans.)
1 tsp black pepper
2 tsp cumin
10 cups hot water

* You can use as little as 1 Tbsp. of salt

DIRECTIONS
•Rinse the beans in a colander. Pick out any bad beans. (Sometimes there is a small stone in there by mistake, or I look for discolored, deformed, or  halved beans.)


•Combine all the ingredients in the crockpot. Remove any floating beans. Cover, and cook on HIGH for 4 hours and on LOW for 2 hours.

•Uncover, and remove extra liquid. Leave enough liquid to reach the desired consistency when the beans are mashed. 

•Mash beans with a potato masher to desired consistency. 

•Serve warm. Store in air-tight containers in the refrigerator and use within 2 weeks, or freeze in ziplock bags for later use.
------
Now you know how to make them, and that they are a tasty accompaniment to many foods!

Let me show you how I used them one night....

I made these:
Beef and bean burritos

• Brown 2 pounds ground beef. Drain (leave a little grease for flavor)
• add spices** (add a little splash of water if it appears too dry)
• stir in one can red enchilada sauce

• On a flour tortilla, layer:
* shredded cheddar cheese
* Refried beans
* meat

• roll up tortilla, tucking in ends
(Don't you love how you can find any image on the Internet? I do!)

• Top with:
* additional enchilada sauce or salsa
* additional cheese (you can zap it in the microwave at this point in order to melt cheese)
* a dollop of sour cream
* chopped cilantro

** I make my own taco seasoning mix because it is cheaper and also I can control the salt: (1T each of garlic powder, onion powder, chili powder and ground cumin, PLUS 1/4-1/2T crushed red pepper)
Make sure you store your spice mix in an airtight container. I use mine all the time!

Buen provecho !


Sunday, May 18, 2014

What's Cookin'? - Side Dishes, Side Dishes and More Side Dishes!

 Holy cow!

I've been so busy stamping lately that I haven't really posted any food! 

This blog is, after all, called "A Few of My Favorite Things", which includes stamping and cooking! 

But, since my last food post (on the 5th of May) I have had two stamp clubs, a 2/5/15 class, and I have been very busy making my oldest son's graduation announcements.

Oh, I haven't stopped cooking! I just went on a food-posting hiatus! So, it is my intention to do a few recipes tonight and one every day of this week, since I do not have any stamping events scheduled. (Next week I have another punch class so I will be sure to show off what I have created!)
By the way, that is the new Circle Personalized stamp from Stampin' Up! You can get it made to say anything you want! As you can see, I had it made with his name, school and "Class of 2014". 

You can view the stamp info online by visiting my website. Click "shop" in the upper right-hand corner:
Until I post pics from the next punch class (May 28) - I hope you are hungry, because I have a lot to share! My iPhone is inundated with pictures of food! I have to blog so I can delete them and free up some space!

My post tonight will be on side dishes. That way I can squeeze several recipe ideas into one post.

Of course we enjoy (or, at least my husband and I do) the regular side dish of vegetables - steamed, roasted, baked - you name it, I'll make it!  Sometimes it's quinoa, rice, potatoes ...Tonight I will share with you some of the sides that I have made recently. A couple are simple and  a couple are indulgent, with fattening  ingredients.
-----
Pineapple stuffing
This recipe was shared with me years ago when I was teaching at Dover Area High School. My friend Tori E. made it for a school potluck and I fell in love with it! She was gracious enough to give me her family recipe. Since then I have made it dozens of times - a couple of those times it was Easter, since it pairs especially well with ham!

•1/2c butter
•1/2c sugar
•4 eggs
•one 20 oz. can crushed pineapple (use juice, too!)
•3 c bread cubes

* Cream butter and sugar
* add eggs, mix well
* add pineapple and bread cubes, mix 
* pour into a greased 2 quart casserole,
  Bake 350° for 30 to 45 minutes or until liquid is absorbed and top is golden brown

------
Roasted Carrots and Parsnips with Rosemary
It is just as the name implies!

This idea was given to me by my friend Marcia B. I think I make it a little differently than she does only because I misunderstood what she told me in the first place! Regardless, it is fabulous and we love it! 

Until I made this I had never even tasted a parsnip. Now this has become a staple in my arsenal of vegetable dishes.  If you've never had a parsnip, look in the produce section of the supermarket for what looks like a white carrot. My store sells them in convenient bags.

 I love roasting vegetables; it brings out their  sweetness as the sugars rise to the surface and become caramelized.

•Cut carrots and parsnips into "sticks".
•Toss parsnips and carrots with olive oil and kosher salt. (You decide on the amount of vegetables you need)
•Add fresh sprigs of rosemary throughout.
•Roast on 450° for about 20 minutes until soft and caramelized (brown).
Trust me you're going to love it! You'll never pass up a parsnip in the produce section again!
---
"Beans and Greens"
This is an old Italian "standby".

I use broccoli rabe (rapini) and cannellini beans. But I bet that you could choose any combo!

•Rinse your greens and remove any tough stems.
• Sauté  in a frying pan with a little olive oil and a some minced garlic. (Sometimes I add 2 tablespoons of butter as well, as I do for a lot of my sautéed Italian vegetables)
• add one can drained cannellini beans
• add 1/2 cup chicken broth
• sook until liquid is absorbed and beans are heated through
• season with salt and pepper as desired
-----
Broccoli Stirfry with Garlic and Mushrooms
I think my mom invented this one! She's one hell of a cook! 

This has become a beloved dish over the years - even from my boys like it, and they normally don't eat broccoli!

You will need:
• one head broccoli cut into florets, stem cut into 1 inch pieces
• 8 ounces fresh mushrooms, sliced
• 2 - 4 cloves of garlic, sliced thin
• 2T olive oil
• 2T butter
• salt, to taste

*Sauté  all in a frying pan on medium-high heat. I do the broccoli first,then add the garlic and the mushrooms, because they take less time to cook.

*Cook until broccoli is soft. Add salt last to taste.

Lately I have been adding about 1T of sesame oil too, for extra flavor. I love the nutty, roasted flavor that sesame oil adds! It seems to give it even more depth.

Enjoy!


Tuesday, March 25, 2014

What's cookin'? - Corn Pudding

One of my new favorite side dishes is corn pudding.
We usually eat a lot of vegetables as side dishes. I like most everything, so it could be anything: artichokes, asparagus, beets, carrots, greens, you name it -I'll eat it! Roasted, raw, baked, steamed... any way you serve it, it's fine with me!

Getting my boys to eat vegetables? Well, that's another story!

I prepare a variety of vegetables, and in different manners hoping to find one that appeals to their immature sense of taste. I know that it's not hopeless - geez, when my husband and I first started dating he only ate corn. Now he eats anything I put in front of him! So I keep plugging away....

I don't always please both sons, but the next day I try to appeal to the other one! Like this one - three out of four of us love it - the other one doesn't like corn ! (Sigh) If he would just try it, I know he would like this one. Maybe someday....

I found this recipe on the Internet and I have made it now three times. Once was at Thanksgiving  (yes, it's special enough to make it to that meal) and the other two times, well, you know, we just needed some comfort food!

That's how I would categorize this side dish. It's definitely not your steamed veggies that you have alongside your fish every night. It's a stick-to-your-ribs kind of side dish.

Take my word for it - it's super yummy! I could just eat it out of the casserole dish with a spoon!

Soft corn bread? Better!
Corn Pudding

• 1 can cream-style corn
• 1 can whole kernel corn, drained
• 2 eggs, slightly beaten
• 1 stick butter, melted
• 1 box Jiffy brand corn muffin mix
• 1 c sour cream

Mix all ingredients well in a casserole dish. Bake 350°, 45 to 55 minutes depending on your size of dish, until edges start to turn golden brown.

Be careful not to eat it all at one sitting!

Monday, February 24, 2014

What's cookin'? - Spicin' it up!

Who doesn't like hamburgers and French fries? It's the all-American meal!

Now they have miniature hamburgers called "sliders" that are all the rage for some reason. They are cute. They are mini. They are the perfect size if you are trying to watch your amount of food intake. Of course, for the men in my family, mini cheeseburgers means that you can eat more of them!

 I followed the directions that I saw online to make these Easy Cheeseburger Sliders and then topped them with Sweet Chipotle Barbecue Sauce. 

Instead of frying individual burgers, you put the ground beef mixture (chopped onion and breadcrumbs) in a square baking pan.

 Poke a few holes in the meat mixture for grease to escape. The burgers are baked at 400° for 30 minutes. Then, pour off all the grease. (Be aware that the meat will shrink and pull away from the pan after done baking!) Being in a square pan makes it easier to cut into individual, square, slider size. 

We topped each burger with cheddar cheese and put the pan back in the oven for a few minutes in order to melt the cheese. We used King's Hawaiian rolls as our slider buns - they are the perfect size!

We also topped this burger with a Sweet Chipotle Barbecue Sauce. This made the burger!

We love this sauce!

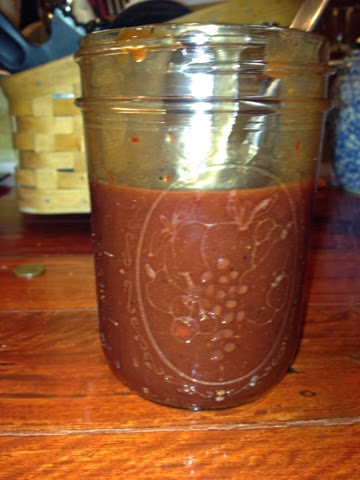
The recipe made extra, so I stored it in a mason jar. But, we have used it in so many things that is almost gone - and I just made it on Saturday!

To make it, you combine in a blender: 1 chipotle pepper and 1/2 cup grape jelly. Pulse on "chop" until pepper is almost completely pulverized. Next, add 8 oz. (one small bottle) barbecue sauce (we use Sweet Baby Ray's).
Yum!

If you've never used chipotle peppers, they add a spicy, yet smoky, flavor! Be careful though! You only need one pepper (and a little of the sauce) for this recipe. There are five or six packed in that little can, so I just put them rest in a Tupperware and store them in my fridge. They keep for a while.

The boys have been using the sauce for their afterschool snack of chicken nuggets. I used some tonight for my mango meatball wraps which I will describe in another post - Delicious!
-------
Thr French fries that I made were Oven- Baked Potato Wedges. Nothing really fancy - you probably already know how to make these.... but in case you don't, I'll share the link where I found the recipe:
http://www.sixsistersstuff.com/2011/08/baked-tater-wedges-and-utahs-famous-fry.html
 
We liked the potatoes because they were full of flavor and had a little crunch. They weren't greasy at all.

The recipe also includes a "Utah" sauce for dipping. We skipped that, as we are trying to avoid mayonnaise-based sauces.

This was a great, kid-friendly meal. And my husband was happy too, since it went well with a beer. It was a Saturday night, after all!


Wednesday, February 5, 2014

What's cookin'? - Sweet Cabbage Haluska

I cook so much Italian food. Sometimes I have to remember my husband's Slovak heritage! He makes awesome halupki (stuffed cabbage rolls) but that's too much work for me! I'll stick to this dish. I can make it several times a year, serving as a side dish alongside pork or kielbasa. You can also serve it as a main dish - it is a wonderful meatless meal!

Sweet Cabbage Haluska
I got the nicest compliment about this last year from my mother-in-law . She was raving about it and said it was "just like I remember from when I was a little  girl"! 

It made me feel so good! But what made her feel good was when I showed her that the recipe I use is from the old Slovak cookbook that she had given to me years ago! She was pleased that I still have it, and that I use it.
Why "mama" is coming out of a treasure chest I'll never know - but one look at this book and you know it is the real deal!

Haluska:

* Cook 8 oz. egg noodles. Drain. Set aside.

* In a large, deep fry pan melt one stick butter.

* Add one chopped onion. Cook until it begins to soften.

* Chop/shred one small head green cabbage. Add to pan.

*Add 1 t. salt, 1 t. sugar. 

* Cook over moderate heat, stirring occasionally, until cabbage is soft and begins to brown.

* Add egg noodles to cabbage.  Stir. Heat throughout.

* Remove from heat. Add 1/4 - 1/2 c cottage cheese. Stir until distributed and most cheese is melted.

(Original recipe says that the cottage cheese is optional and that you can add sauerkraut  instead of cottage cheese)

Yum! 

Friday, January 17, 2014

Healthy eating - Mmmm...

 I told you before that I am trying to eat better. I really watch what I have during the day and then I cook a normal dinner for the four of us. Sometimes that is higher in fat or contains meat because my boys are not ready to go completely "lean". They are teenagers and they're not done growing yet. They are both thin but my oldest one especially is trying to have more protein in his diet to bulk up a little with muscles. Sometimes I can fool them - like the cheesy rice we had the other night (see recipe below). Other times, I can't quite pull the wool over their eyes, like the time I substituted tofu for chicken in a meal that we have often. It was quite humorous watching them chew the "chicken" and realize it was a different texture - not saying anything,  afraid of hurting my feelings.

The two recipes I want to share with you today are a part of my "watch what I eat diet". They both contain quinoa, which is recognized as a" super"food. Is actually a seed, not a grain, and it's very high in fiber and protein. I have cooked it several times. Some recipes have been great and others have been not so good!

Here are two that I have tried recently and I think they are super! 

 Garlic rice /quinoa With creamy cauliflower sauce
(That's my mom's recipe country ribs on the plate with it ! Major Yum !)

I found the recipe on Pinterest and it is a brown rice dish made with a creamy cauliflower sauce. I have never had anything with cauliflower sauce but I keep seeing recipes, so I thought it was time to give it a try.

I changed the recipe up just a little by taking some shortcuts. I used this brown rice /quinoa packet that I got at Costco, instead of using all brown rice.


 Following the recipe for the sauce I ended up using three packets of the rice /quinoa mixture! Holy smokes! The original recipe calls for, I think, only  a cup and a half of brown rice. It's all good, though! Yes, I had leftovers but it was so good that I ate it for lunch and so did my husband!

Here's the link to the original recipe:
http://pinchofyum.com/creamy-cauliflower-garlic-rice


Because my packet already was flavored with garlic I skipped the part of making the butter and garlic sauté. So basically I made the cauliflower sauce as directed, made the rice /quinoa packets in the microwave (which was super easy), stirred it together, then added some cheese at the end.

That site also has another link arecipe for   Alfredo sauce made with cauliflower. We enjoyed what we ate so much that I think I might have to try that one too! 
_________
Quinoa Breakfast Bowl - From Hungry Girl (this recipe makes one serving)


In a large sauce pan combine:
1/4 c Quinoa
1 Stevia packet
1/8 teaspoon cinnamon
3/4 c Unsweetened almond milk
1/3 c Water
dash Salt

Cook over moderate heat until boiling. Reduce heat and simmer 12 to 14 minutes until most of liquid is absorbed and quinoa is fully cooked, stirring occasionally. ( When quinoa is fully cooked you'll see these little string- like things from the seeds!)

I added chopped strawberries, blueberries and bananas.

Super yummy change- up to oatmeal!