Showing posts with label Cards. Show all posts

Monday, May 23, 2016

Last call for retiring list items!


This past Friday night, May 20, I did another Facebook Friday live stream presentation about my favorite retiring stamp sets from Stampin' Up!

I also held a class that afternoon/evening, so I just held up the cards that we had made that night, featuring some of my favorites.

Card #1
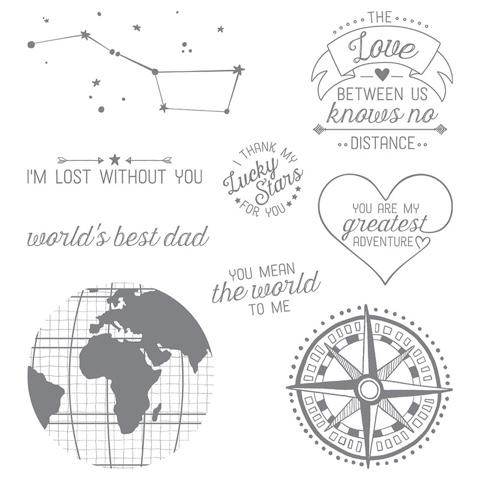
From "World of Dreams" (Below), stamped on washi tape.


Card #2
This colorful card from "Bravo":
Dots were made with sponge daubers! Colors are Blackberry bliss (retiring), Mossy Meadow (retiring), and Calypso Coral.


Card #3
We used a clear block as a stamp on this card from "Serene Silhouettes":

Tap the clear block on an ink pad (you can also use markers to do this), spritz lightly with water so the colors blend a little, and then stamp!

Card #4
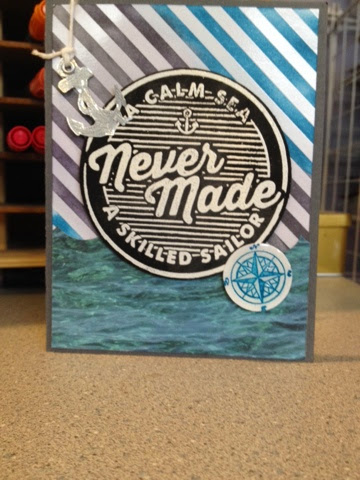
This masculine card was made with the  "Going Global" set:

If you act quickly, there is a Designer Series Paper stack that coordinates with the set along with the awesome "World Traveler" embossing folder (shown here). They are all in the Occasions mini catalog.


Card #5( and final card that we made) was from the popular retiring set "Giggle Greetings"- so popular that it must already be sold out, because I can't find a picture of it anywhere on the website!

-----

Just a reminder, that the last day to order anything from the retired list is May 31.
Everything on that retired list is "while supplies last", but actually I'm surprised with the excess supplies that they have this year. I have not really run into any major problems with items selling out!

This week only (May 21 through May 28), I am offering a special offer for last-minute orders!

Any order placed through my website that has a sub-total of $50 or more will be entered in a prize drawing!

I'm giving away some stamping "loot" to one lucky winner!
If you are placing an order, please visit my website:

Orders under $150 should also use this hostess code: GG4U4SZQ
If you have an order over $150 you should NOT use this code, as you  will earn your own free hostess benefits!

As always, THANK YOU!


Saturday, January 24, 2015

Truly irresistible!

Product spotlight
Irresistibly Yours Designer Series Paper

Doesn't look like much, I know!

But you are going to love this paper! It is being offered as one of the free selections in this year's Sale-a-Bration brochure!

The paper is 12 x 12, and each sheet has a glossy white design on white card stock. Glossy areas will resist ink once applied ("emboss resist"). Therefore, you can customize this paper any way you want!

There are six different designs and two sheets of each. That  gives you plenty of area to cut down and to use on your cards or scrapbook pages.

In my last post I included this as one of the two most popular free selections this year. THIS IS MY PREDICTION, as I just love what you can do with this paper, and I think you will too!

Let me show you how to use it first. Then, I will showcase each pattern in use on cards that I have created.

HOW TO COLOR YOUR IRRESISTIBLY YOURS DSP:

After doing my research (as I always do) by scouring Stampin' Up!, Pinterest and YouTube for other demonstrators and what they're doing,  AND THEN TRYING IT FOR MYSELF, these are the best ways I have come up!

#1 Stamping Spritzer
•Fill a spritzer bottle with rubbing alcohol and add drops of ink refill to achieve your desired color. 
•Spritz paper lightly from a distance of about 5 inches.
•(As with other methods) you'll want to have a paper towel or tissue nearby to remove excess ink from glossy areas.
**The paper will not hold an excessive amount of water! Spritz lightly!
**This method works well with different colors being used and you can alternate the intensity of the spritzing!

#2 Brayer
If you want even, intense color - this is the method you should use!
** Remember when using a brayer be sure to ink it and use it rolling, repeatedly, in ONE DIRECTION! Going back and forth only uses about 1 inch of your roller - think about it!

#3 Sponge
(MY FAVORITE!) It doesn't matter if you prefer a sponge or a dauber - just apply ink until desired color consistency is reached and wipe off excess.

In the picture below, I have done the left-half of the strip of paper with a brayer and the right-half with a sponge dauber:

(#4) Blendabilities alcohol markers
I put this method in parentheses because I'm not 100% sure about it - try it if you like it!

•Just scribble on the DSP with your marker and then wipe.

A couple things I found with using the Blendabilities method to color DSP are:
1) The glossy areas absorb some of the marker color and do not, when buffed, completely reveal bright white. (Some demonstrators are saying, though, that if you apply it and quickly wipe away excess you will get white!) 

Here is a picture compared to the brayer/sponge so you can see the difference in the glossy areas:


2) If you do not color in the same direction you'll see your color lines!

-----
Here are some cards that I made, using each of the patterns.

BTW, I did something that I haven't done in a very long time - that is, I got so carried away playing with my new stamps, that I went to bed at almost 3 AM! That's what I used to do when my kids were little! It was the only time I had to myself after they went to bed, so I would "lock" myself in my stamp room!

Last night my oldest son came down about 1:30 (as he was getting ready to retire for the night ) and said, "Geez Mom, go to bed!"

How are roles are beginning to reverse...

Anyway, here are my cards:

Here are the vines again. 
New set: Indescribable Gift


I also used it in this card from my last blog post, (so you can see the flower design here, too):
New set: Lotus Blossom (free SAB)


Here is the paper with the stars- this was a card inspired by a very similar one that I saw on alystamps.com:
New set: Simply Wonderful (free SAB), Best Year Ever DSP (free SAB)


The dotted paper was cut out with the balloons framelits and then sponged on this one:
New bundle: Celebrate Today stamp set and Balloon framelits (also shown:  Bash Specialty DSP)


A Valentine card done with the scalloped design - I have two alternatives - feminine (more bling-y with a large rhinestone on the "fork bow") and masculine (with a mini metallic clothespin):
New set: You Plus Me (also shown: Stacked With Love DSP stack, Calypso Coral Pom-pom trim)


And, finally, the stripes...:
New set: Adventure Awaits  (also shown: Adventure Bound DSP stack)

I had so much fun playing with the Irresistibly Yours DSP and also many of my new products that I purchased from the Occasions catalog!

I hope to continue sharing ideas with you in future posts.

If you are interested in purchasing any product, please contact me through this blog or email: Dandyspandy@sbcglobal.net
You can also visit my online store and shop  24/7 at: http://www.stampinup.net/esuite/home/dandyspandy/

Remember: until March 31, during Sale-a-Bration, with each $50 subtotal of your order you get to choose one free product. I'm betting that Irresistibly Yours DSP will be one of your choices!


Sunday, November 2, 2014

Christmas card punch class sneak peek!

I have two cards finished and I wanted to share them with you...
Isn't he cute?


I'm having a Christmas card punched class - here are the details:

Wednesday, November 5 at 6:30 PM
$8 for 3 cards + envelopes
Deadline to register is Tuesday at noon!

Can't make the class?

Try my "class to go"!
$10 for the kit (unassembled cards)
Same registration deadline as above.

Isn't he cuter?

Don't miss out on these cards!

After the class meets, I will post all the details for these two cards plus the third card!

Monday, September 22, 2014

September 2/5/15 cards


You saw a sneak peek of these cards a couple of weeks ago. Now let's take a closer look at each....
-----

#1
Our first Christmas card of the season! (Next month's class will be all Christmas cards!)

Stamps: Festival of Trees BUNDLE (includes stamps and matching punch) 
Found in Holiday catalog

Ink: Garden Green, Early Espresso, Real Red
Other: Gold Shimmer card stock, star from Itty Bitty Accents punch pack, Filigree Frame embossing folder.
( emboss folder in Holiday catalog)

Note: We inked up the whole tree in the Garden Green. Then, we removed the green ink from the tree trunk with a blender pen! Finally, we added a brown tree trunk with the Early Espresso marker.

This is sold as a clear photopolymer set. It will make lining up other set element,s like tree garland, really simple!
-------
#2


I can't believe that I've had this set sitting on my stamp room desk for over a month, and this is the first time I got to use it! 

I love it! (And, so did everyone else!)

It was made with the Flower Patch set and matching framelit. 

We only used one framelit for this card but there is actually a whole set that matches the stamps:
These two are available to purchase as a bundle so you don't have to buy one or the other. You won't want to do that, believe me!

Inks: Pink Pirouette, Blushing Bride, Calypso Coral, and Wild Wasabi.

Note: This is sold only as a photopolymer set, making placement super easy with the totally clear stamps! Lining up the green stem for a second stamp, in order to make the flower stem longer, was so easy!

Although you can't see it in this picture, the rhinestone was colored with a Calypso Coral Blendabilities alcohol marker before adding it to the center of the flower - perfect color coordination!
-----

#3
Sold as a single wood stamp, Halloween Street, is a great purchase!

Card stock: Pacific Point, So Saffron, Tangerine Tango

Ink: Basic Black (dots were created with a number two pencil eraser!)

Other: Tangerine Tango two-tone trim, and Frosted Sequins (both in Holiday catalog)
----

#4
This card is super fast and easy! I used a birthday greeting, but any can be used. Same goes for matching card stock and t"ink! (I used the retired color More Mustard)

Stamp set: Dotty Angles
----

#5

Stamps: Seasonally Scattered (Holiday catalog)
Ink: Cajun Craze

Other: Needlepoint emboss folder (from Clearance Rack), Lost Lagoon satin stitched ribbon, flower from the Itty Bitty Accents punch pack,  pearls

(emboss folder still available on clearance rack)

This was a great mixture of cards. Keep watching this blog, your email, Pinterest and Facebook for the announcement of the October 2/5/15 Christmas card class and "cards to go"!

If you bought the "cards to go" for this class, they are already in the mail and you should have them by the end of this week!

It's always I'm happy to answer any questions you may have about Stamping Up and Stamping Up product!

Please visit my website and the online store if you're interested in purchasing product.

Be sure to check out the Stampin' Up! blog page too, for plenty of ideas, Weekly Deals (announced every Tuesday) and any new additions!